The Microservices Architecture World, we can meet many concepts and patterns, like the Centralized Configuration, Circuit Breaker, Service Registry and Discovery, etc.. Two of these patterns are the CQRS and the Event Sourcing patterns, coming from the Domain Driven Design planet 🌏 In the most of the use-cases, these two patterns are sold together 😁 in this new tutorial, we will discover what does each one ? why they are usually used together ? and for sure we will implement these two patterns in Java ☕️ obviously 🤓
Let’s start with some definitions and literature 😇
What is the cqrs pattern ?
CQRS stands for Command Query Responsibility Segregation is a design pattern that aims to separate the Read and Write operations. In the CQRS distinguishes the operations as:
- Queries: a Read only operation - no state is updated after executing queries
- Commands: a Writing operation - state is updated after executing commands
The schema describes the CQRS pattern:
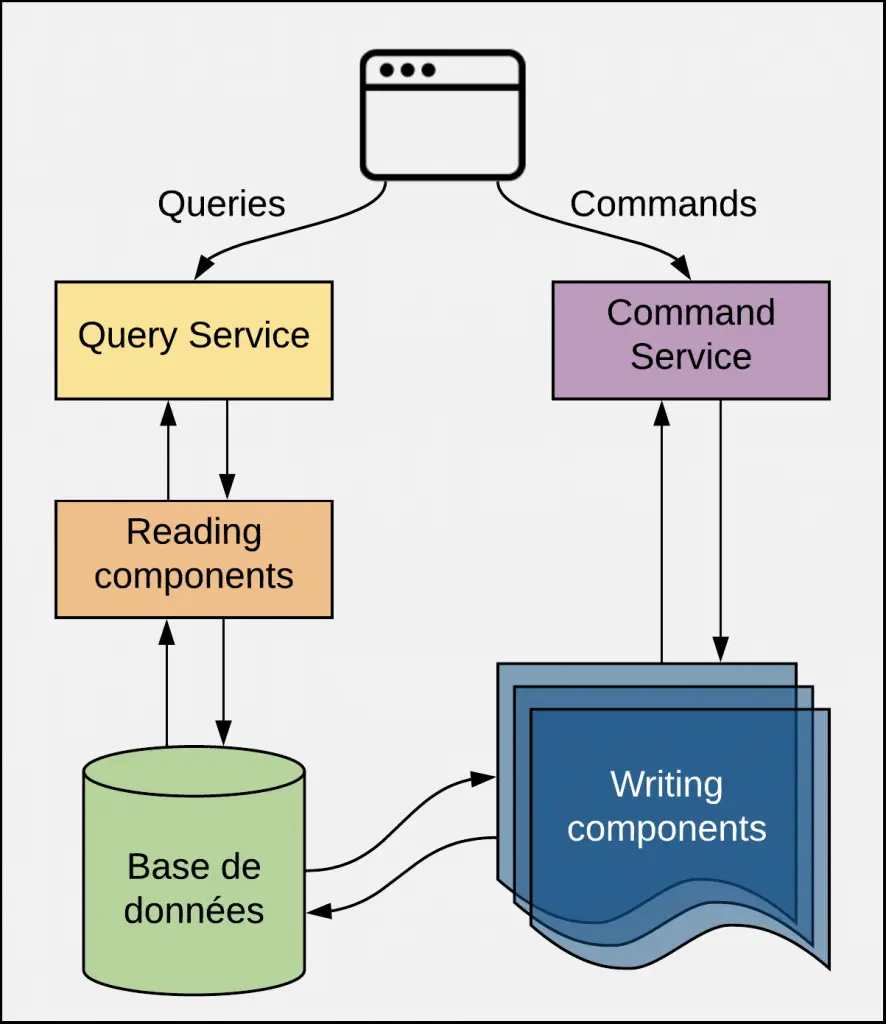 CQRS pattern
A Query is a Read operation, that does not update any the state of the application. A Query is handled by the Reading Components that will interact with the DB, parses the DB response, creates a Data Transfert Object that will be returned to the User.
A Command is a Business Action that the Application’s user want to do, for example: RegisterStudent, MakeDeposit, etc..
Every Command has a Handling Layer that knows how to apply the Business Action. Generally, commands are inserted in a Queue to be processed asynchronously, so technically speaking, a Command Handler is invoked by a Queue Listener..
What is the Event Sourcing Pattern ?
Event Sourcing aims to persist the state of a business entity (BankAccount for example) as a sequence of state-changing events. Every action performed on a business entity should be persisted. The application reconstructs an entity’s current state by replaying the events.
For example, to reconstruct a given BankAccount current state, we need to replay all the events occurred on this business entity. It means we do not store the state of the BankAccount.
Applications persist events in a database of events called event store. The store has an API for adding and retrieving an entity’s events. The event store also behaves like a message broker. It provides an API that enables services to subscribe to events. When a service saves an event in the event store, it is delivered to all interested subscribers.
Some entities, such as a BankAccount, can have a large number of events. In order to optimize loading, an application can periodically save a snapshot of an entity’s current state. To reconstruct the current state, the application finds the most recent snapshot and the events that have occurred since that snapshot. As a result, there are fewer events to replay.
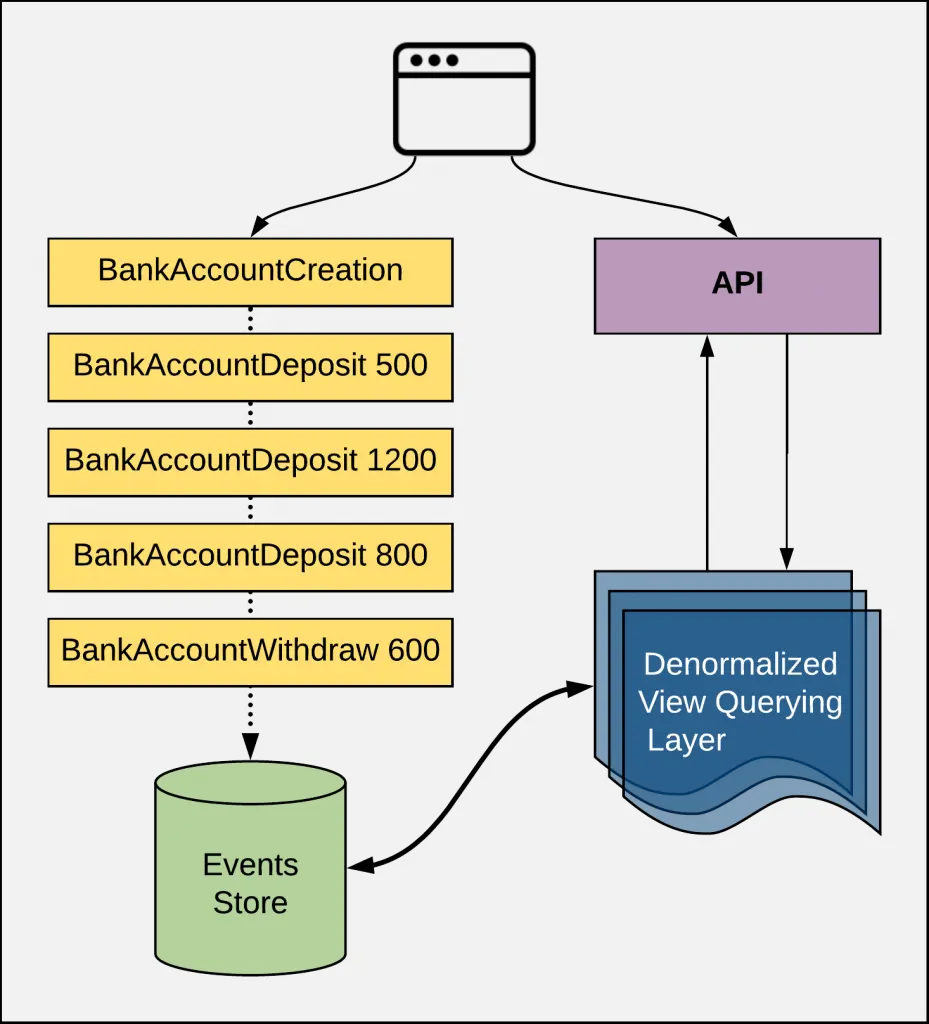 Event Sourcing (very) simplified diagram
Why we are always coupling these patterns ?
CQRS separates the responsibilities, typically into different components. The first component covers CUD operations (without the Reading), while a second component will ensure the Read operation.
Reads and writes from different places can create a timing issue. Most database theory focuses on consistency. It should be possible to keep a log of every data change. That way, at any point in time, the values that the queries display are logically correct. Here comes the Event Sourcing, which will ensure consistency. Event Sourcing stores a record of every action in a dedicated database. From there, an event handler reads these changes in order, applies them appropriately and marks them as complete once the transaction is complete. This event handler does not need to be complex – it can be as simple as an API endpoint. Once the event handler creates an event record, a central service messaging system can push notifications every time it discovers about a new event.
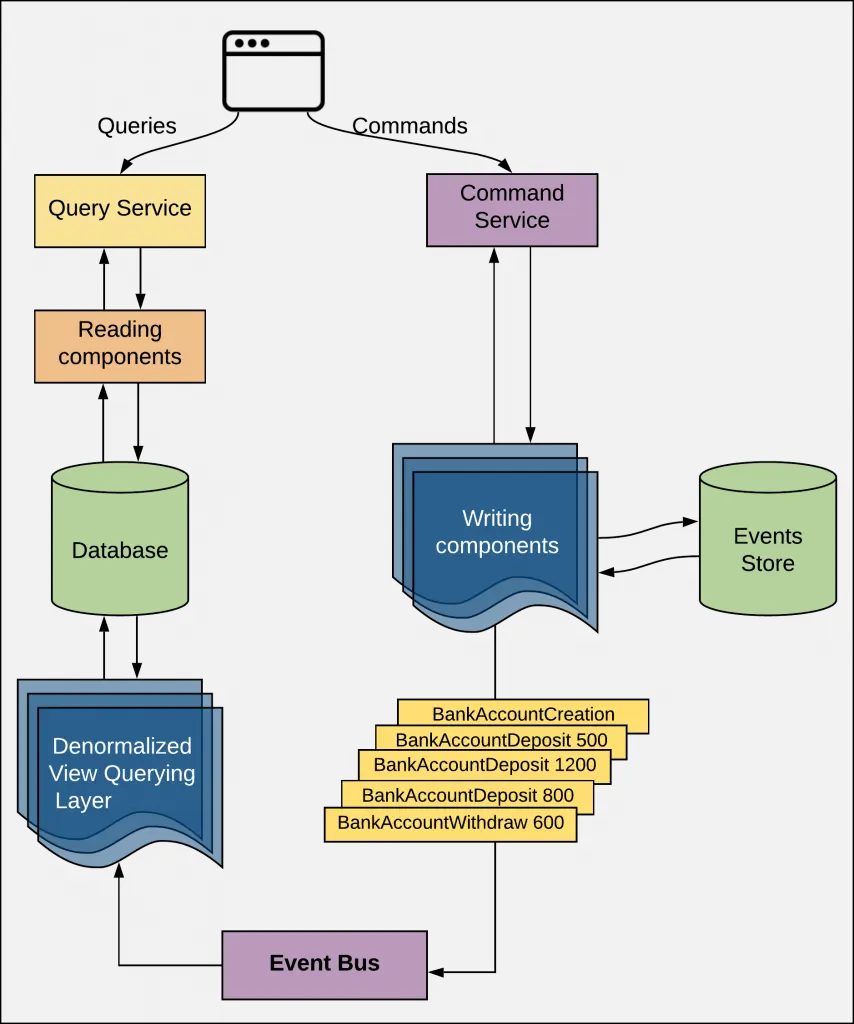 Coupling CQRS and Event Sourcing Diagram
CQRS and Event Sourcing patterns are frequently used together. Coupling these two patterns means that each event on the Writing part of our application. Obviously 🤓 the Reading part is made by playing the events.
Let’s implement the CQRS & Event Sourcing in a typical Java application
We will create a small Spring Boot application on which we will implement CQRS and Event Sourcing patterns using Axon.
What is Axon ? 🤔
Based on the official documentation:
Axon provides a unified, productive way of developing Java applications that can evolve without significant refactoring from a monolith to Event-Driven microservices. Axon includes both a programming model as well as specialized infrastructure to provide enterprise ready operational support for the programming model - especially for scaling and distributing mission critical business applications. The programming model is provided by the popular Axon Framework while Axon Server is the infrastructure part of Axon, all open sourced.
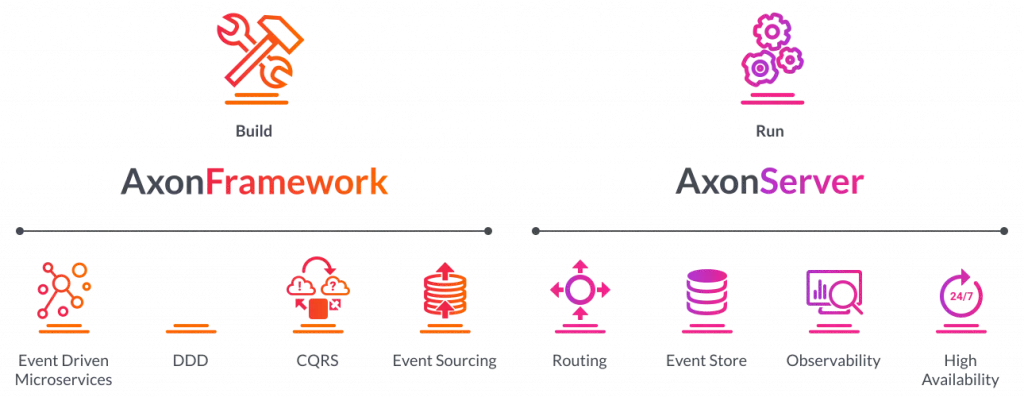 Axon Framework and Server - Official documentation
Let’s dig into the coding part; we will start by generating the Spring Boot application using the Spring Initializr with these dependencies:
- Web
- H2
- Actuator
- H2 Database
- Lombok
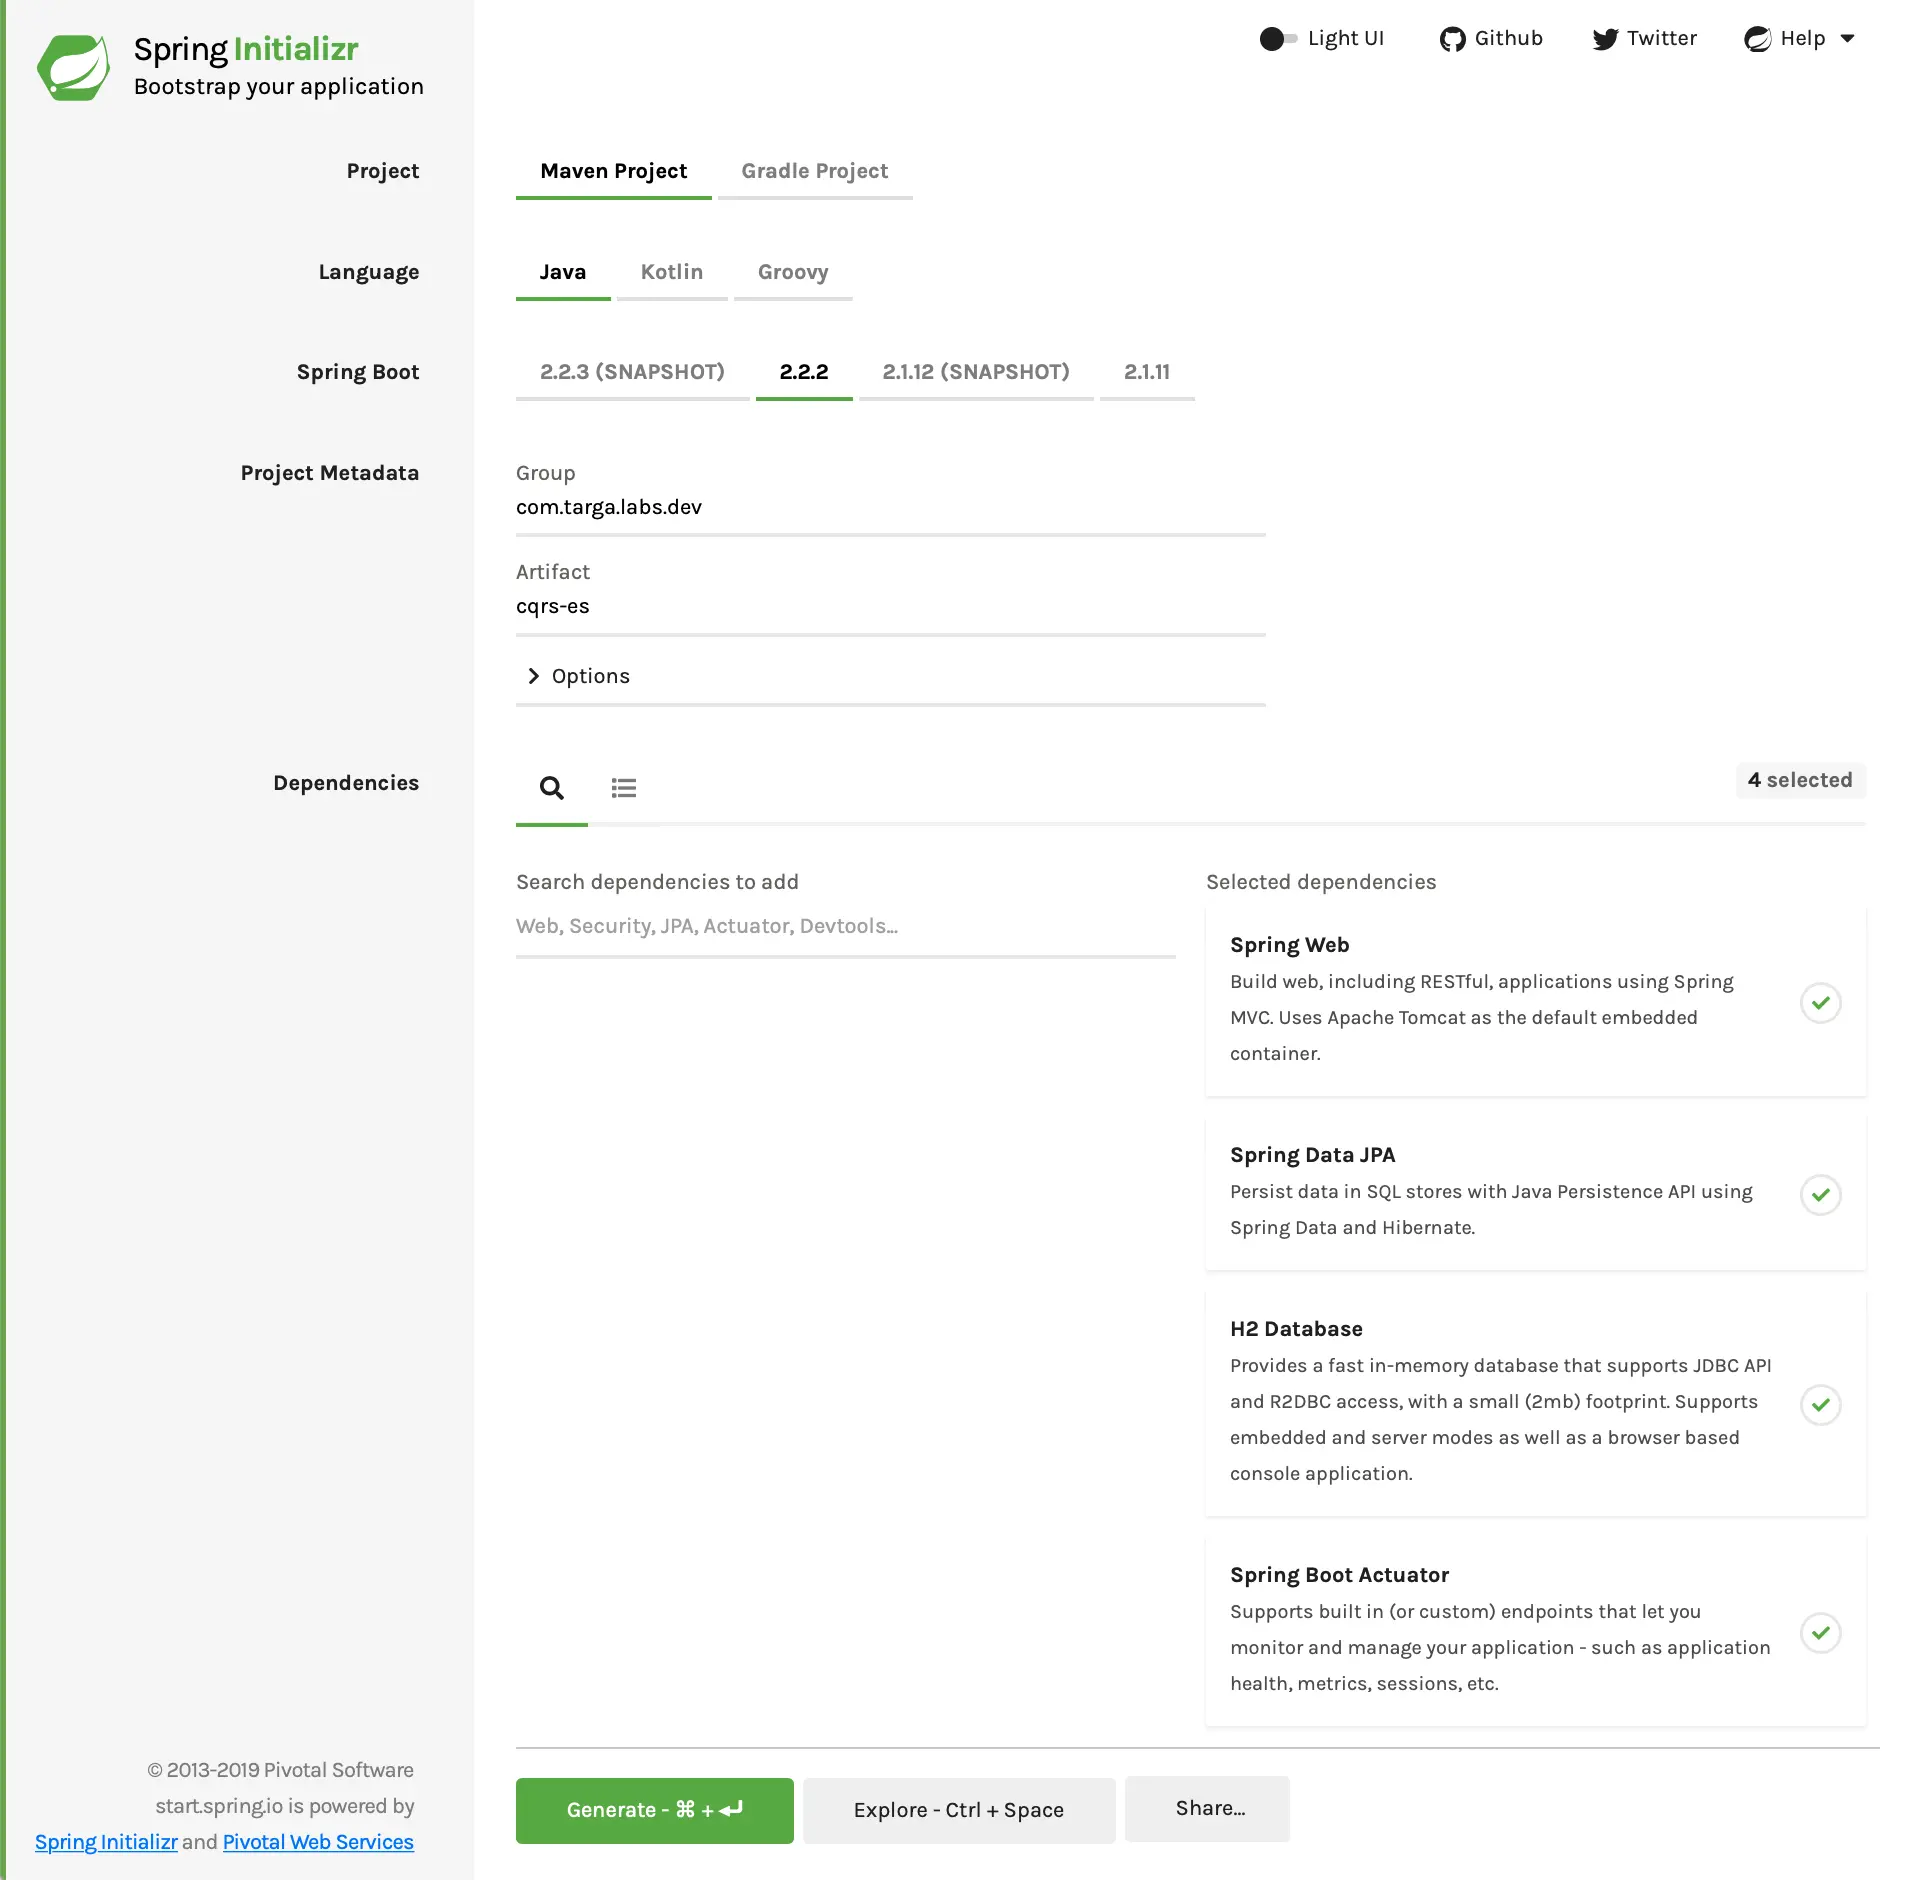 Generating the Spring Boot application
After generating the project. We will add these dependencies to the pom.xml:
SpringFox Swagger2 and Swagger UI:
 1
 2
 3
 4
 5
 6
 7
 8
 9
10
<dependency> <groupId>io.springfox</groupId> <artifactId>springfox-swagger2</artifactId> <version>2.9.2</version> </dependency> <dependency> <groupId>io.springfox</groupId> <artifactId>springfox-swagger-ui</artifactId> <version>2.9.2</version> </dependency>Axon Spring Boot Starter:
1
2
3
4
5
<dependency> <groupId>org.axonframework</groupId> <artifactId>axon-spring-boot-starter</artifactId> <version>4.2.1</version> </dependency>Axon Test module 🤓 We will be testing our code 🤬
1
2
3
4
5
6
<dependency> <groupId>org.axonframework</groupId> <artifactId>axon-test</artifactId> <version>4.2</version> <scope>test</scope> </dependency>
Our sample application will be a Bank Account manager. Our application will have these features:
- Create a new account for a given Owner with a given Initial Balance
- Credit an amount on a given account
- Debit an amount from a given account
- Read information about a given account
A BankAccount will look like:
| |
commands and queries
Now, we need to list the Reading and Writing actions related to the application features:
| Feature | Command | Query |
|---|---|---|
| Create a new account | Yes | No |
| Credit an amount from account | Yes | No |
| Debit an amount from account | Yes | No |
| Get Account information | No | Yes |
Based on this table, our commands will be:
- CreateAccountCommand
- CreditMoneyCommand
- DebitMoneyCommand
For the queries, we will have only one:
- FindAccountQuery
- What’s next ? 🤔
- Did you forgot that the CQRS and Event Sourcing are two patterns that belong to the DDD paradigm? 🤔 As it’s a Domain Driven, we need to start designing our Domain 😁
We will start by implementing the Command model for our CQRS segments, using Aggregates 😱
Aggregate
I have found two definitions of Aggregates in the Axon Documentation:
- An Aggregate is a regular object, which contains state and methods to alter that state.
- An Aggregate is an entity or group of entities that is always kept in a consistent state (within a single ACID transaction). The Aggregate Root is the entity within the aggregate that is responsible for maintaining this consistent state.
⚠️ I have a small objection on these definition: I dont like to have the word entity - because like everyone, I will directly think on JPA Entity - but keep in mind, Aggregate is a pattern in Domain-Driven Design, and in this level (the design) we dont talk about technical details. 👉 This is why I would like to say business entity instead entity.
The updated definition that I like 😁
- An Aggregate is a regular object, which contains state and methods to alter that state.
- An Aggregate is a business entity or group of business entities that is always kept in a consistent state (within a single ACID transaction). The Aggregate Root is the business entity within the aggregate that is responsible for maintaining this consistent state.
For example: an aggregate can be an e-Commerce Order with the related OrderItems and Customer information. Here, the Order class is the Aggregate Root:
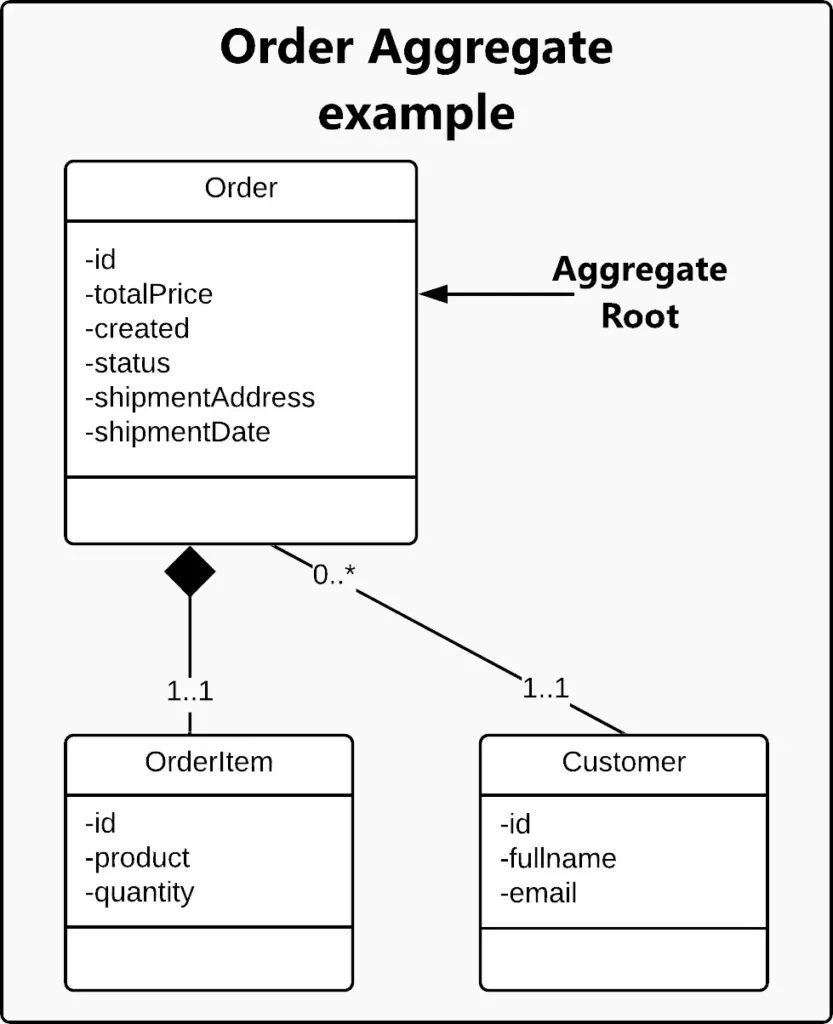 Order Aggregate example
In our application, our Aggregate is the BankAccountAggregate will look like:
| |
- The
@Aggregateannotation informs Axon’s auto configurer for Spring that this class is an Aggregate instance. - The
@AggregateIdentifieridentifies the field as the identifier of the Aggregate.
⚠️⚠️ For sure that you are saying now that the BookAccountAggregate and the BookAccount JPA Entity looks like the same structure. Why are we duplicating the code? Why don’t we use the BookAccountAggregate class as the JPA Entity class? The answer is that the BookAccountAggregate will contain more Axon boilerplate code which cannot fit to a JPA Entity class, which is used only to represent data stored in a DB 🤓
Let’s continue to code our BookAccountAggregate class.
Now we will code the constructor. We already said that we have a Command that will create a new account: CreateAccountCommand. Here will come the first glue between the Commands and the Aggregate: the CreateAccountCommand will be passed to the Aggregate constructor:
@CommandHandler public BankAccountAggregate(CreateAccountCommand command) { }
The @CommandHandler will mark this method (constructor) as a Handler of the CreateAccountCommand. The command needs to bring the data needed by to construct the BankAccount instance. Think of it as a Data Transfert Object used to wrap data received and sent via REST APIs. Obviously a CreateAccountCommand will have the same content like the BankAccount JPA Entity and the BookAccountAggregate. It will look like:
| |
The @TargetAggregateIdentifier will identify the field as the identifier of the targeted aggregate.
We said before that in the CQRS and Event Sourcing based applications, for every Command made, we dispatch an Event.
For example; for the CreateAccountCommand we need to create an AccountCreatedEvent that will be used to say that a Command has been received.
You can notice that the Command is formed by an Action + Command suffix while the Event is PastAction + Event suffix
Guess what 😁 the AccountCreatedEvent will look like:
| |
Now, the CommandHandler will look like:
| |
The AggregateLifecycle component is used to notify the Aggregate that a new BankAccount was created by publishing the AccountCreatedEvent.
Good ! The same way, if we dispatched a Command, we defined its CommandHandler. Now, as we dispatched an Event, we need to define the EventHandler:
| |
The @EventSourcingHandler will define the annotated method as a handler for Events generated by that Aggregate.
Now, we will define the two remaining Commands:
The CreditMoneyCommand:
1 2 3 4 5 6 7 8 9@Data @NoArgsConstructor @AllArgsConstructor public class CreditMoneyCommand { @TargetAggregateIdentifier private UUID accountId; private BigDecimal creditAmount; }The DebitMoneyCommand:
1 2 3 4 5 6 7 8 9@Data @NoArgsConstructor @AllArgsConstructor public class DebitMoneyCommand { @TargetAggregateIdentifier private UUID accountId; private BigDecimal debitAmount; }
The remaining two Events:
The MoneyCreditedEvent:
1
2
3
4
5
6
@Value public class MoneyCreditedEvent { private final UUID id; private final BigDecimal creditAmount; }The MoneyDebitedEvent:
1
2
3
4
5
6
@Value public class MoneyDebitedEvent { private final UUID id; private final BigDecimal debitAmount; }
The BankAccountAggregate will finally look like:
| |
I defined an InsufficientBalanceException for handling an error while debiting money:
| |
At this stage, we created the aggregate that receives and handles the Commands and for every Command will dispatch a Query.
Good ! But no data is inserted in the DB, no boundary is available to emit instructions 🥺
Now we will create the JPA Repository for our BankAccount JPA Entity:
| |
Now, we can use the BankAccountRepository to made CRUD operations on BankAccount in the DB. Ok, but from where ?
You can think in the BankAccountAggregate, but it will not be suitable, as it will be doing many tasks which will cause us to lose the Single Responsibility principle.
The common practice is to create a dedicated class that will match the DB operations for every received event. I saw that the Axon team is calling it Projector class.
We will call our Projector class BankAccountProjection that looks like:
| |
The BankAccountProjection is a Spring Component on which we injected our BankAccountRepository.
Good ! Now, we need to define the Handler for every emitted Event. For example, the EventHandler for AccountCreatedEvent will look like:
| |
Opppaaa 🥳 ! The Event is serving as a DTO wrapping the needed values to create a BankAccount 😁
The same thing for the MoneyCreditedEvent and MoneyDebitedEvent:
| |
Here, I defined an AccountNotFoundException thrown when no account is found:
| |
Yoopi ! 🤩 Now, we will need the REST API and the Spring Service that will be receiving the HTTP Requests and dispatching the Commands to the Axon Engine.
Let’s start by the REST API for the Commands:
| |
The AccountCreationDTO:
| |
The MoneyAmountDTO:
| |
Now, we will create the Spring Service that will be dispatching the Commands to the Axon Engine. To do this, the framework has a very useful component called CommandGateway, which is a very convenient interface towards the command dispatching mechanism 😁
Our AccountCommandService will look like:
| |
Cool ! 🥳 We need to define the Query part. Let’s start by defining FindAccountQuery:
| |
In the BankAccountProjection, we need to add a QueryHandler method:
| |
We need to create the Query REST API and Service. The AccountQueryController looks like:
| |
The AccountQueryService looks like:
| |
STOP!!👮🏻♂️⛔️ What is this strange EventStore ?? EventStore provides access to both the global event stream comprised of all domain and application events. We will be using it to list all the events about a given aggregate.
We need to add these properties to the application.properties:
| |
We will be using Swagger to have a small UI to test our REST APIs. The SwaggerConfiguration file looks like:
| |
Now, let’s start our application:
| |
Wooh 😱😱😱 These errors are due to a missing Axon Server. We can start a new instance it easily using a Docker Container:
| |
Now, the Axon Server UI will be reachable on http://localhost:8024/
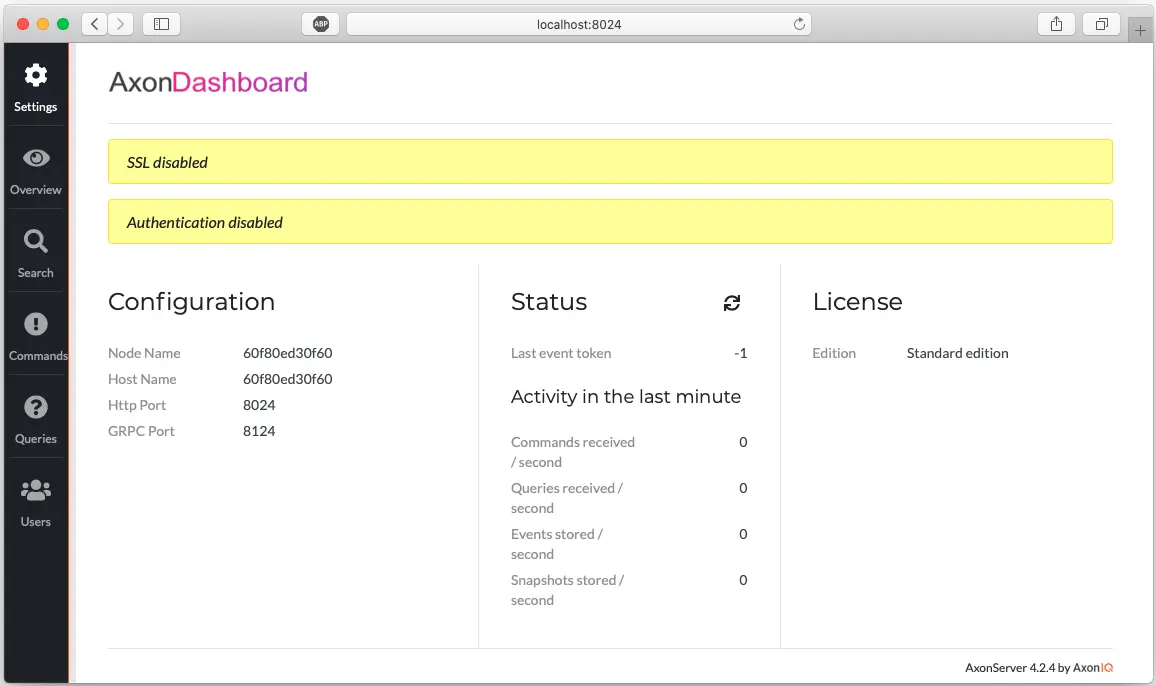 Axon Server UI
If you click on the Overview section:
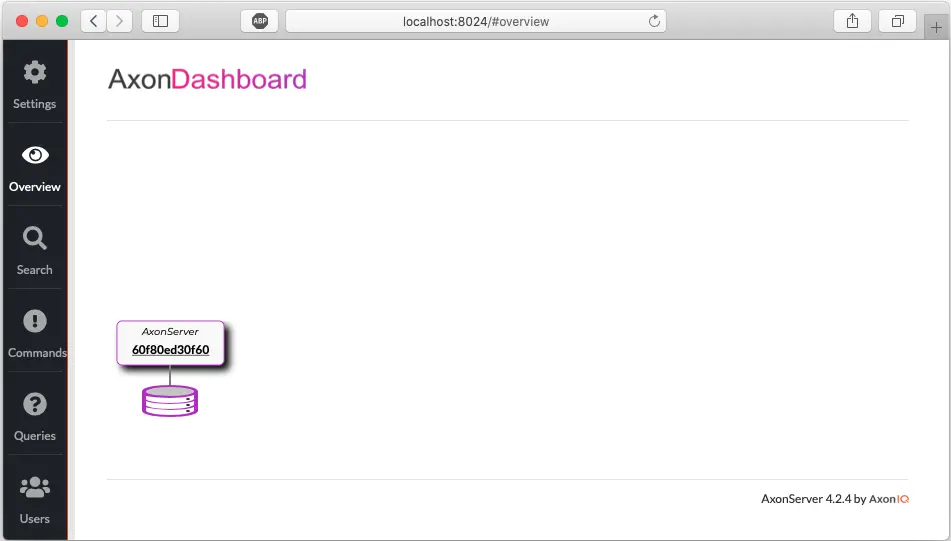 Axon Server UI - Overview
Next, check the Commands section:
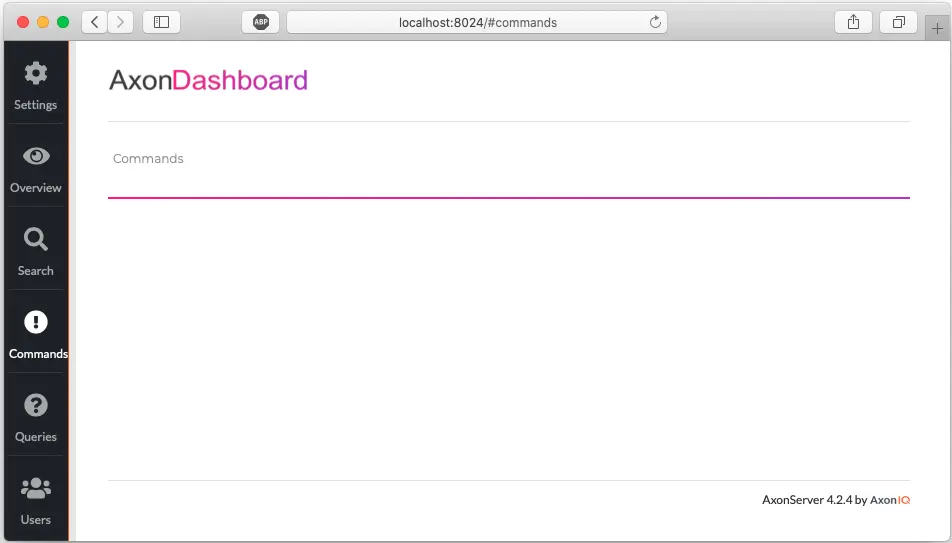 Axon Server UI - Commands
Next, check the Queries section:
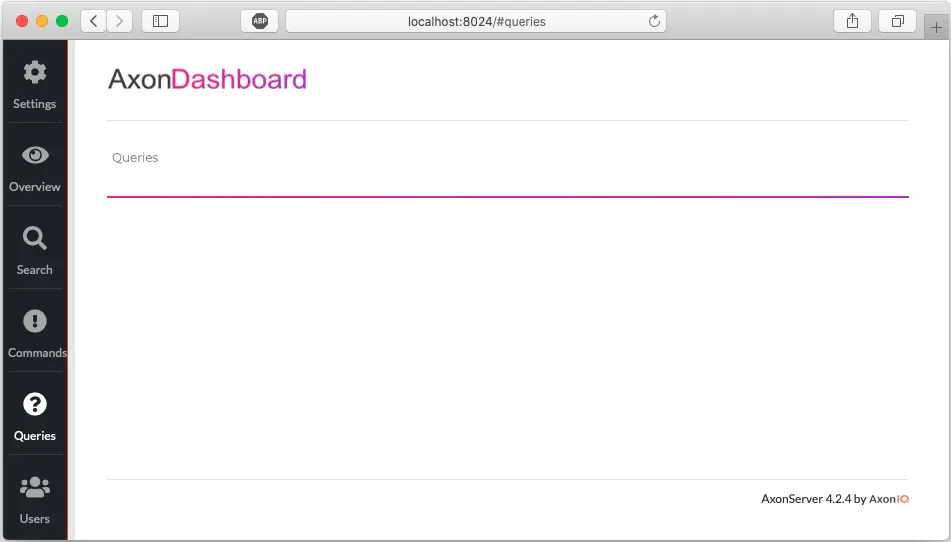 Axon Server UI - Queries
Nothing wrong 😆 Don’t be scared, as no application is communicating with the Axon Server, everything is empty.
Let’s start now the application again:
| |
Cool ! Let’s access now the Swagger UI on http://localhost:8080/swagger-ui.html:
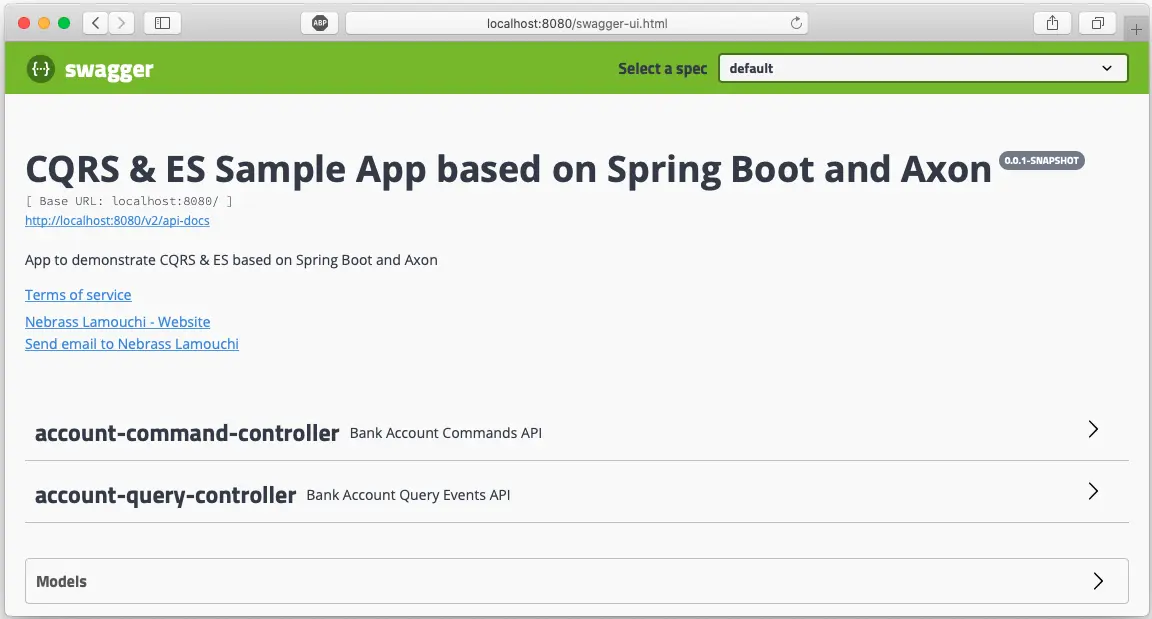 Swagger UI
As you see, there is already two REST Controllers one for the Commands and one for the Queries. Let’s test the createAccount REST API:
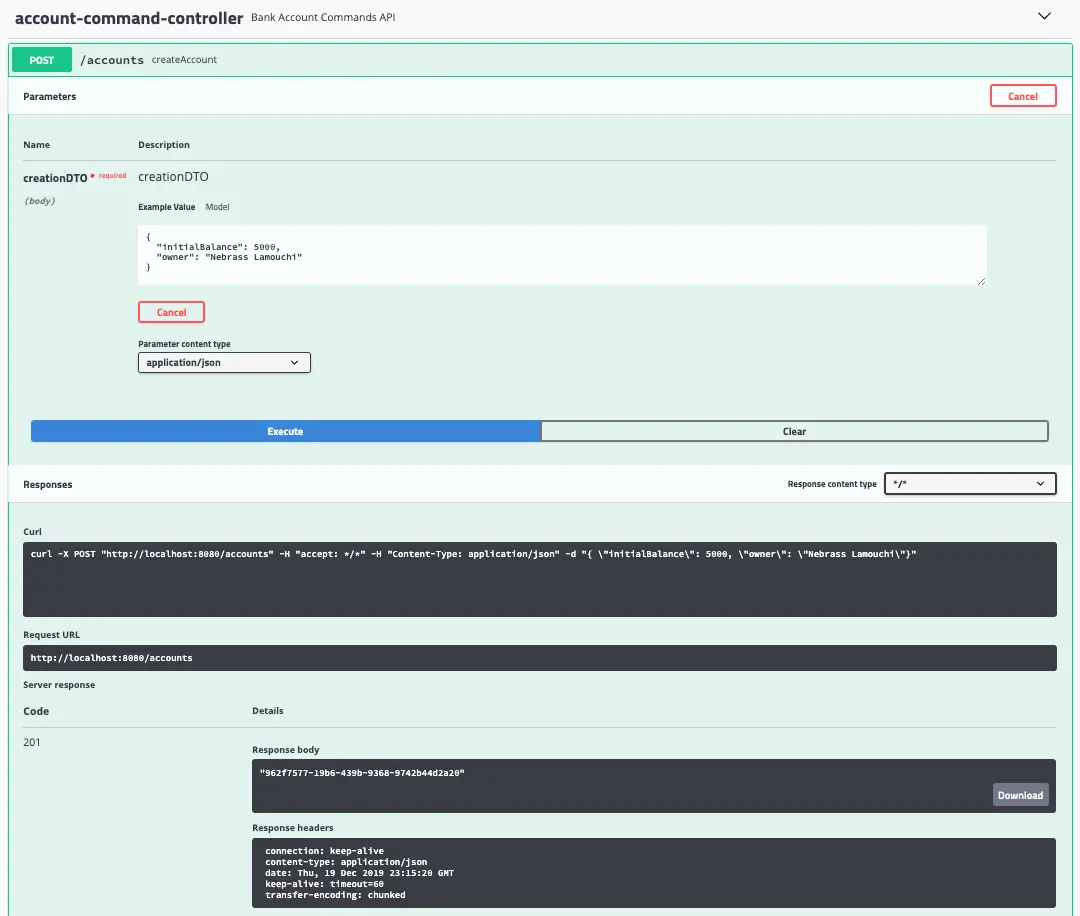 Create Account - Swagger UI
Here we created a new BankAccount that has:
- id: 962f7577-19b6-439b-9368-9742b44d2a20
- initialBalance: 5000
- owner: Nebrass Lamouchi
Next, I will test some creditMoneyToAccount operation twice the first with an amount of 300 and the second with 480:
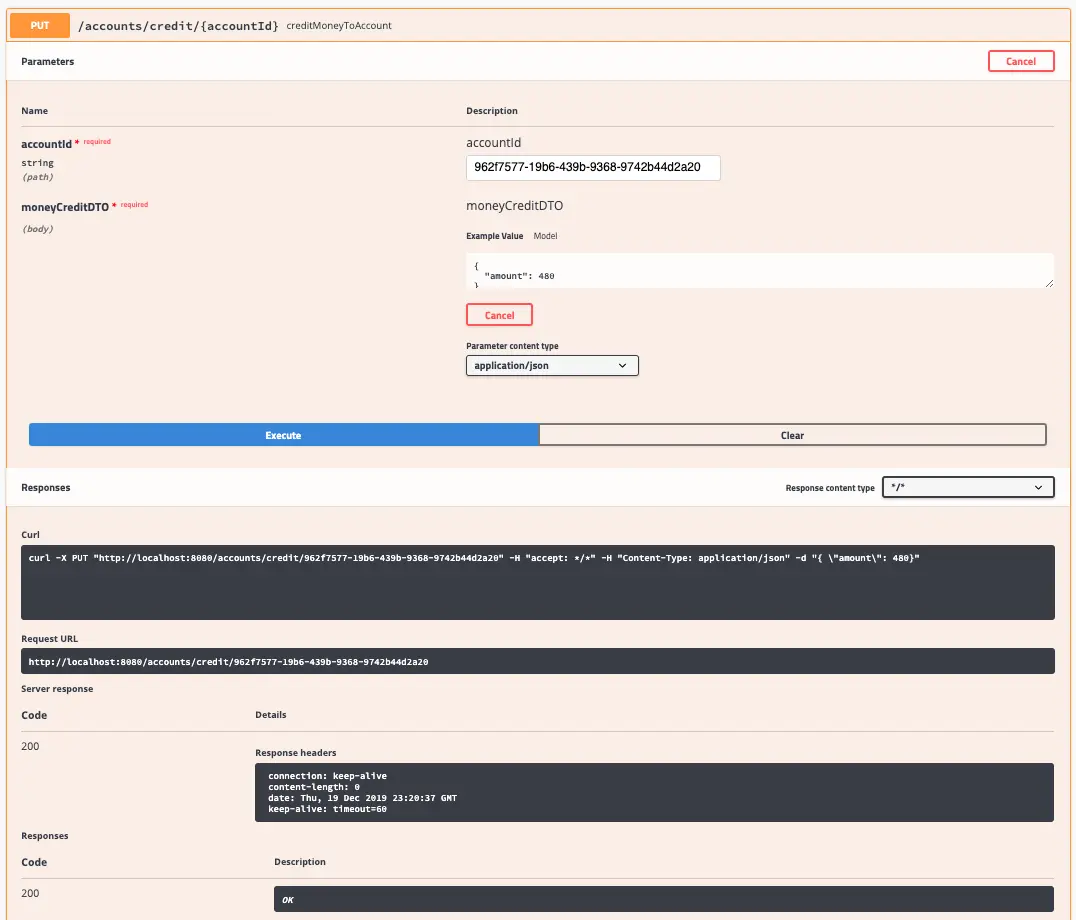 Credit Account - Swagger UI
Let’s debit the amount of 2000 from the sample account using the debitMoneyFromAccount operation:
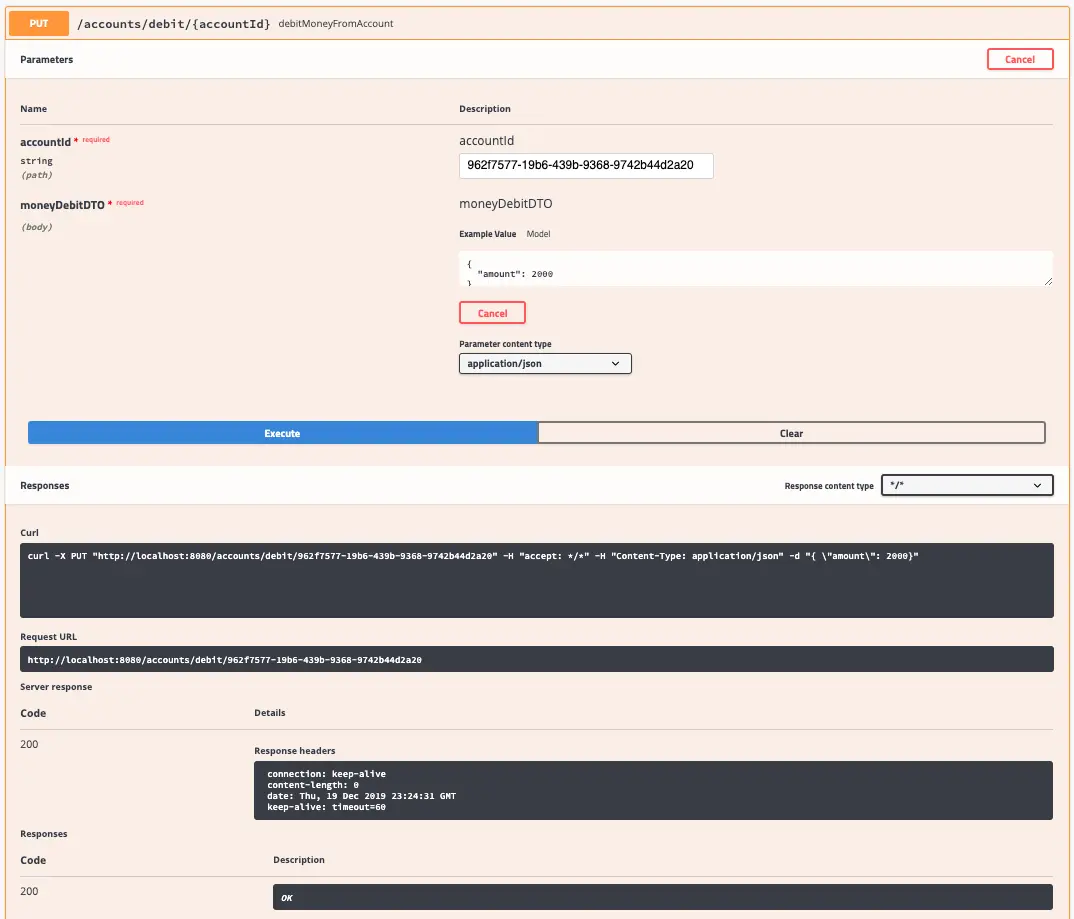 Debit Account – Swagger UI
Now, we need to check how much we have in our account, normally the remaining balance will be 5000 + 300 + 480-2000 = 3780.
Let’s check the account using the findById operation on the AccountQueryController:
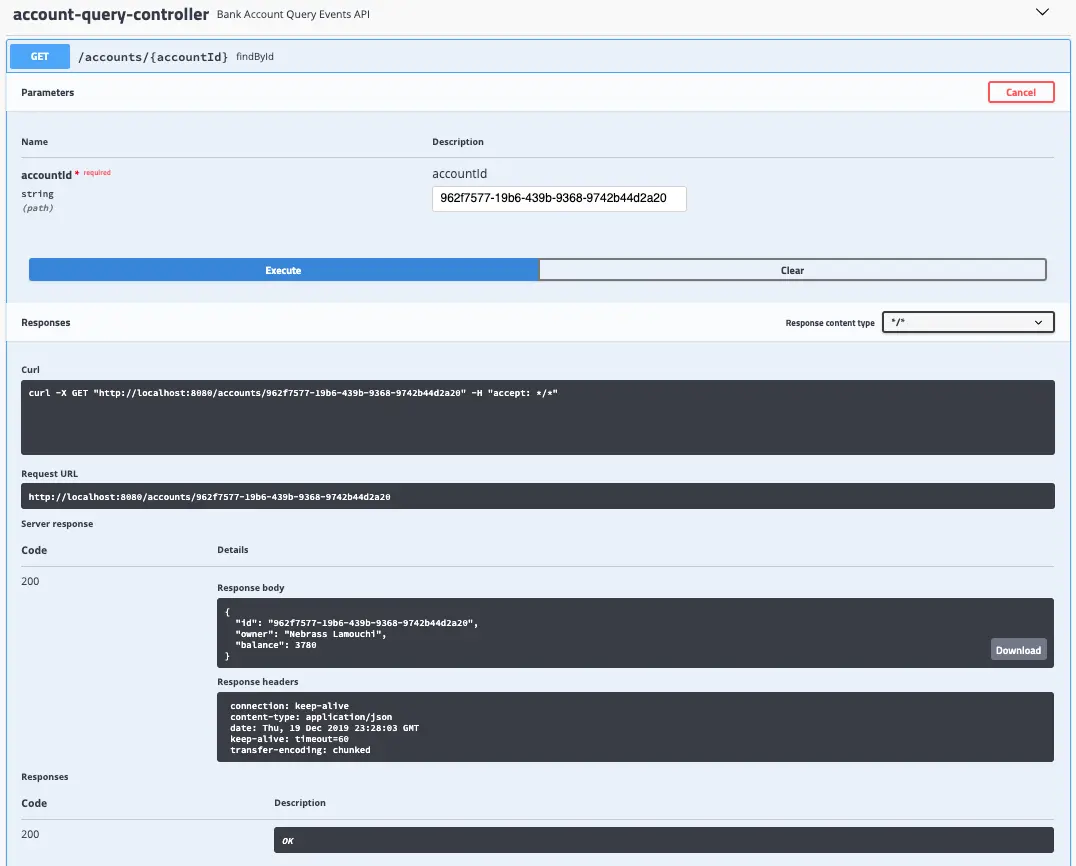 Find Account by ID – Swagger UI
As expected ! the balance is 3780 🤩
We can verify the Events list occurred on our BankAccount using the listEventsForAccount operation:
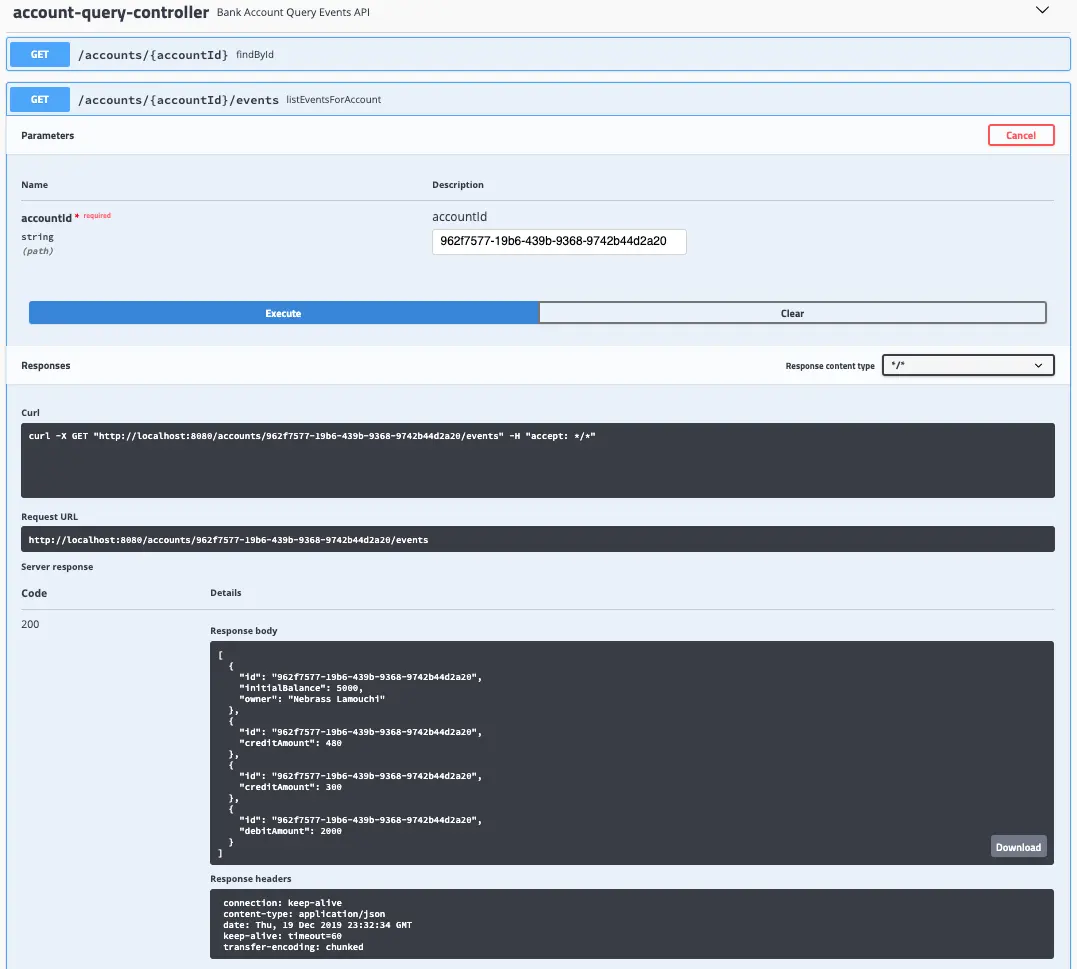 Account Events list – Swagger UI
Great ! Everything is working like a charm ! 🥳
After we executed our application and after we did some operations, let’s visit again the Axon Server UI:
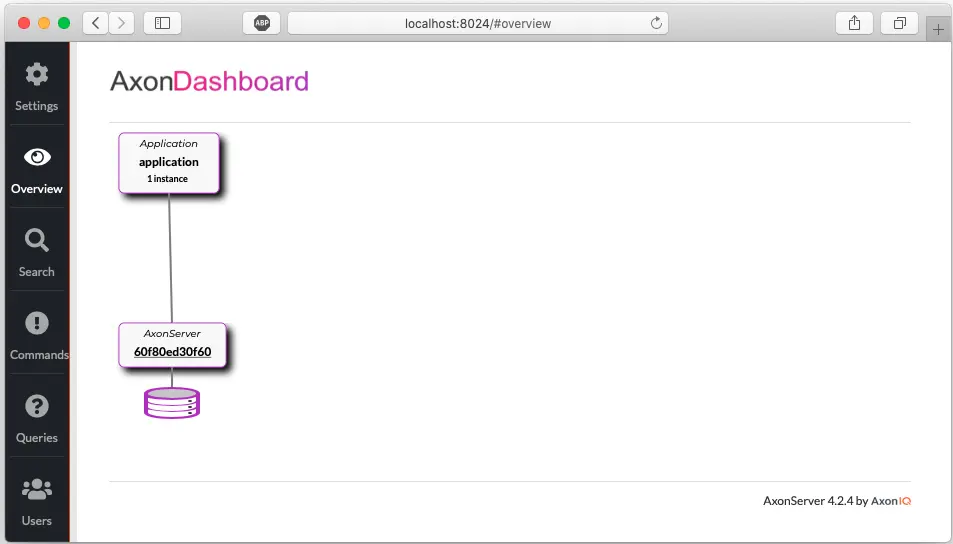 Axon Server UI - Overview after execution
As you see, our application instance is spotted on the Axon Dashboard. Let’s move to the Commands section:
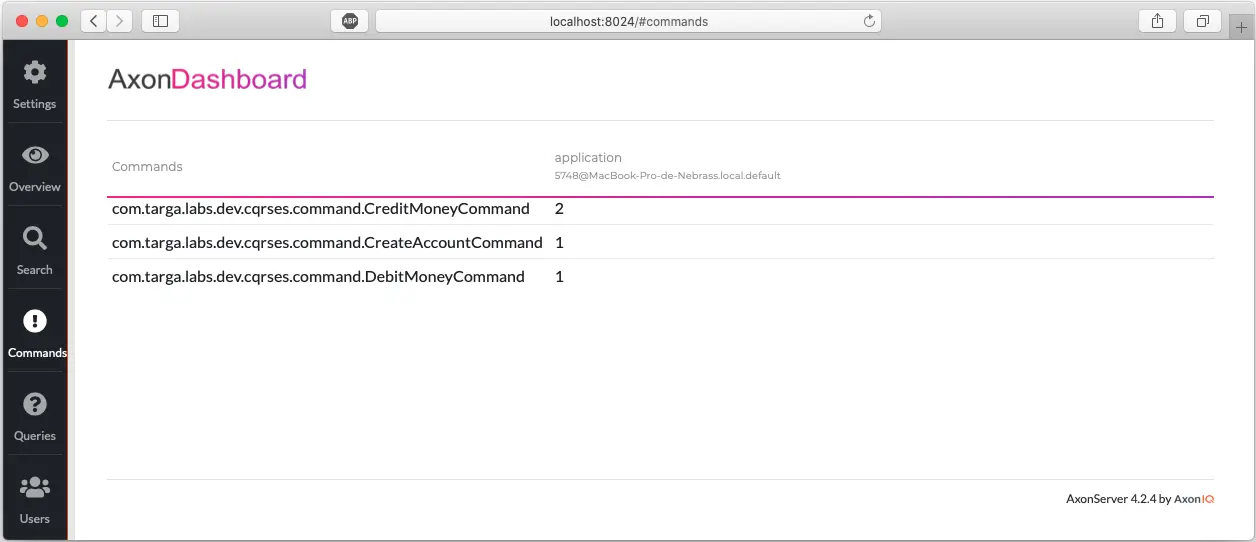 Axon Server UI - Commands after execution
You already see that the CreateAccountCommand was fired once, the CreditMoneyCommand twice (300 & 480) and the DebitMoneyCommand once (2000).
Next, move to the Queries section:
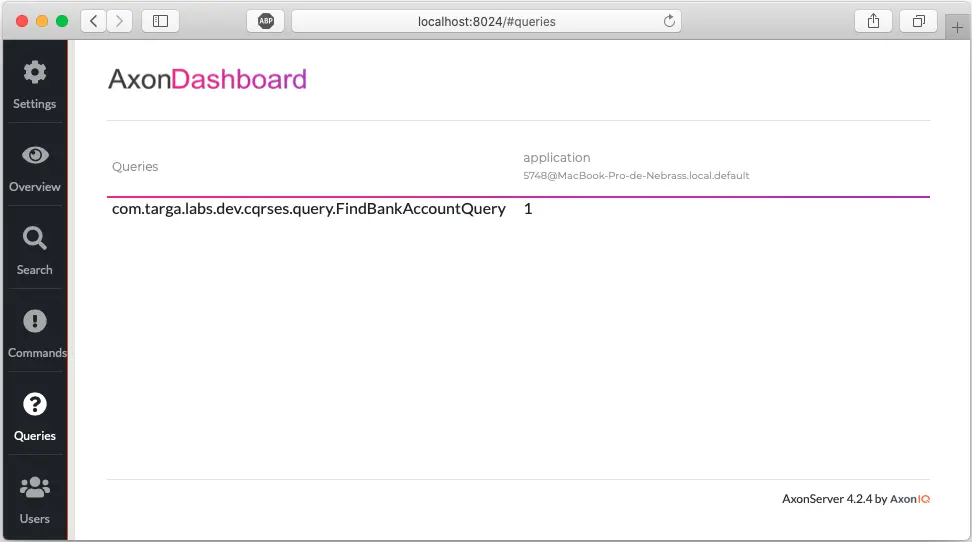 Axon Server UI - Queries after execution
You can easily see that the FindBankAccountQuery was executed once.
You can see all of the Events in the Search section. Click directly on Search button to grab all the Events:
 Axon Server UI - Search section
If you want to test our Axon code programmatically, we will start by adding the Axon Test module to the pom.xml:
| |
Next, we will create a BankAccountTest class:
| |
In our BankAccountTest class, we are using FixtureConfiguration class which we will use to define a test scenario in terms of events and commands:
- Given certain events in the past
- When executing this command
- Expect these events to be published
Our test are designed like:
- In the first test, we are testing an Account Creation operation:
- we are supposing that we don’t have any account created
- when we will dispatch a CreateAccountCommand
- we are expecting to get the a AccountCreatedEvent with the same values
- In the second test, we are testing the Credit Money operation:
- we are supposing that we have an account
- when we will dispatch a CreditMoneyCommand with an amount of 100
- we are expecting to get the a MoneyCreditedEvent with an amount of 100
- In the third test, we are testing the Debit Money operation:
- we are supposing that we have an account
- when we will dispatch a Debit****MoneyCommand with an amount of 100
- we are expecting to get the a MoneyDebitedEvent with an amount of 100
- In the third test, we are testing the impossibility to execute Debit Money operation when the requested amount is higher than the account balance:
- we are supposing that we have an account
- when we will dispatch a Debit****MoneyCommand with an amount of 5000
- we are expecting to have NO events that occurred
 The end !
Conclusion
In this tutorial, I have implemented a CQRS and Event Sourcing based Spring Boot application using the Axon Platform. This is a blog post I wanted to write from some time ago, but I couldn’t find an opportunity until now. I tried to present the key concepts of the CQRS and Event Sourcing patterns and the main features offered by Axon Platform. I tried to make the demo using a very common example in the DDD world, the Bank Account.
I really encourage you to dig into the DDD paradigms especially that we have many great platforms like Axon which make our life easier.
The sample code of this tutorial can be found on Github.
