Before the introduction
This is my first tutorial about one of the Microsoft’s tools and platforms.. I started working for Microsoft on May 6th, I started to look to this huge and mysterious world by the eyes of a Java Developer. I will try to make some tutorials based on the great tools that I use or discover in the Microsoft ecosystem 😊
⚠️ Disclaimer : This is not a marketing content 😆 I just want to share with you a feedback about tooling to boost your productivity and to make the Java journey wonderful 😍
Introduction
Serverless computing is an architecture that aims to delegate the execution of a piece of code to the cloud, where necessary resources will be dynamically allocated. Dynamic allocation means always the pay-as-you-go model when we are hosting the code on a Public Cloud Provider.
The serverless application is composed by functions triggered by some event like an HTTP Request, a Message (Kafka for example) or even a Scheduled event. That’s why, we refer to the serverless applications as “Functions as a Service” or “FaaS”.
Today, I will make my first tutorial with Microsoft Azure FaaS which is called Azure Functions.
What is Azure Functions
We will be based on the Microsoft’s presentation of Azure Functions:
Azure Functions is a solution for easily running small pieces of code, or “functions,” in the cloud. You can write just the code you need for the problem at hand, without worrying about a whole application or the infrastructure to run it. Functions can make development even more productive, and you can use your development language of choice, such as C#, Java, JavaScript, Python, or PHP. Pay only for the time your code runs and trust Azure to scale as needed. Azure Functions lets you develop serverless applications on Microsoft Azure.
Requirements for this tutorial
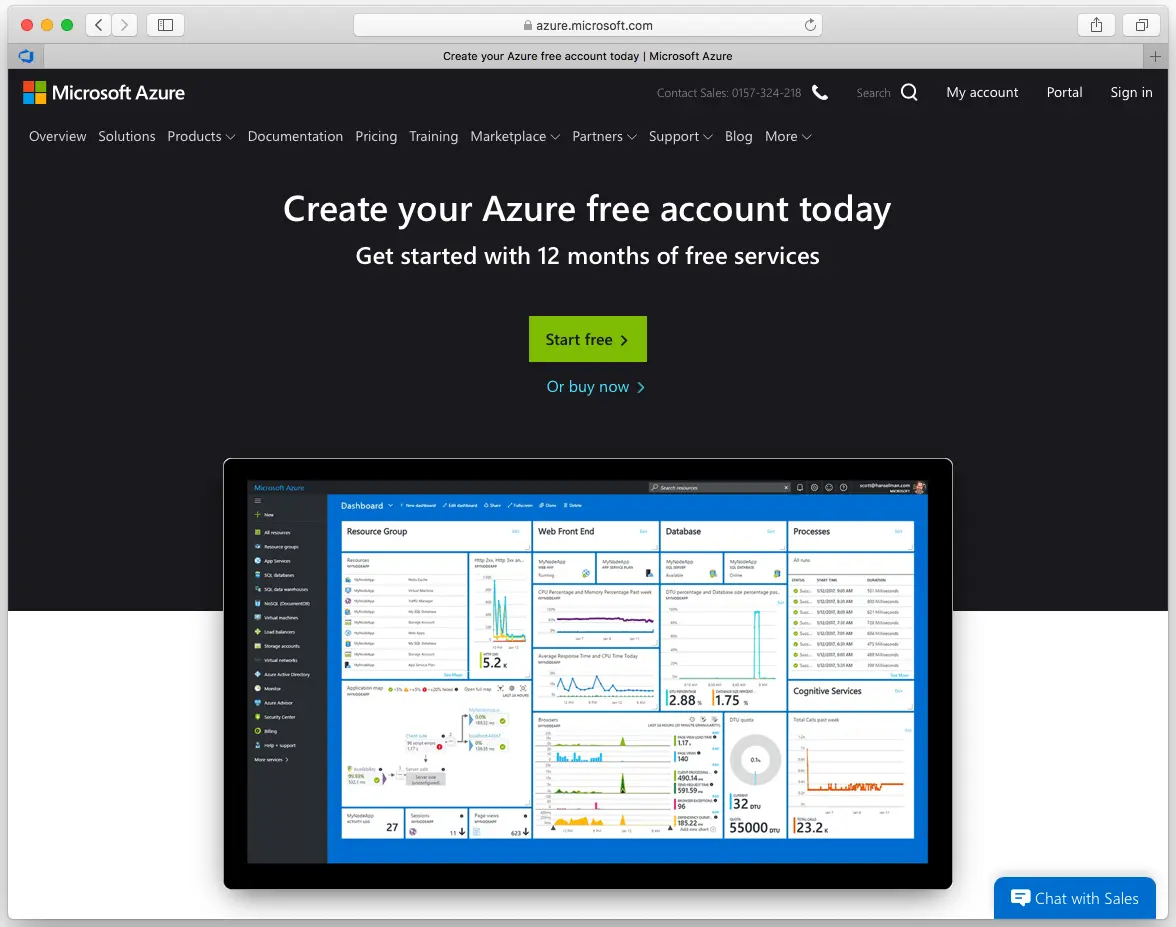
To do this tutorial, you will need an Azure Subscription. If you don’t already have one, you can get one with free 200$ credit from this link:
In the Free Tier account, we can have up to 1 Million requests per month for FREE !!
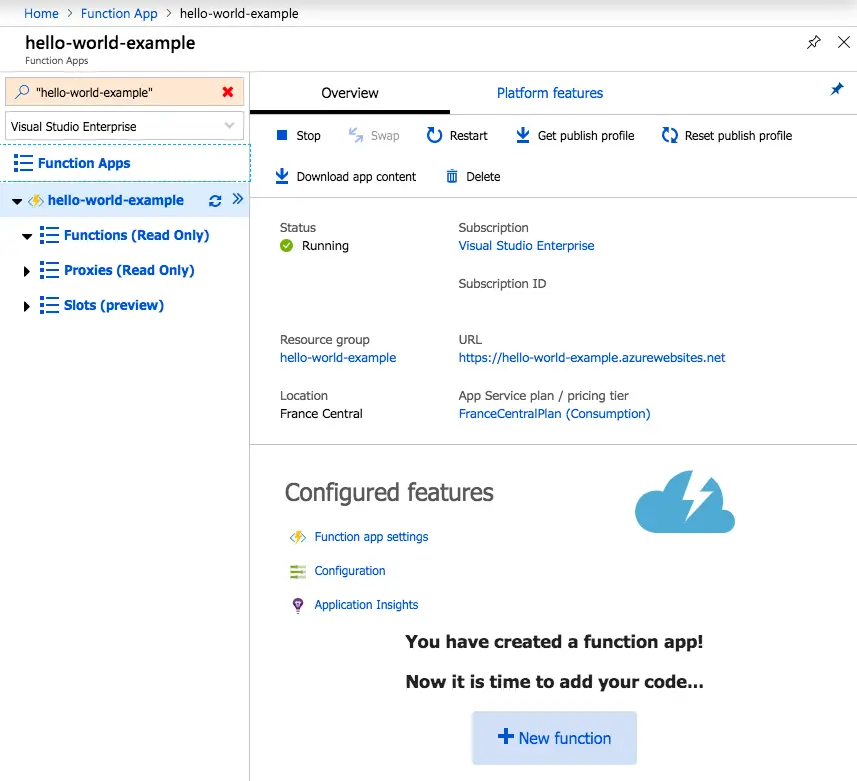
Creating the Azure Function App
The first step is to create the new Function on the Azure Portal: https://portal.azure.com
Next, go to the Function App and when you click on Add you will get this window:
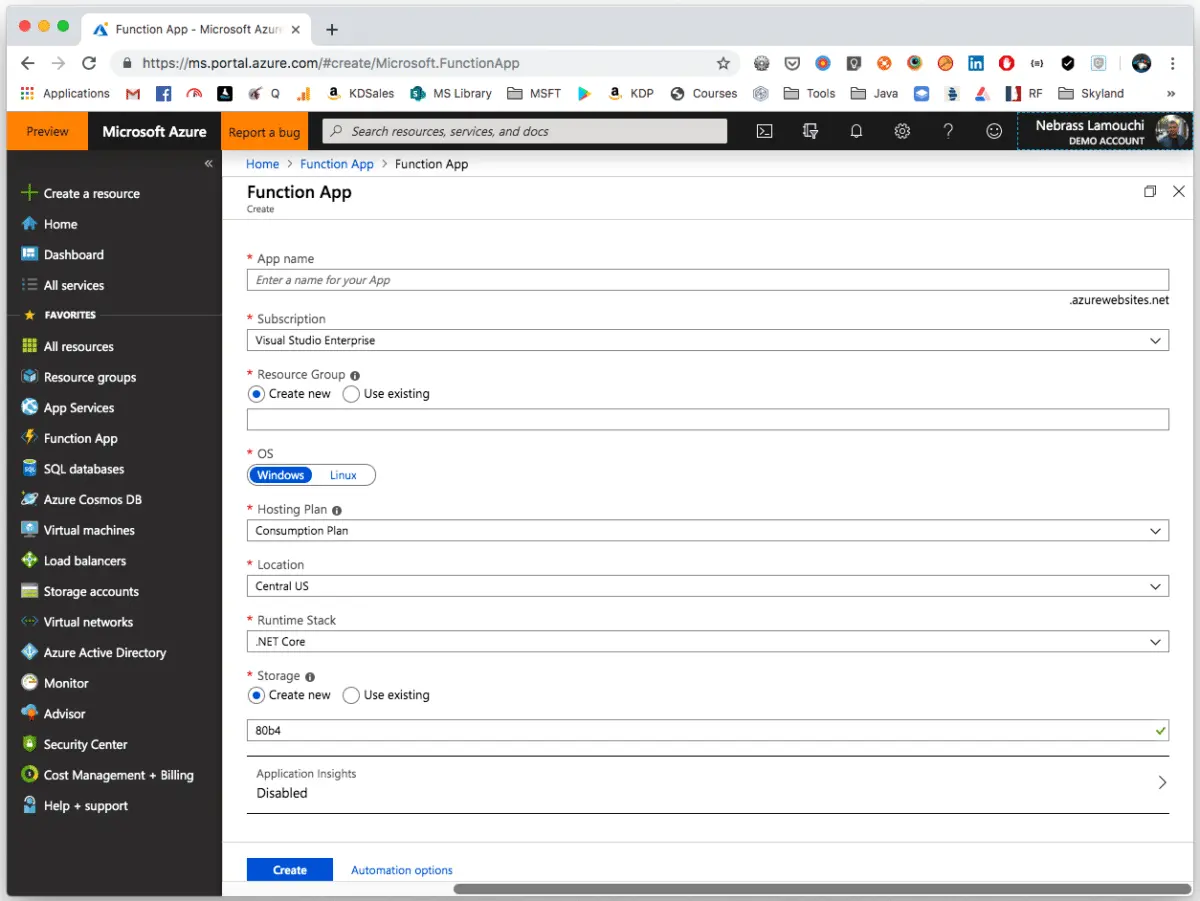
Fill this form with this details:
- App name: the Function App name and will be used in the application’s URL: https://APP_NAME.azurewebsites.net 👉 I will call it: hello-world-example -the application will be reachable on the URL https://hello-world-example.azurewebsites.net/
- Resource Group: a logical container that will be holding Azure Resources, like the Function App here 👉 in this tutorial we are creating a new one called hello-world-example-rg
- OS: We will choose Windows as it has the Java Runtime Stack.
- Hosting Plan: The Consumption plan lets you pay-per-execution and dynamically allocates resources based on your app’s load. App Service Plans let you use a predefined capacity allocation with predictable costs and scale 👉 we need to choose Consumption plan.
- Location: The nearest one for me is France Central.
- Runtime Stack: Obviously Java 😁
- Storage: We will create a new one 😃 Maybe we will need it later 🤪
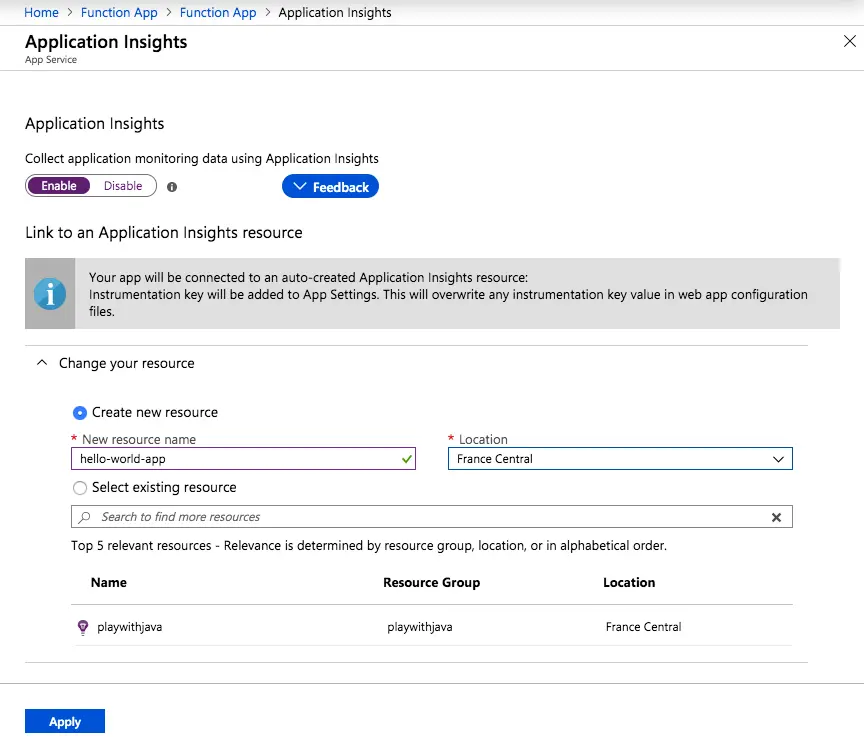
- Application Insights: an Azure monitoring platform that we will enable to monitor the Function App 👉 Just click on Application insights and Enable the Collect application monitoring data using Application Insights:
 Then Apply next click on Create
Create your first function code
After the application is created, it’s time to add code. To do that, click on your new application on the Function Apps list, to access to the application content:
Next, click on the New function button:
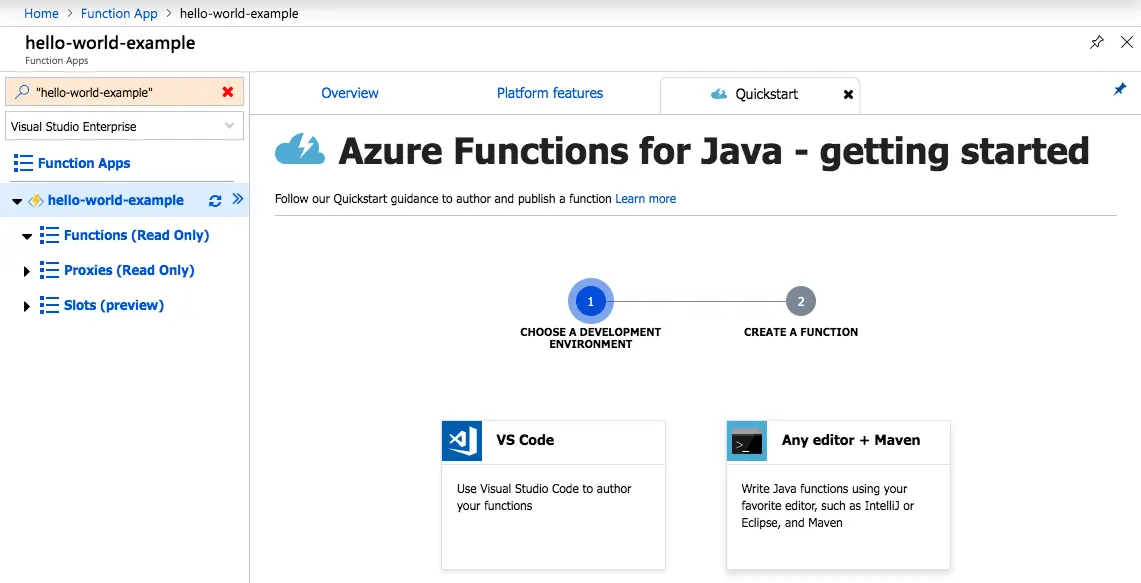
We will chose Any editor + Maven and proceed to next step:
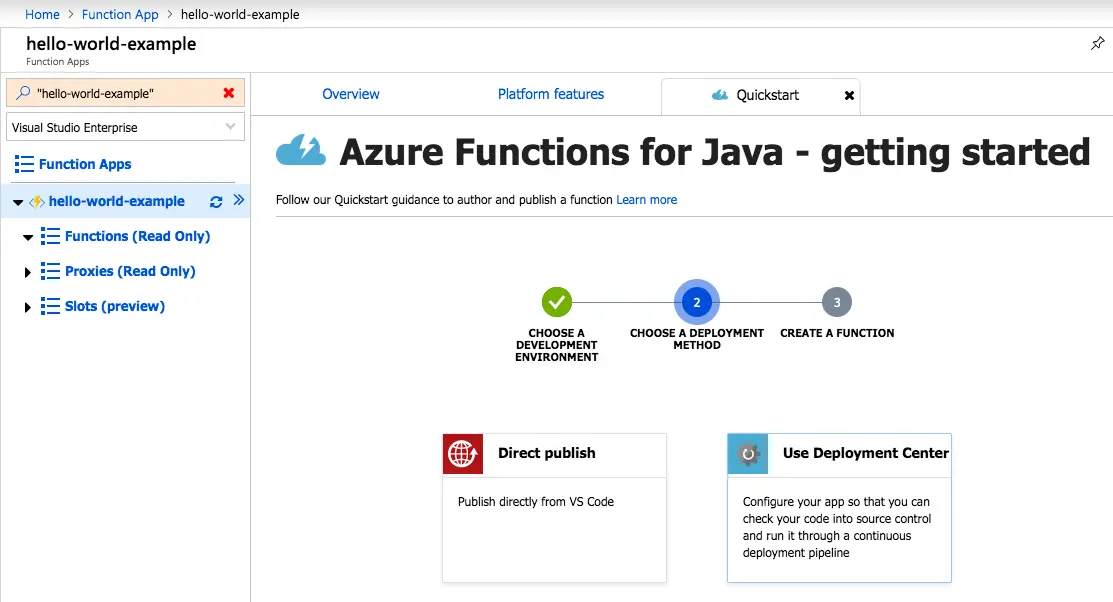
For the deployment method, we will use Use Deployment Center and proceed to next step:
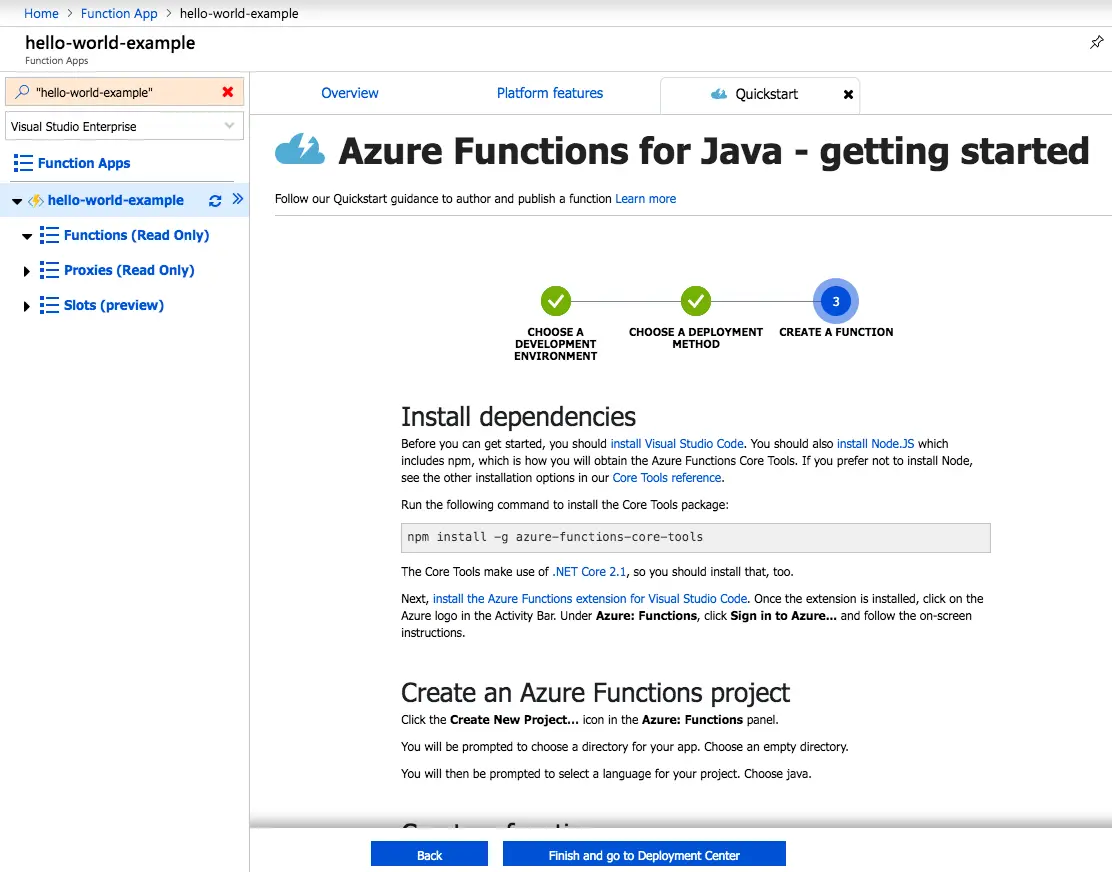
In this section of the wizard, there are many important sections: like installing dependencies and how to create an Azure Functions project via Maven, which is the important part.
Click Finish and go to Deployment Center to finish the wizard.
Create the maven project
The Maven command showed in the quickstart wizard looks like:
| |
With in my case:
- region: FranceCentral
- resourceGroup: hello-world-example
- functionAppName: helloworldexample
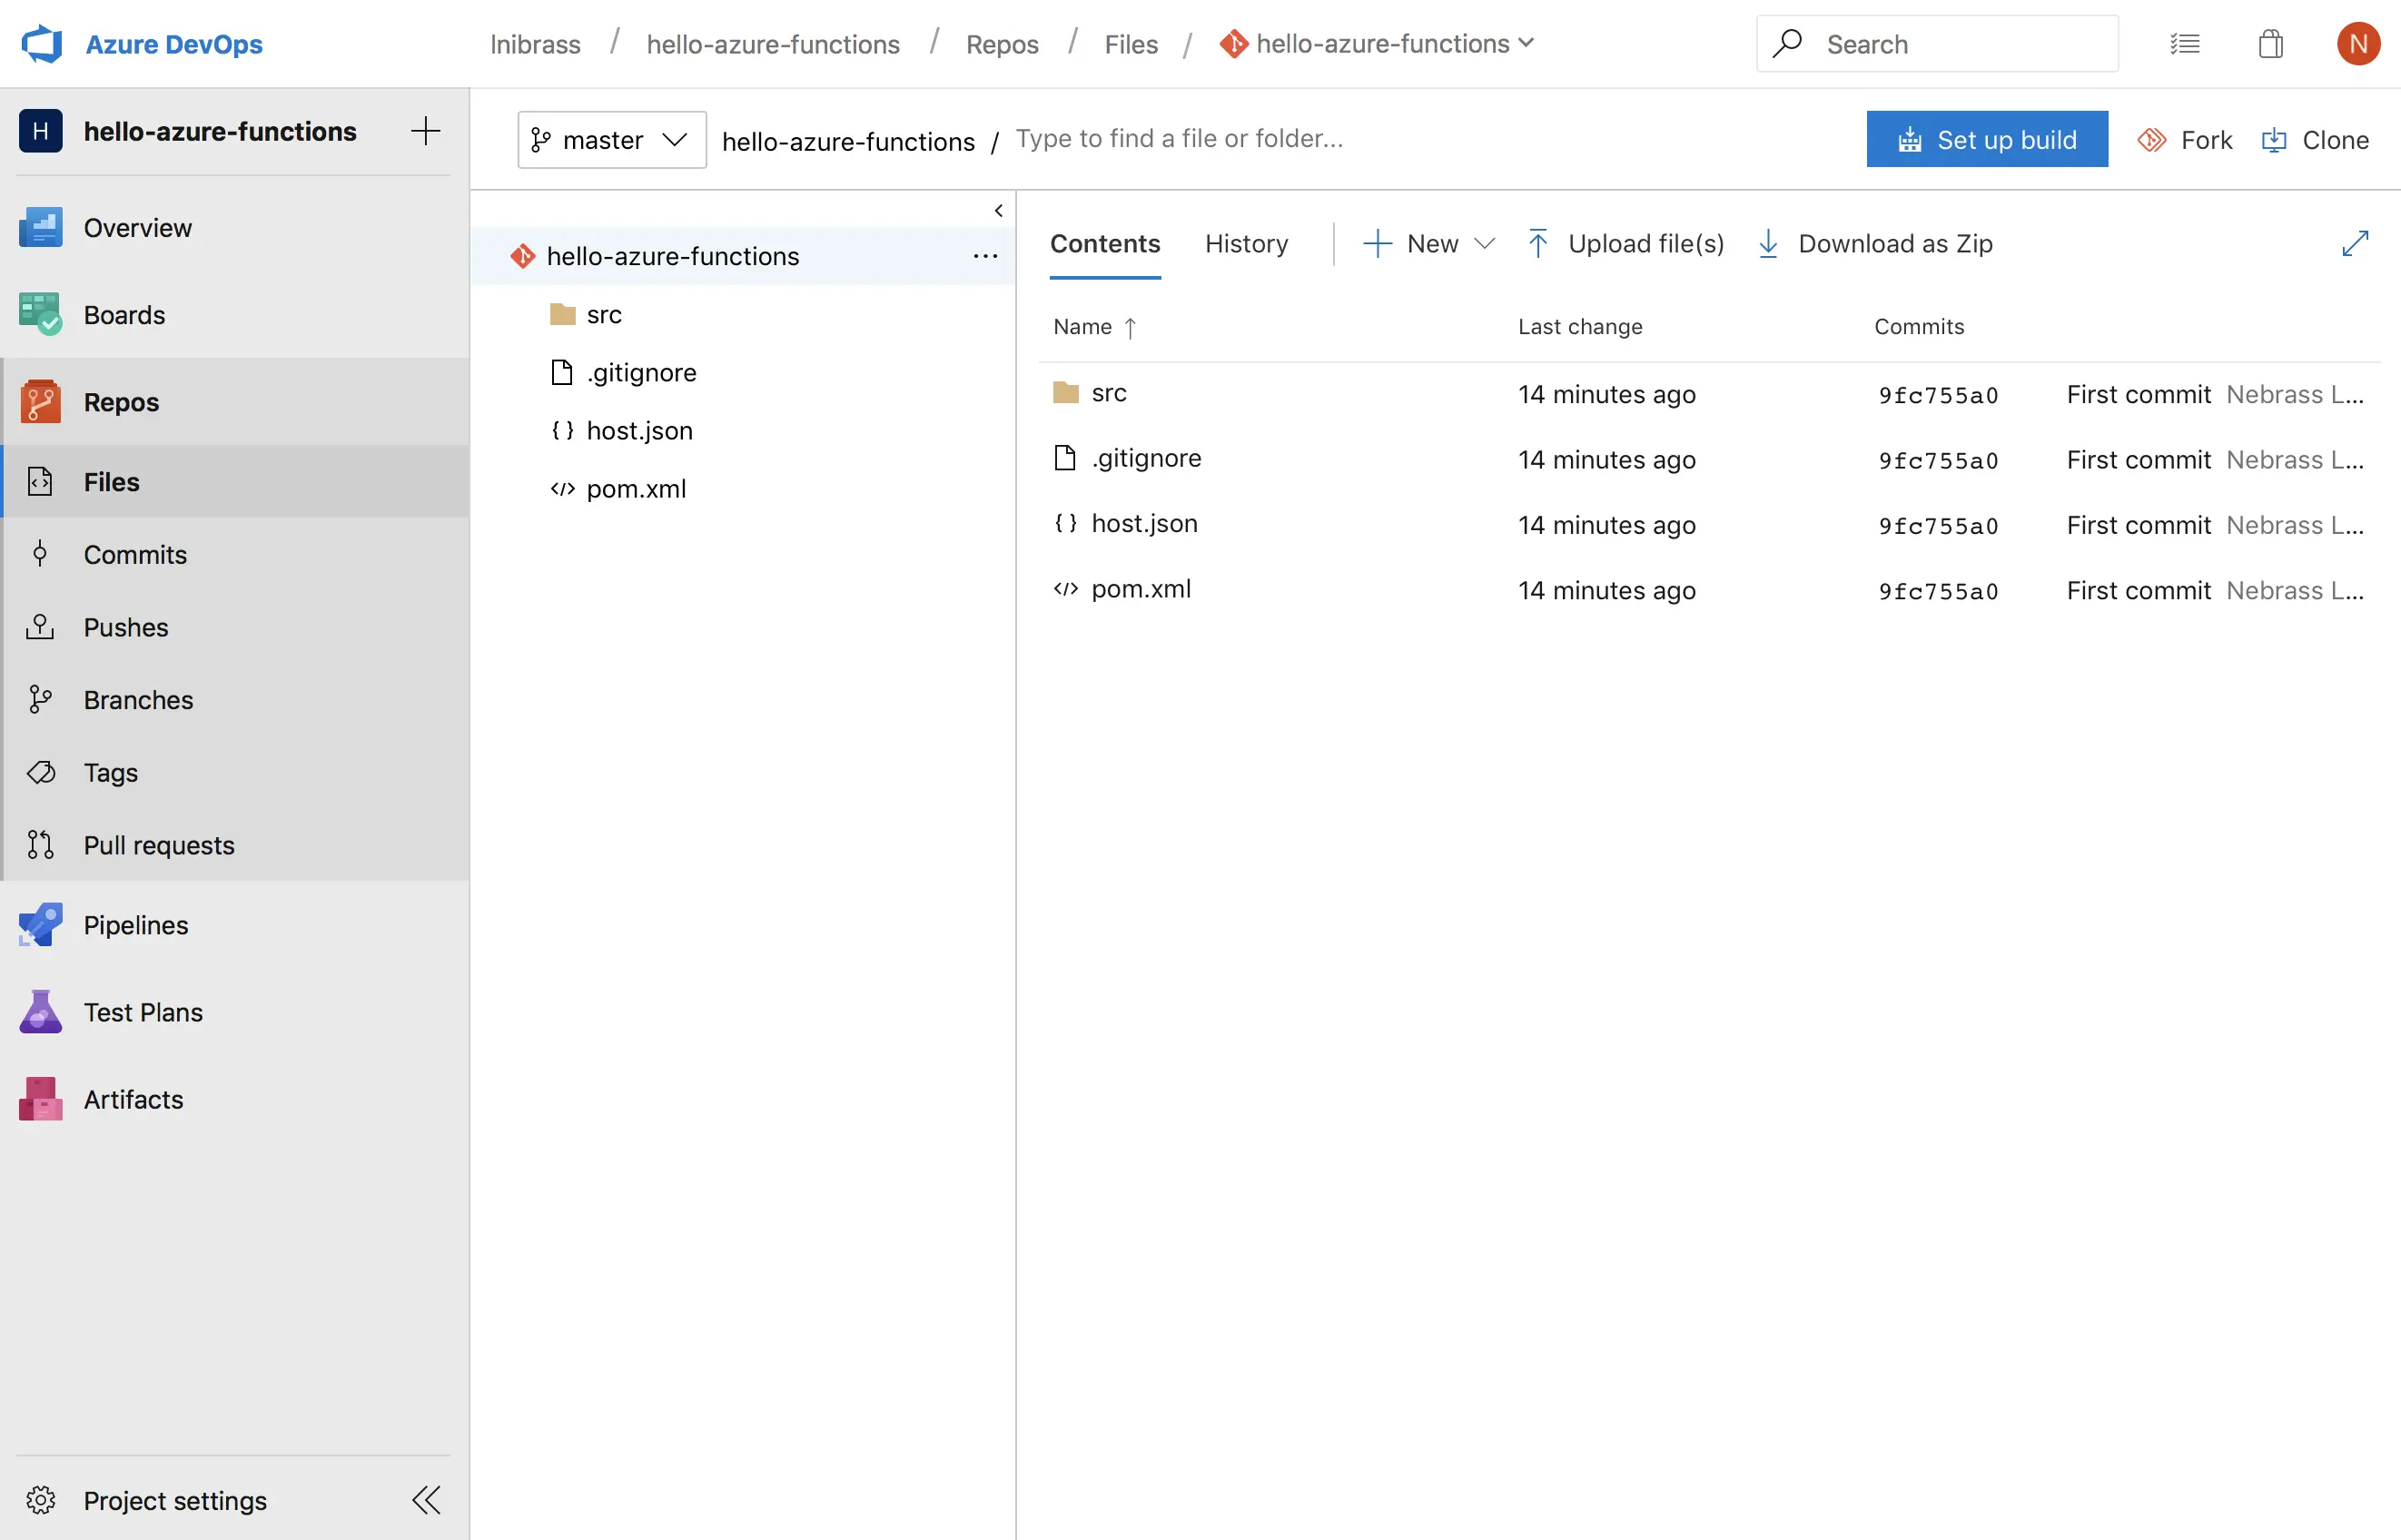
After generating the Maven Project, just enable the Git version control by typing:
| |
Add all the generated files to Git:
| |
Commit the changes to Git:
| |
import the project in the Azure DevOps
First of all, we need to create a project in Azure DevOps. Ok but what is Azure DevOps ? 😆
Azure DevOps is a Software as a Service (SaaS) from Microsoft that provides many great features for Software Teams - which cover all the lifecycle of a typical application:
- Azure Pipelines: CI/CD that works with any language, platform, and cloud (not only Azure 😁)
- Azure Boards: Powerful work tracking with Kanban boards, backlogs, team dashboards, and custom reporting.
- Azure Artifacts: Maven, npm, and NuGet package feeds from public and private sources.
- Azure Repos: Unlimited cloud-hosted private Git repos for your project. Collaborative pull requests, advanced file management, and more.
- Azure Test Plans: All in one planned and exploratory testing solution.
For the used Java developers; Yes, Azure DevOps is a great alternative of Jenkins/Hudson.
First of all, go to the Azure DevOps portal:
Click Start free to create an account..
Next.. authenticate to your Oulook/Hotmail/Live account..
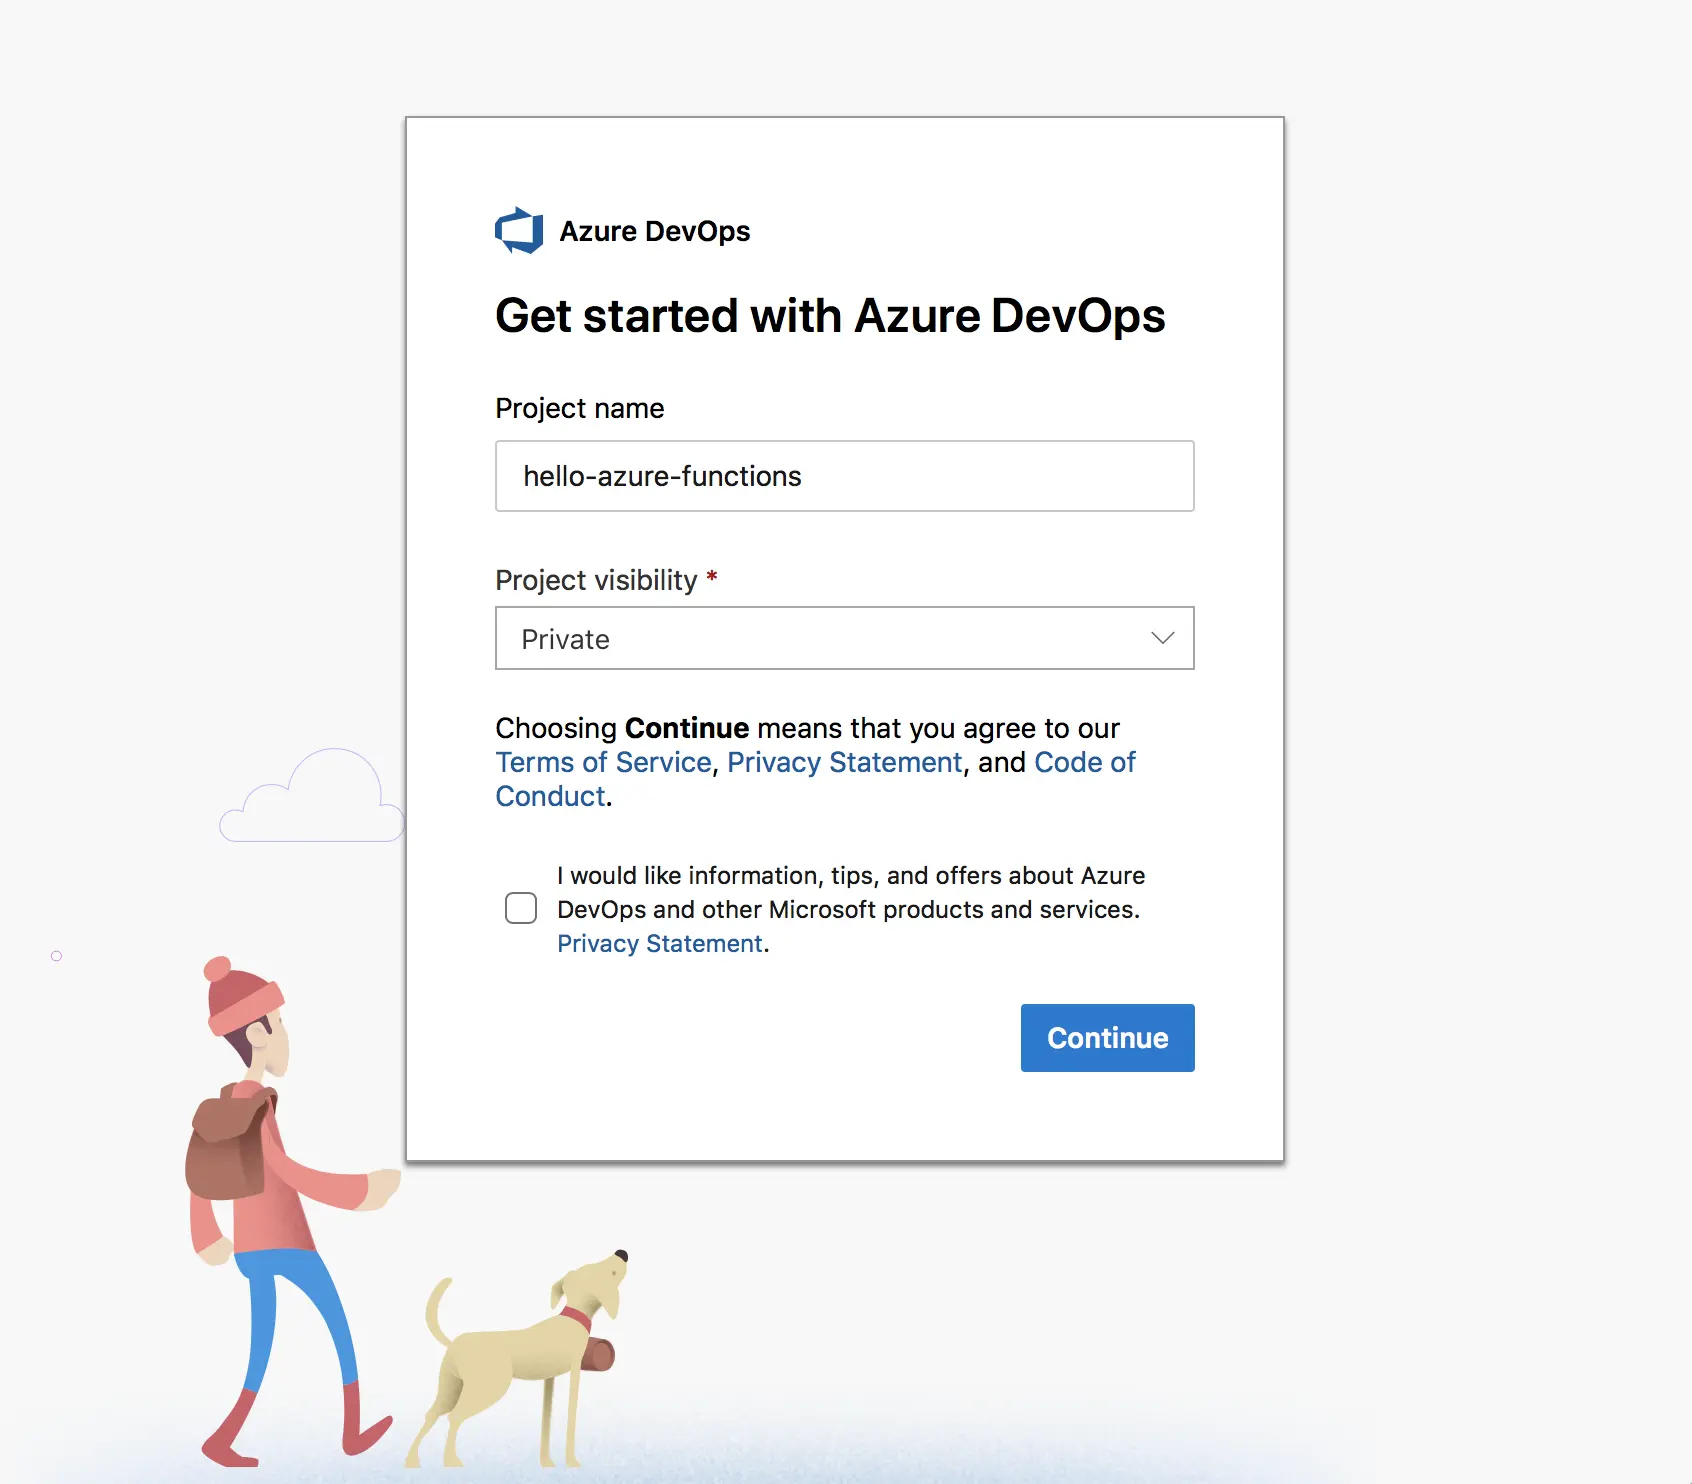
Next.. create your first project:
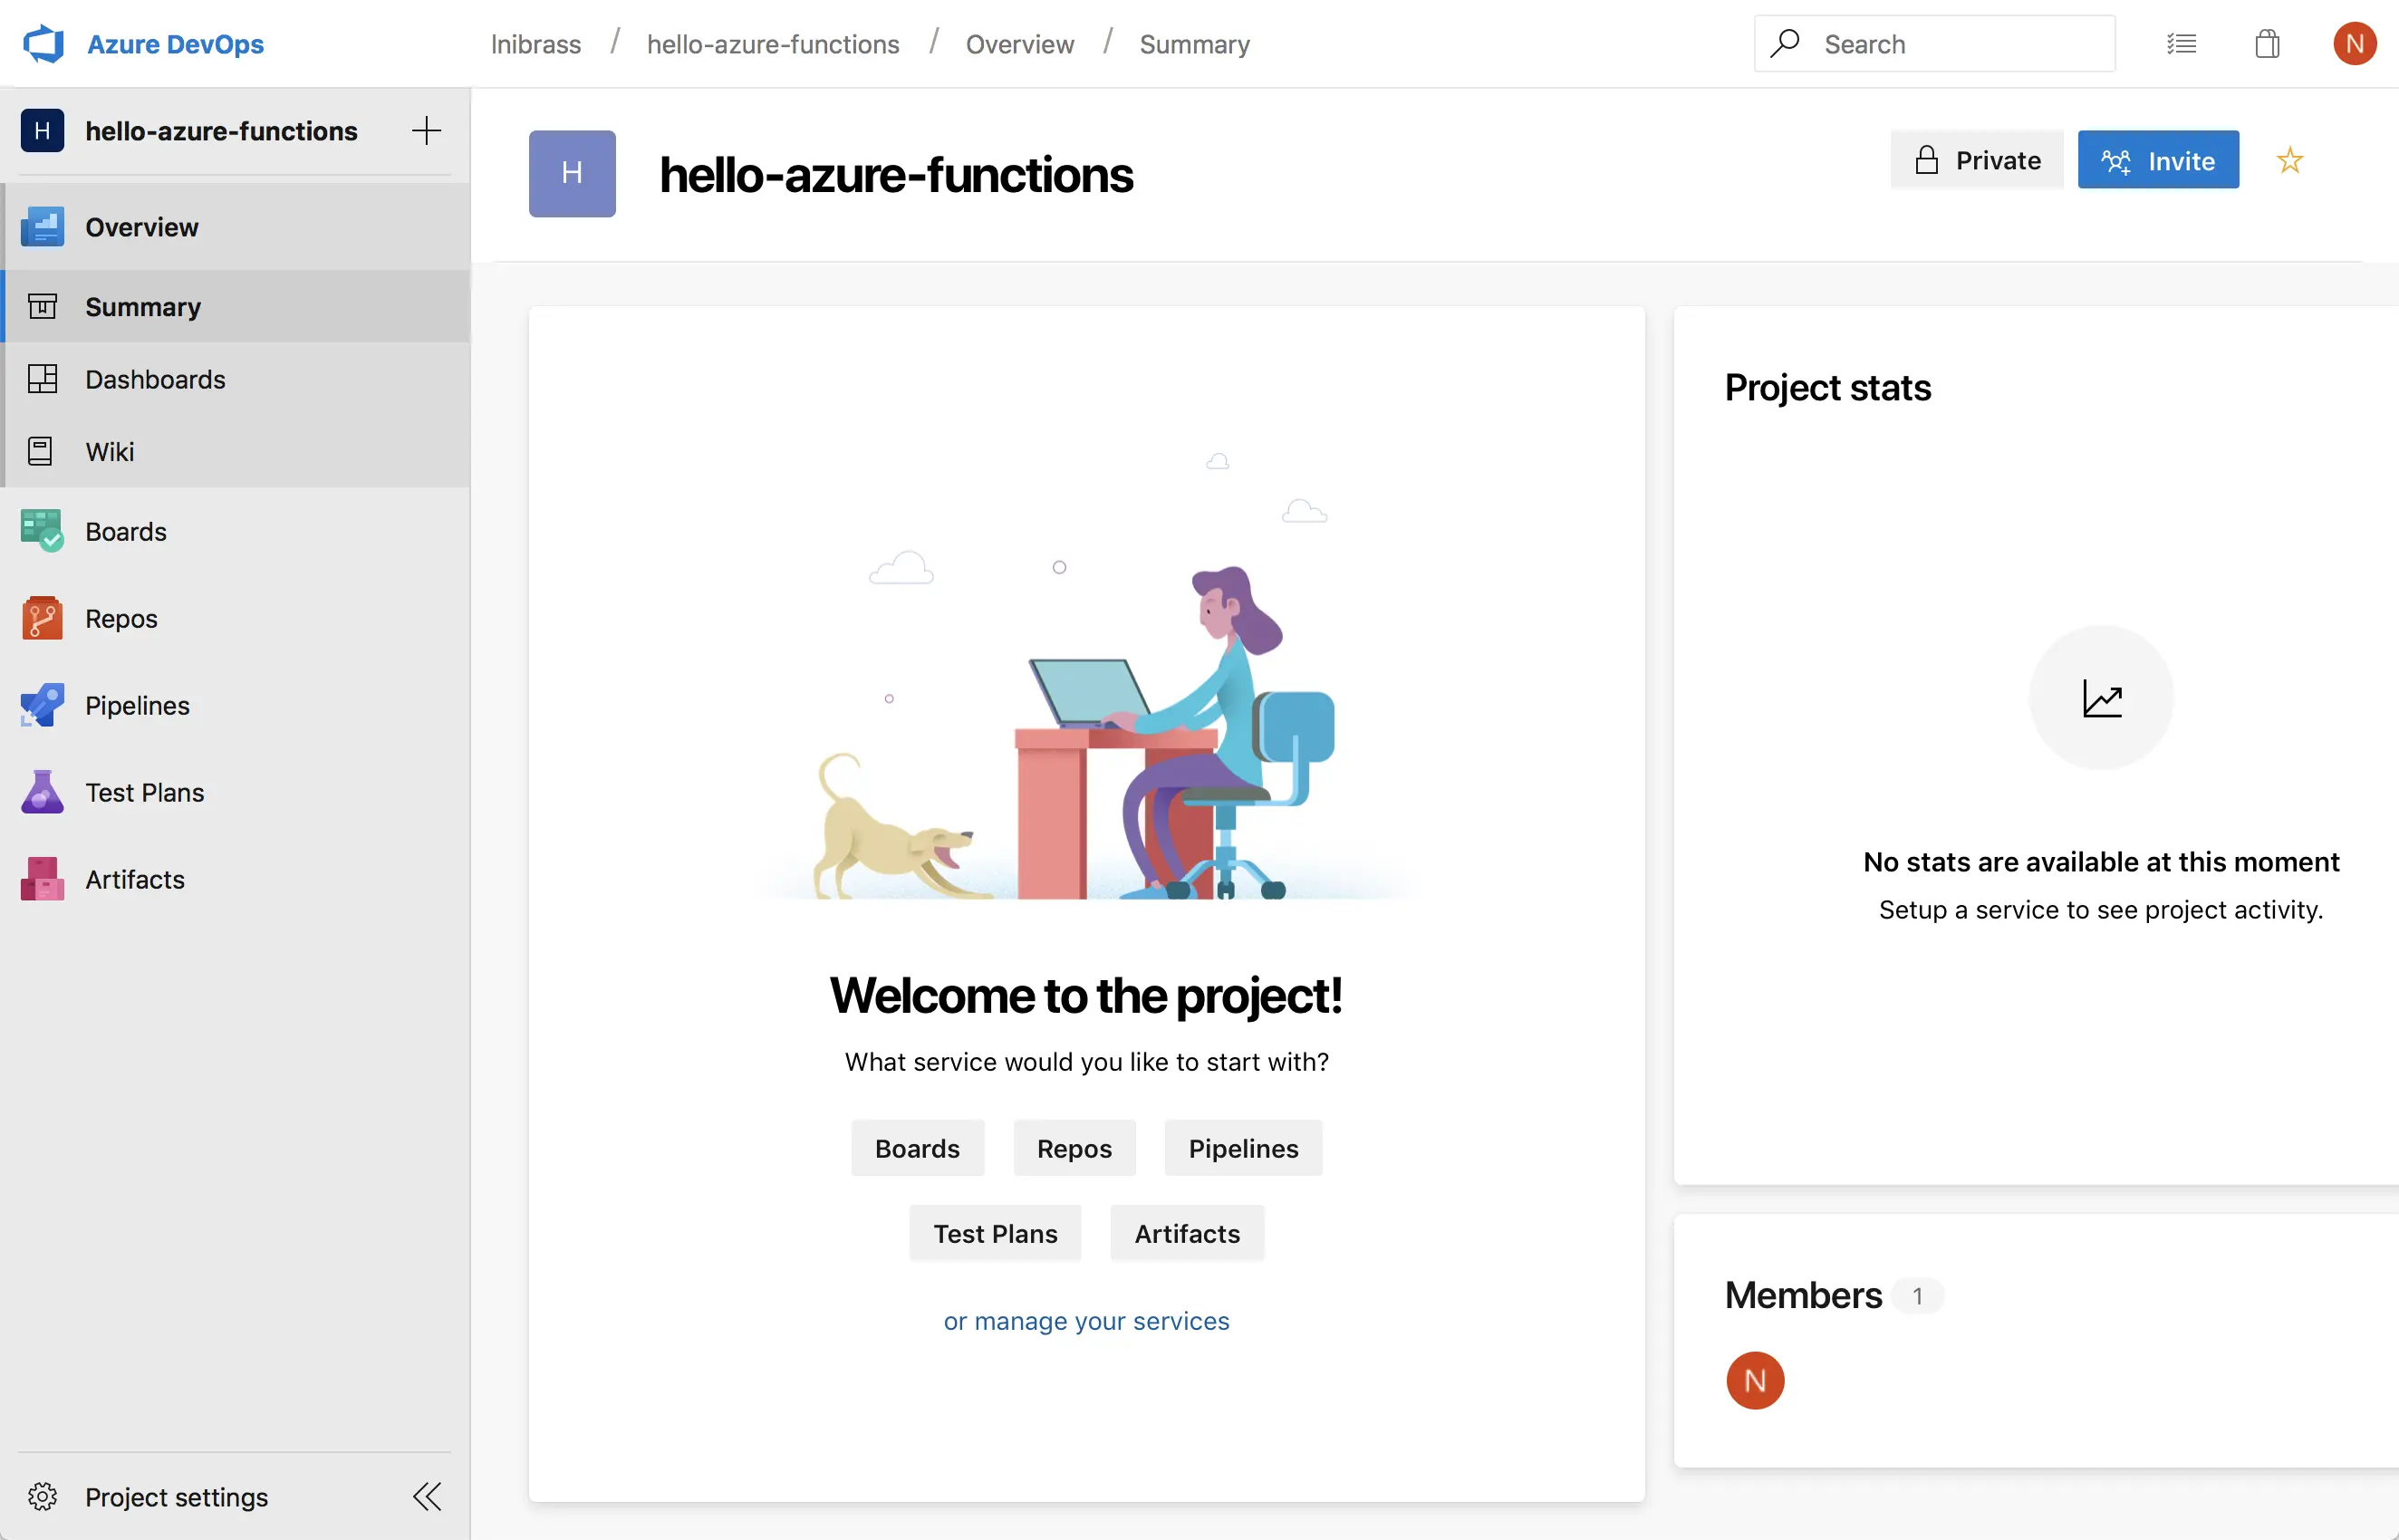
Next, when the project is created, you will be redirected to the Dashboard:
Go to the Repos section:
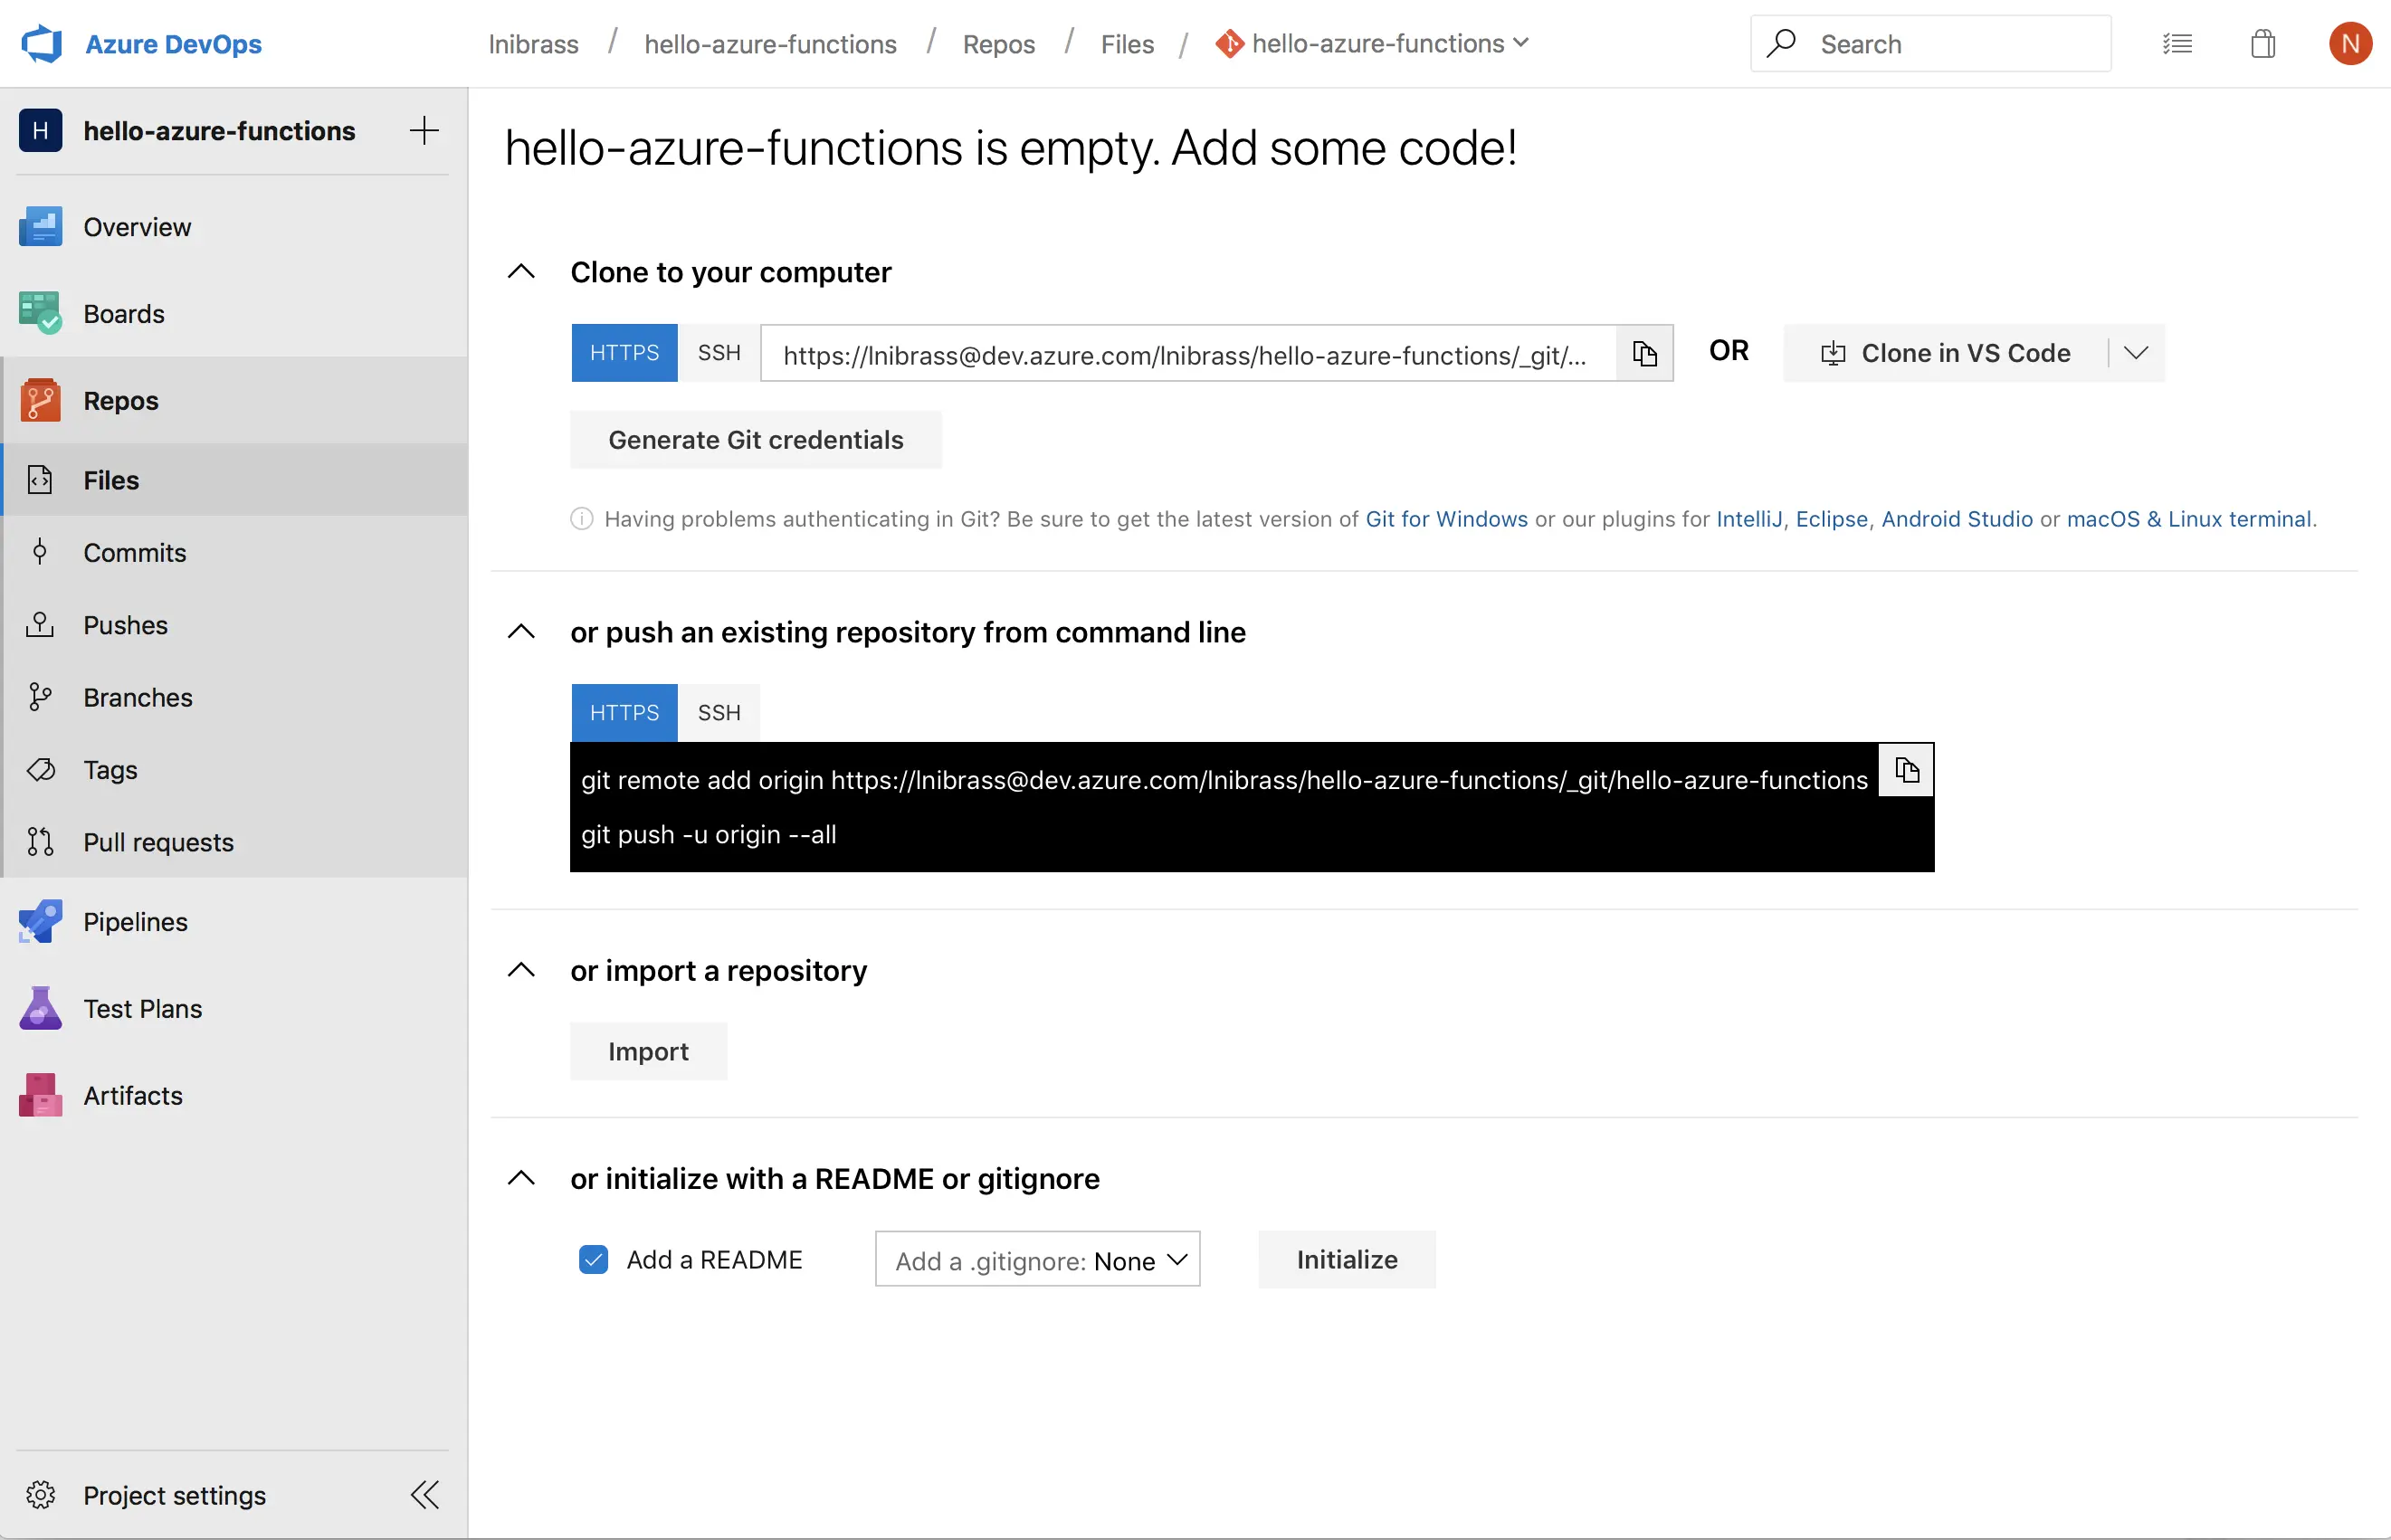
Next.. we need to authenticate the Git CLI to be able to push code and do operation from the CLI on this repository.. to do that.. Azure DevOps offers a great one-time generated passwords that you can directly get when you click on Generate Git credentials..
Next.. we will go to our generated Maven project and add our Azure DevOps Git repository as remote repository:
| |
Next.. we will push all our code to the Azure DevOps Git repository:
| |
When files are pushed to the repository:
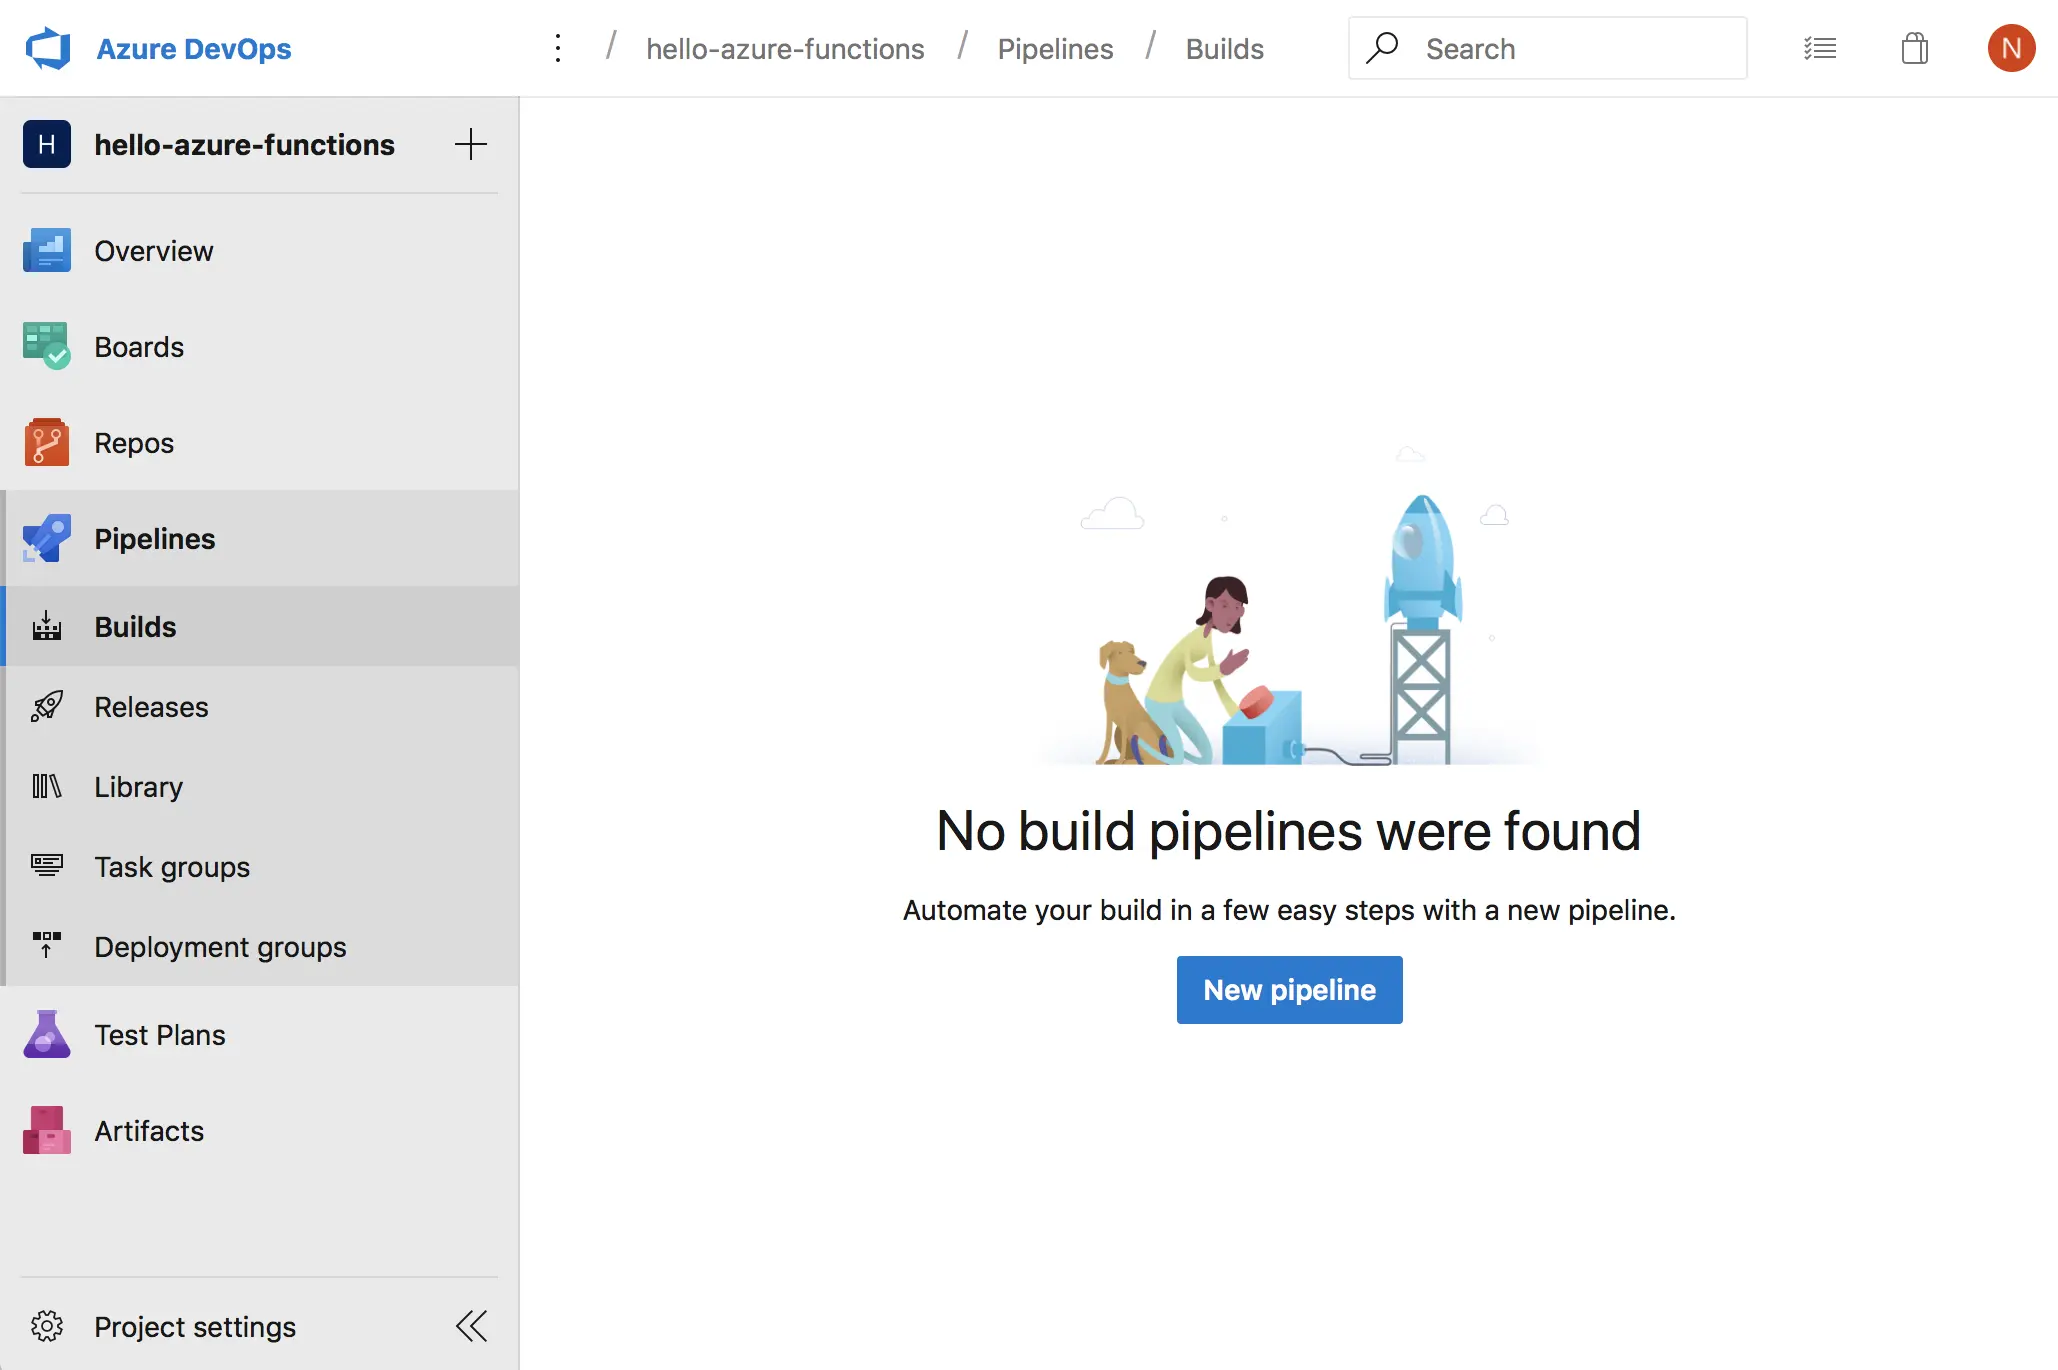
Create the Azure DevOps CI/CD Pipelines
Continuous integration
To create our first Build pipeline, just go to Pipelines 👉 Builds and click on New pipeline..
Next.. click on Use the classic editor:
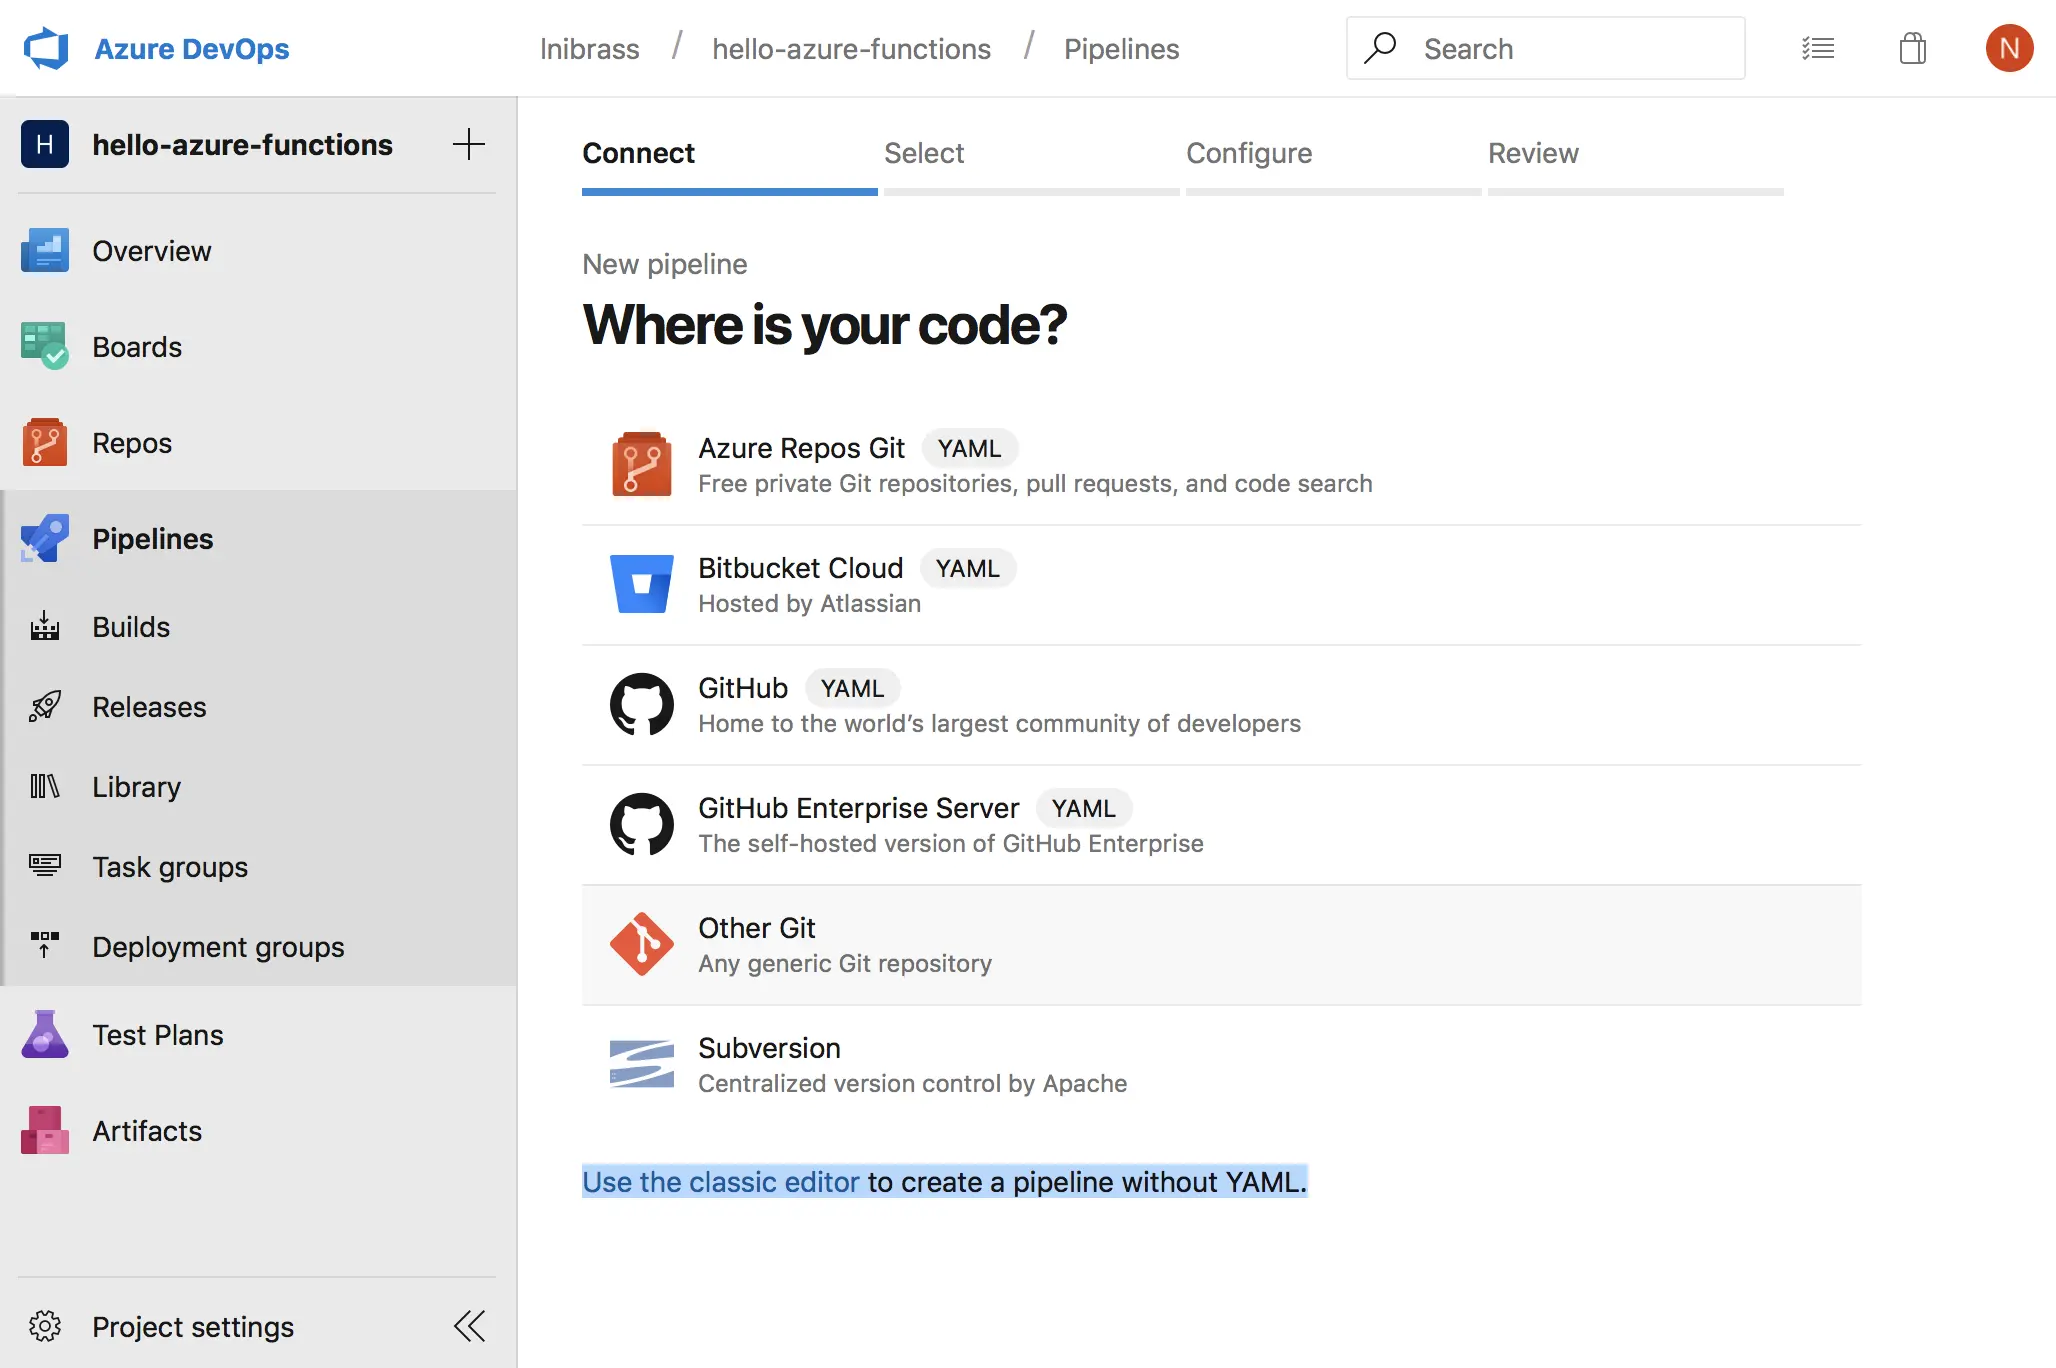
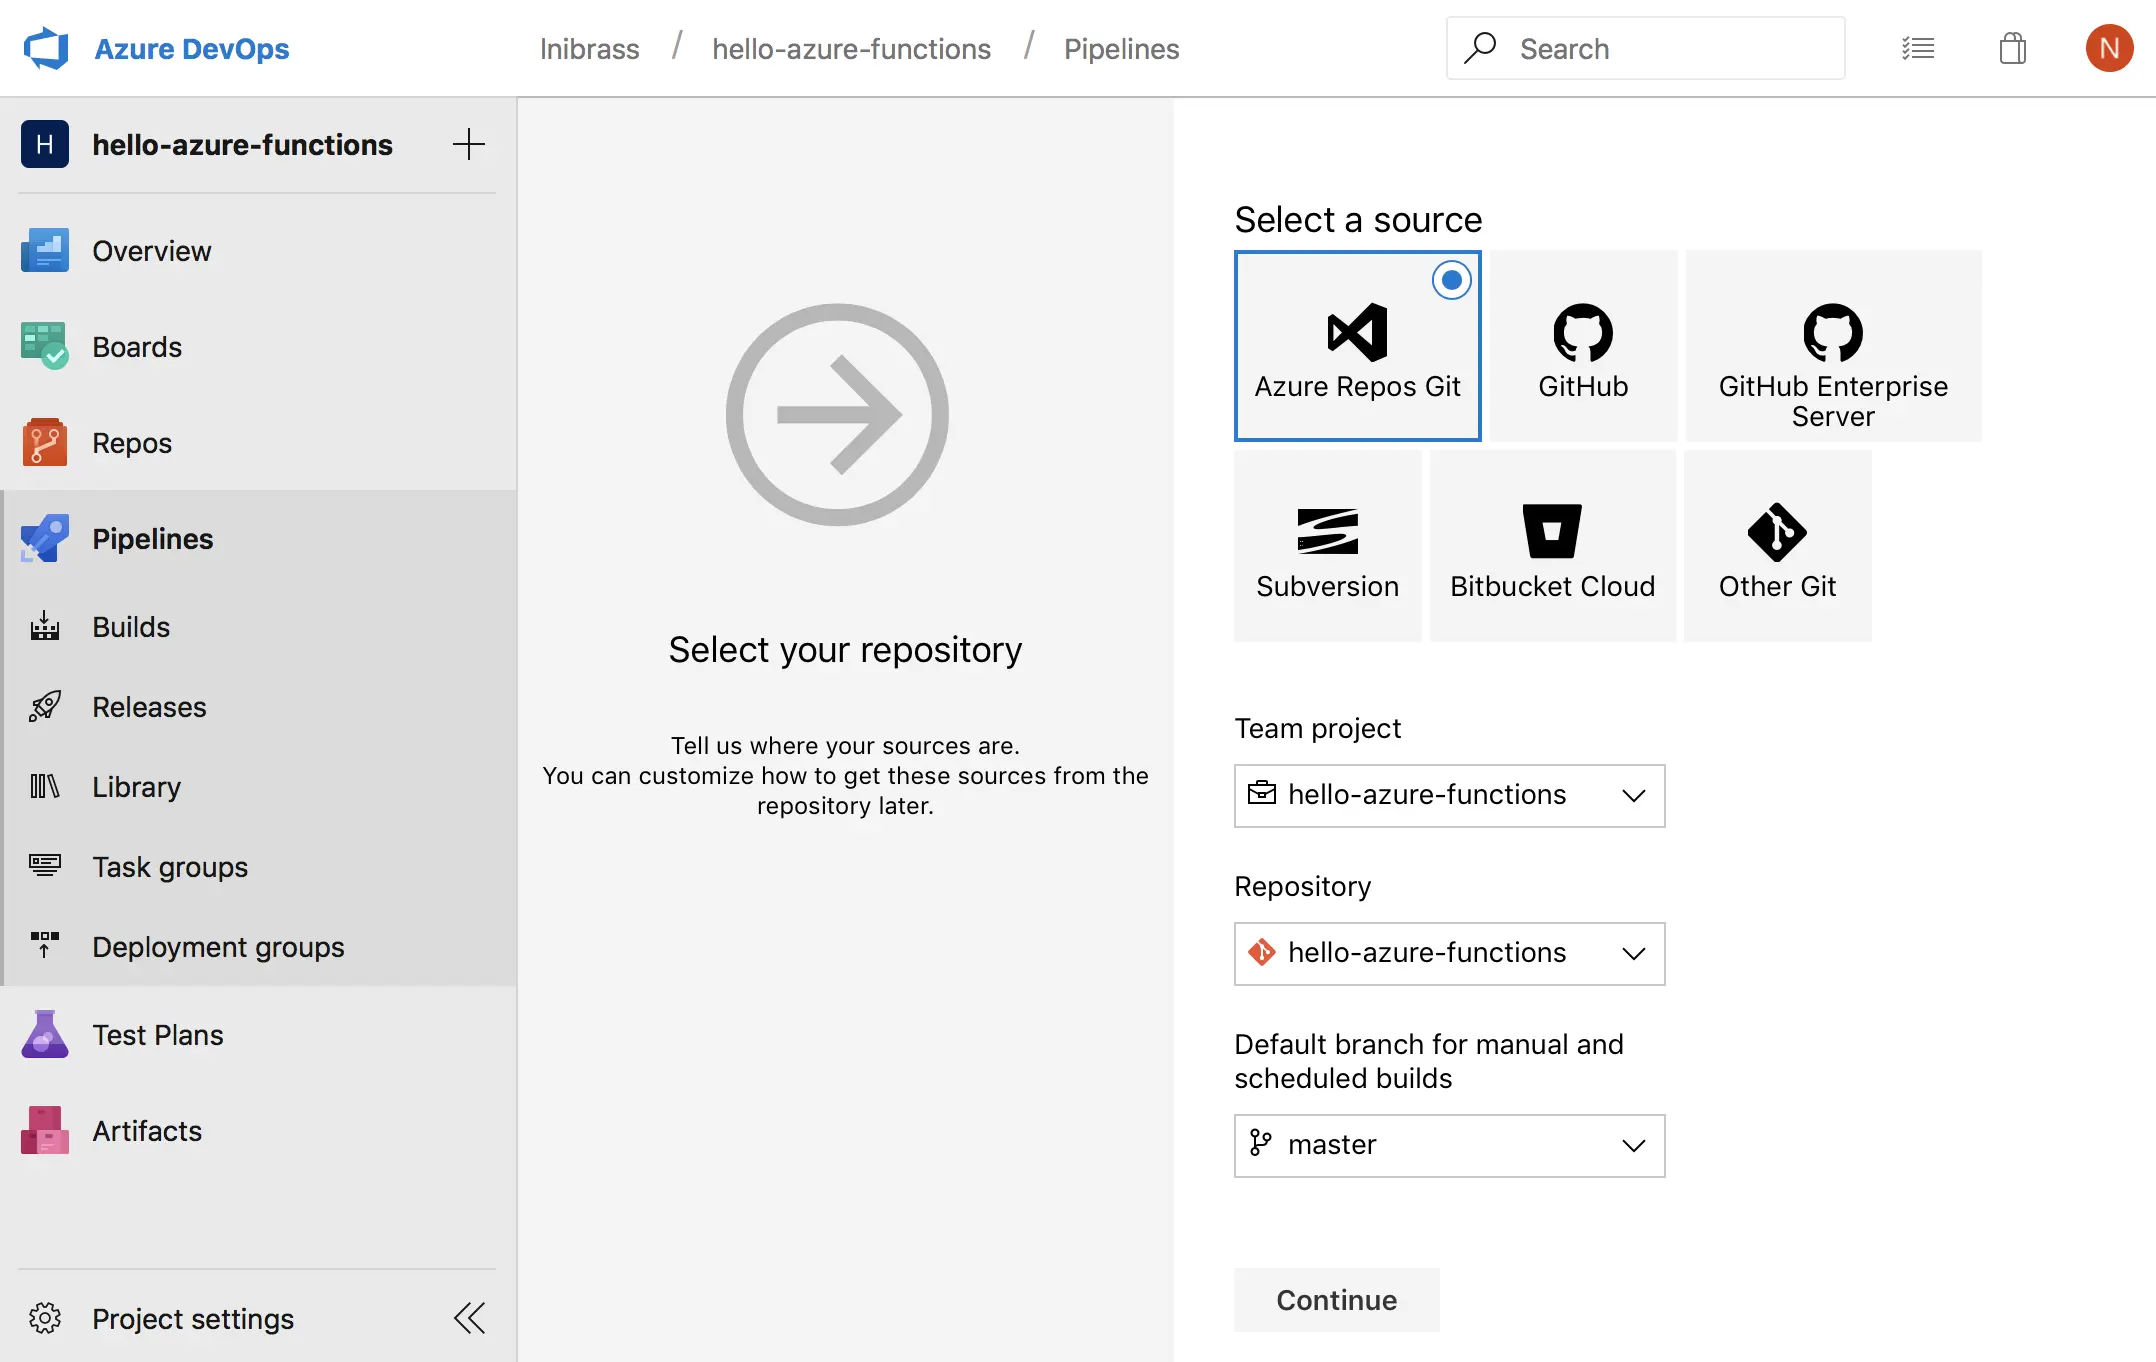
Next.. choose the Source of the project:
Next.. the wizard will be listing some templates; obviously, we will choose the Maven template:

Next.. you will be redirected to the job content..
In Azure DevOps, every job (Integration or Delivery) is composed of some tasks .. a Task is a step that can be doing some specific logic in the job.. for example..
As we will have steps to execute, before diving into them, we need to know the Agent pool that will be running them: Why we need to define an agent? They’re not similar?
We define an agent because they are some tasks that can be done exclusively by a specific kind of agents, for example, building DotNet framework 💩 requires to have a Windows based agent.. in our example will be using an Ubuntu based agent:
In our Maven, we can have some separate tasks, for example:
mvn package👉 for building the projectmvn sonar:sonar👉 for executing the Sonar quality gates
We can have other needs or constraints that require to have a specific task 😸 for example; if you need to do some Bash command, or copy some files from somewhere..
Let’s see how looks a job ?
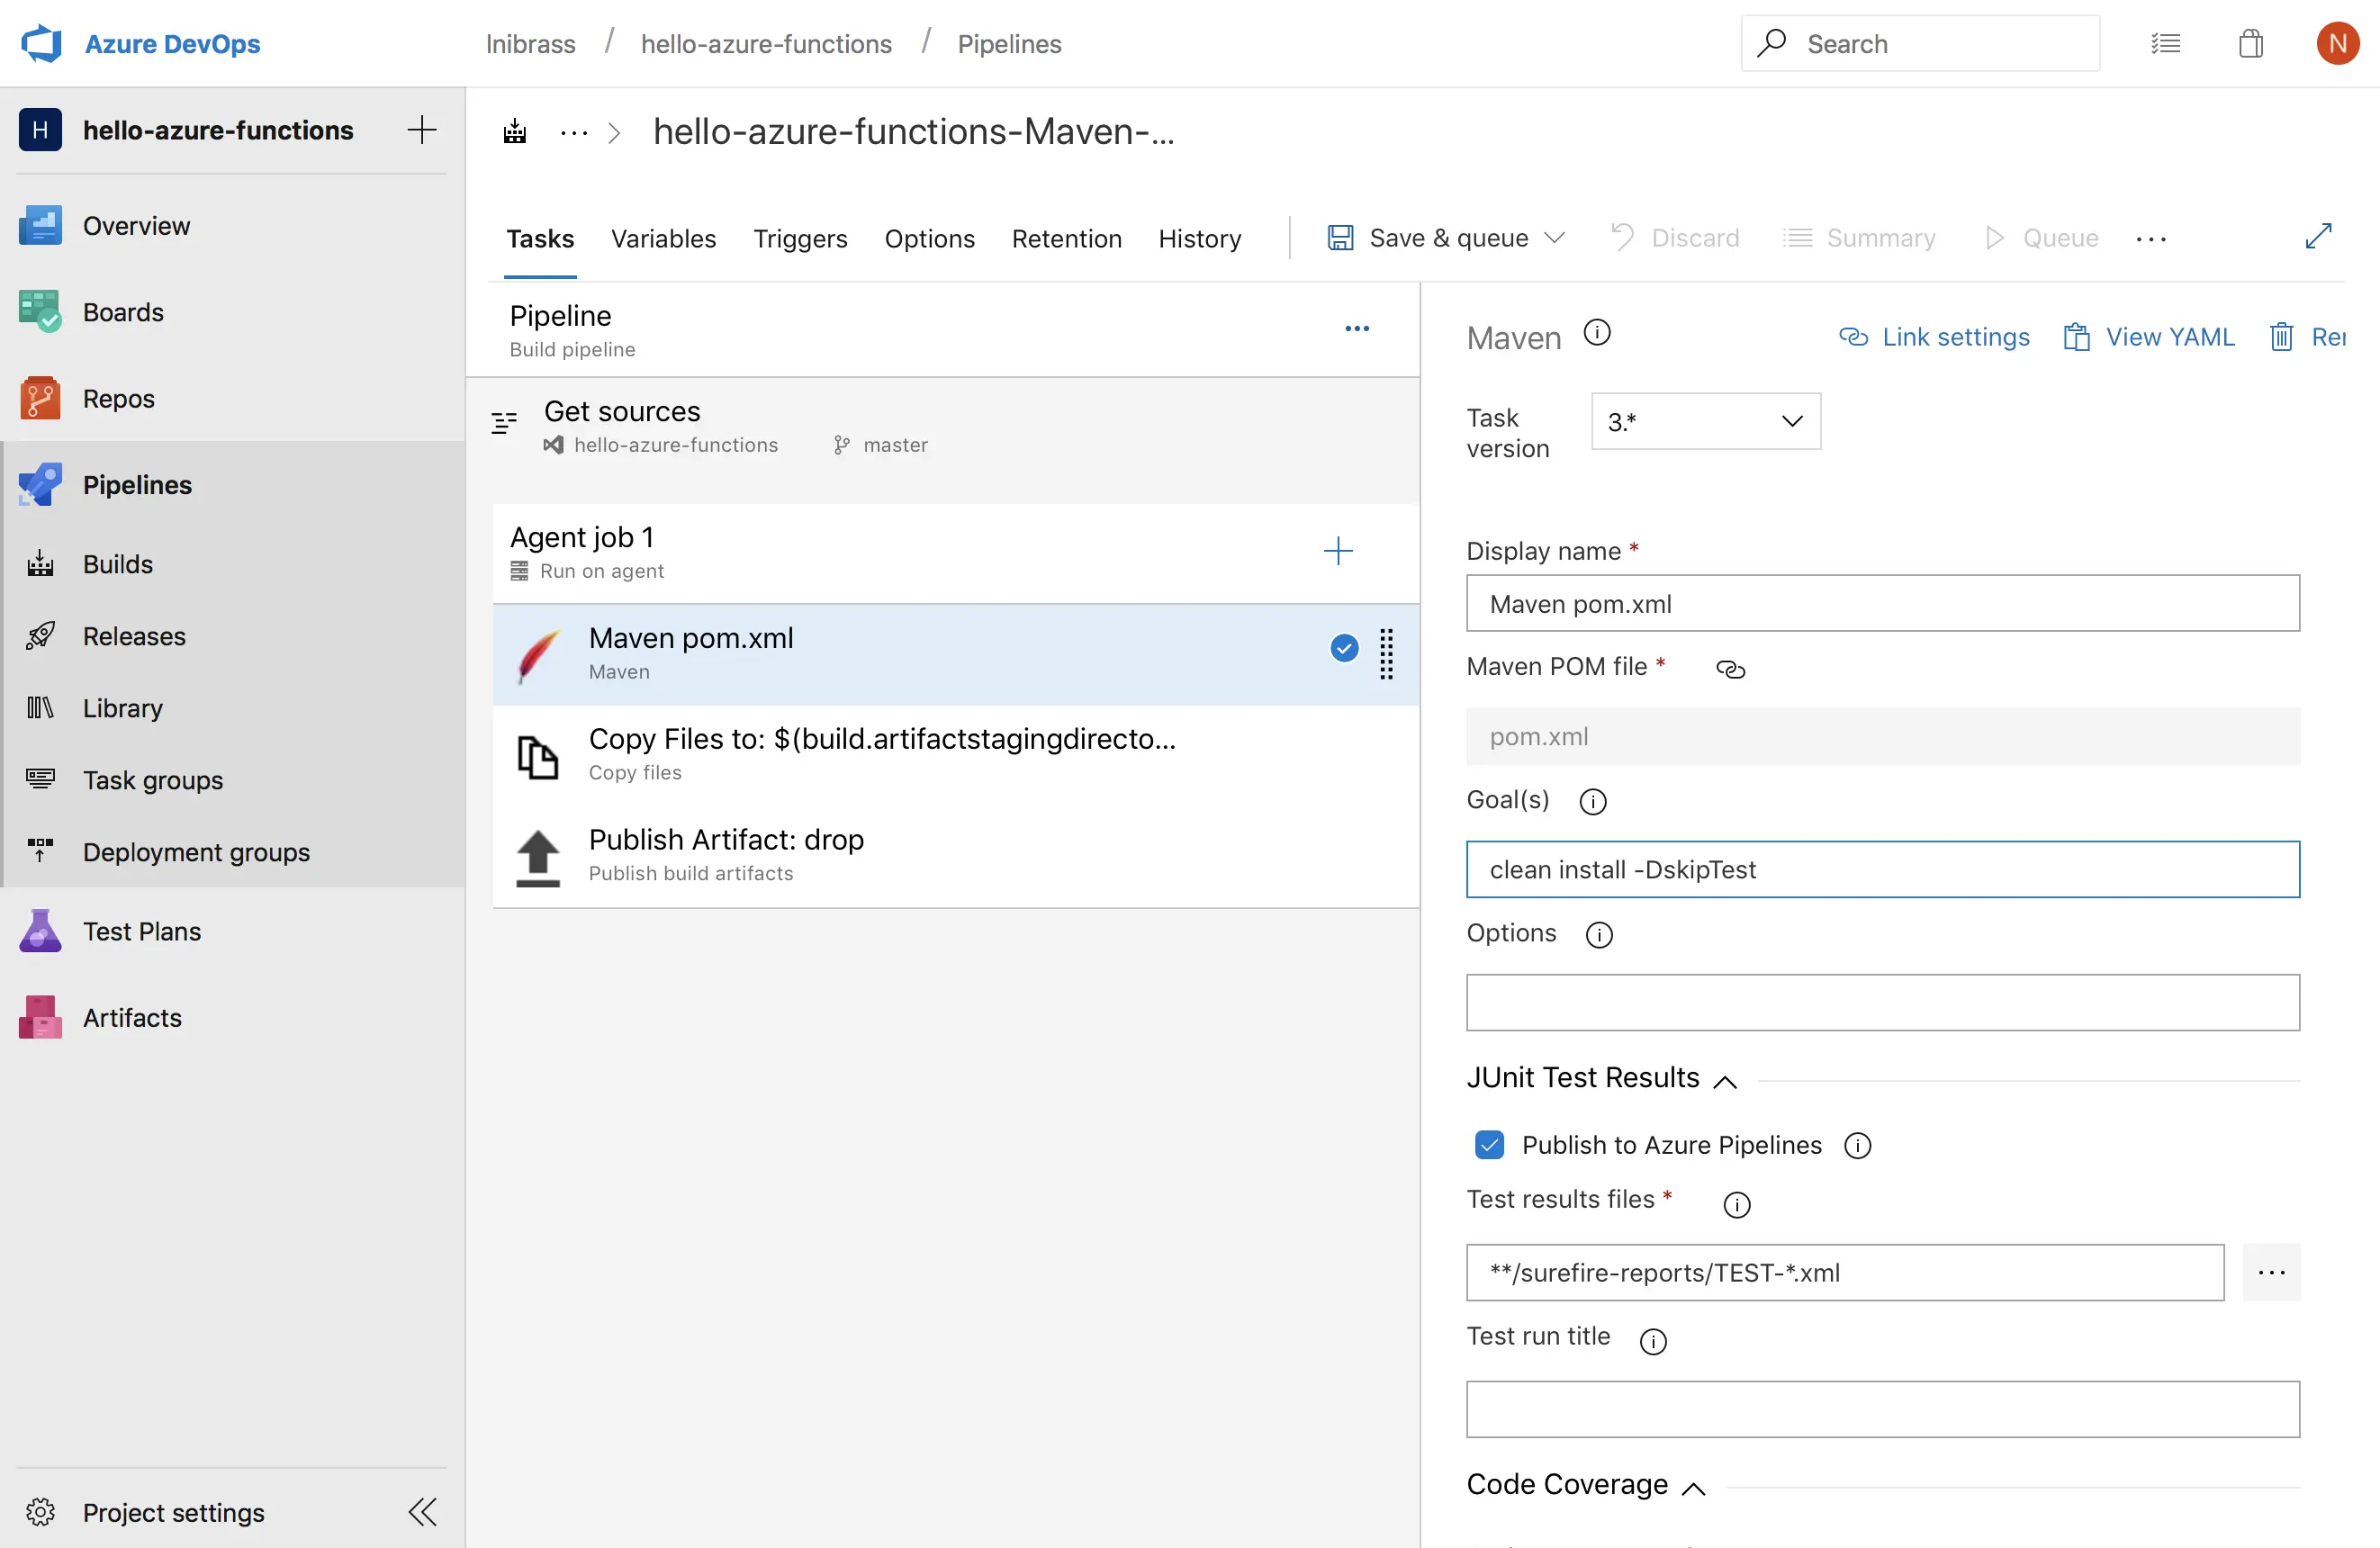
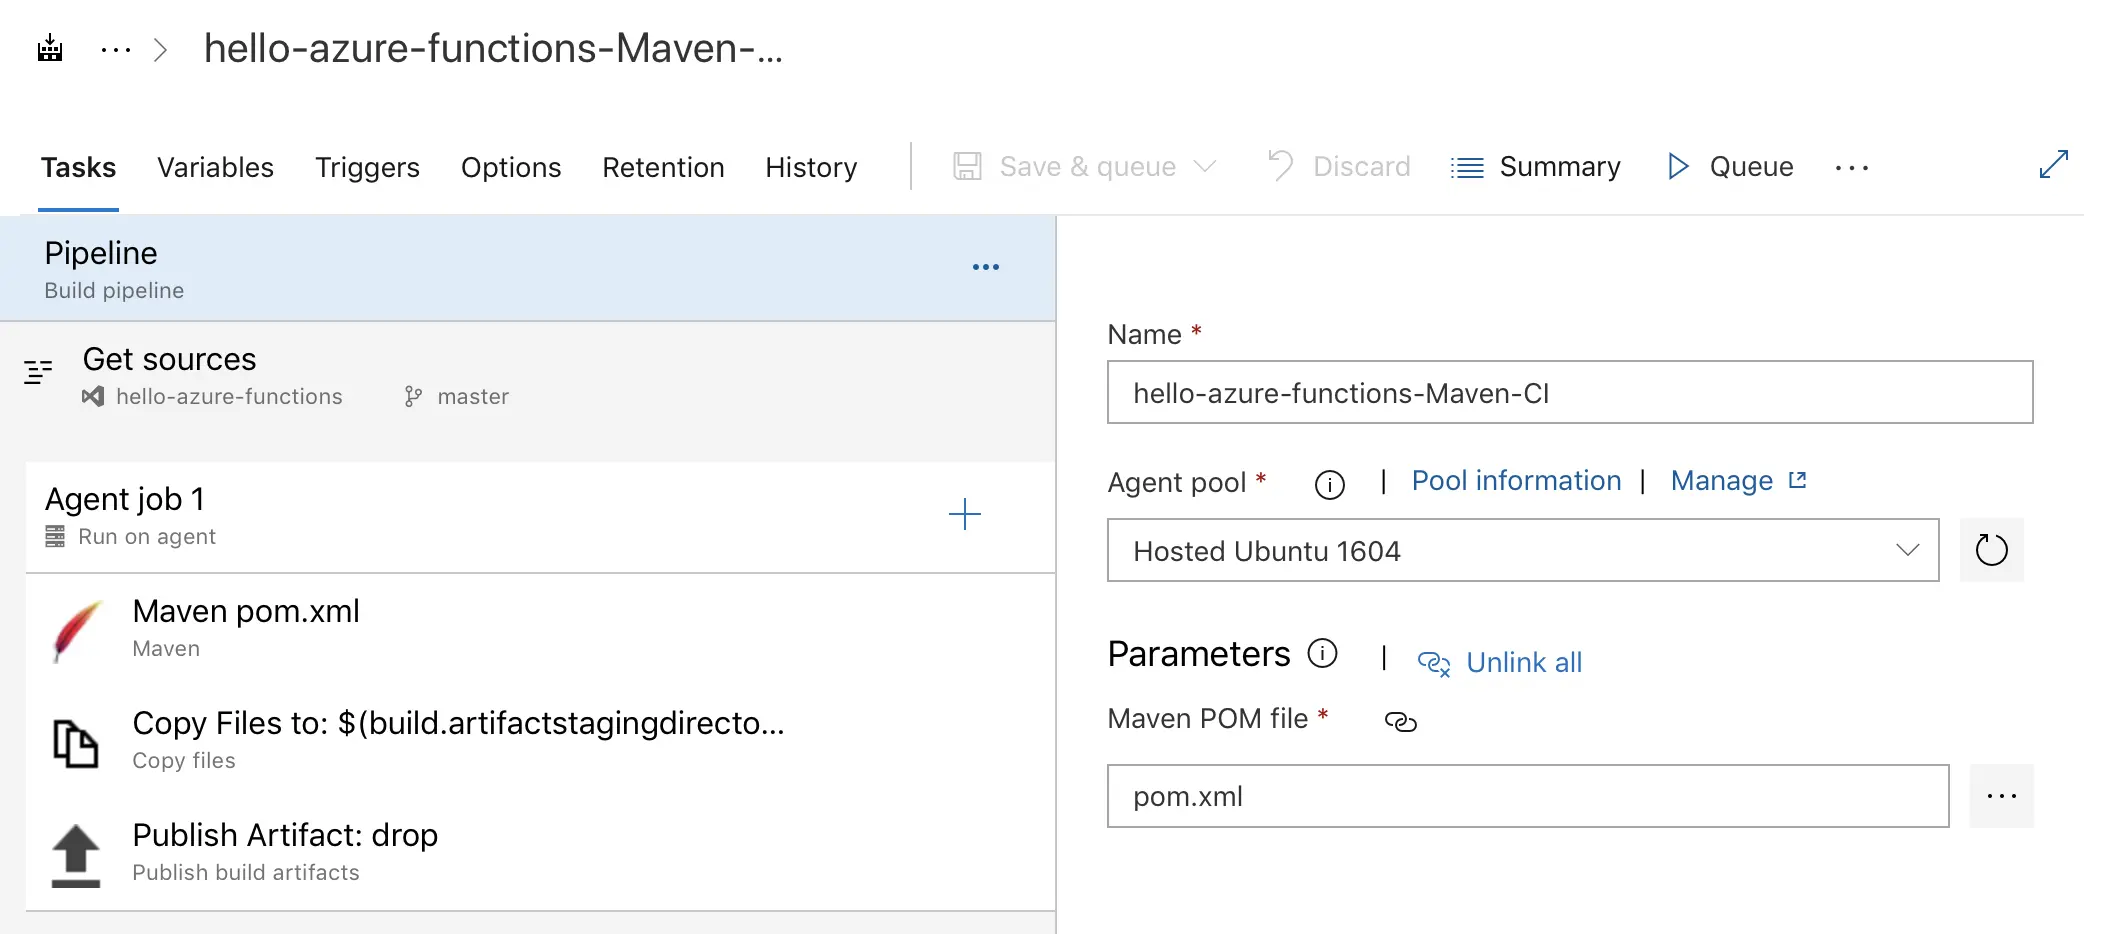
In the previous screenshot, we can enter the Maven goal that we want to run.. the same way as like your OS CLI.. and there are more you can enable the SonarQube reporting just by some clicks in this same task, on the Code Coverage section:
In my tutorial, I will just be building the Maven project without running the tests ☠️ Yes ! I know it’s a bull 💩💩💩💩 but for our case, I need to show how it works ! 🤡
So my Maven Goals:
clean install -DskipTests
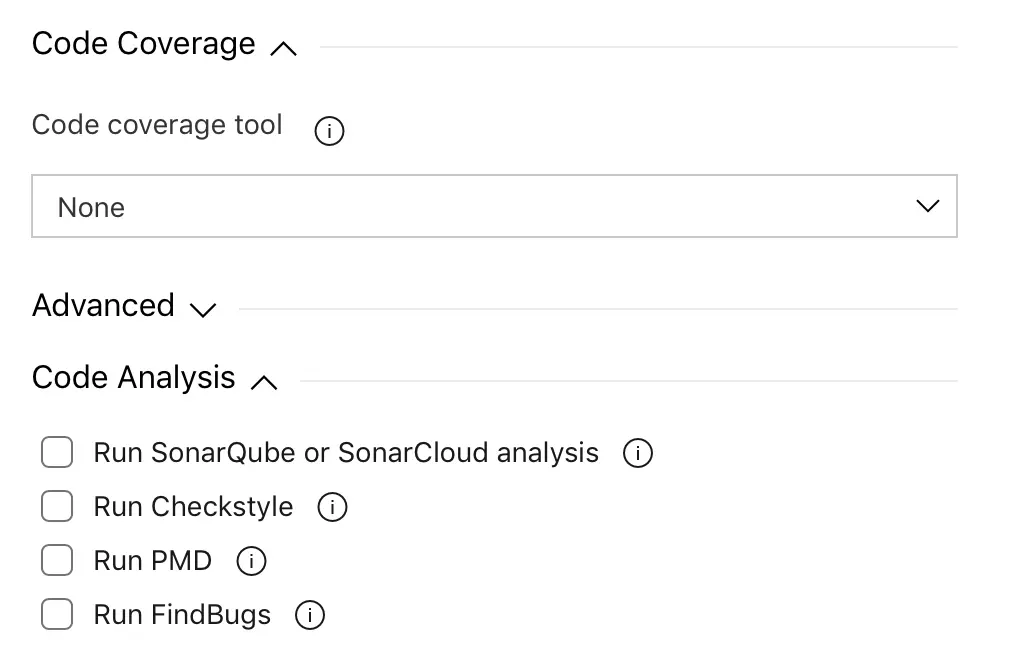
After that we run our Maven task, the pipeline will :
1️⃣ Copy Files to: $(build.artifactstagingdirectory) 👉 In this task, we will be copying the packaged project to a dedicated folder, so we can use the output of the previous task in the incoming tasks.
Our Azure Functions Java application is a Maven based project, so when we build our project, we will get the packaged and built files in the target subfolder of our project folder.
So we will be copying the files that are available in the target subfolder. So the Copy task will look like:
The $(something) are predefined variables of Azure DevOps pipelines. More info here.
2️⃣ Publish Artifact: drop 👉 In this task we will be publishing the files that we grabbed from the previous task to a some network reachable location so it can be used later in the Continuous Deployment pipeline.
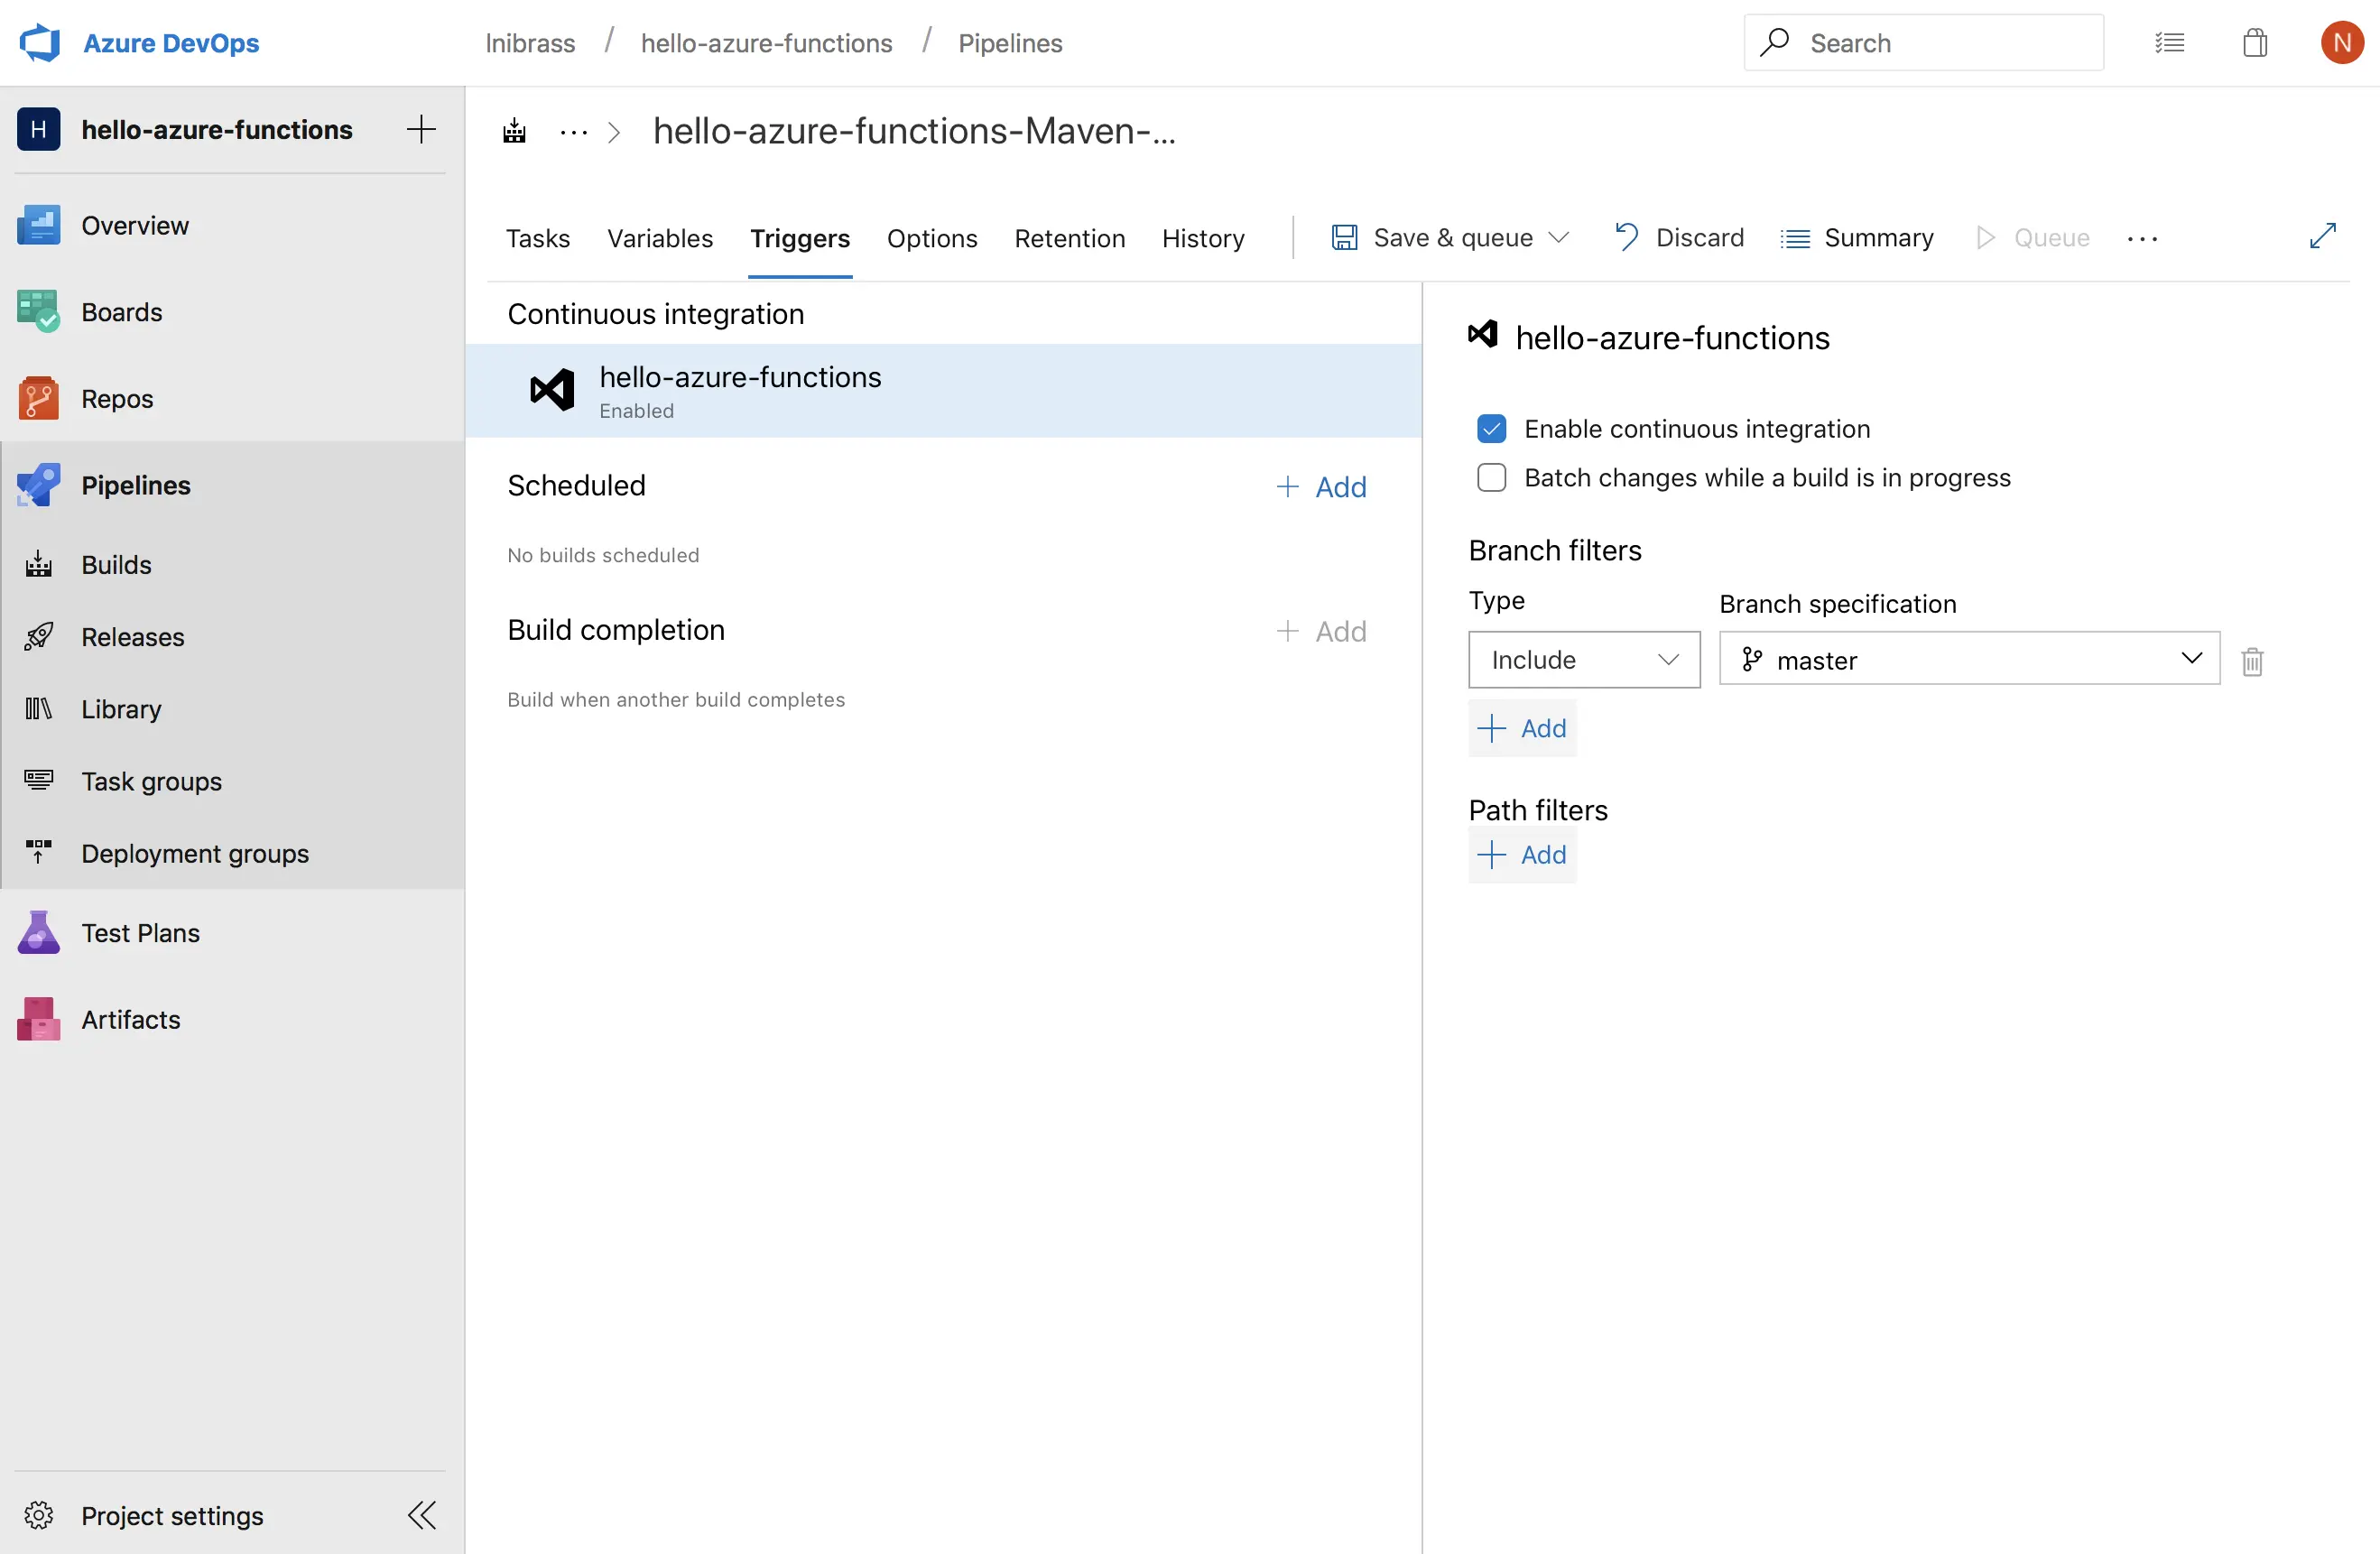
Now.. we need to enable the Continuous integration to start a new Build when new code is pushed to the master branch of our Git Repository:
Now, everything is ready, we can go to prepare our CD pipeline.. 🤓
Continuous Deployment
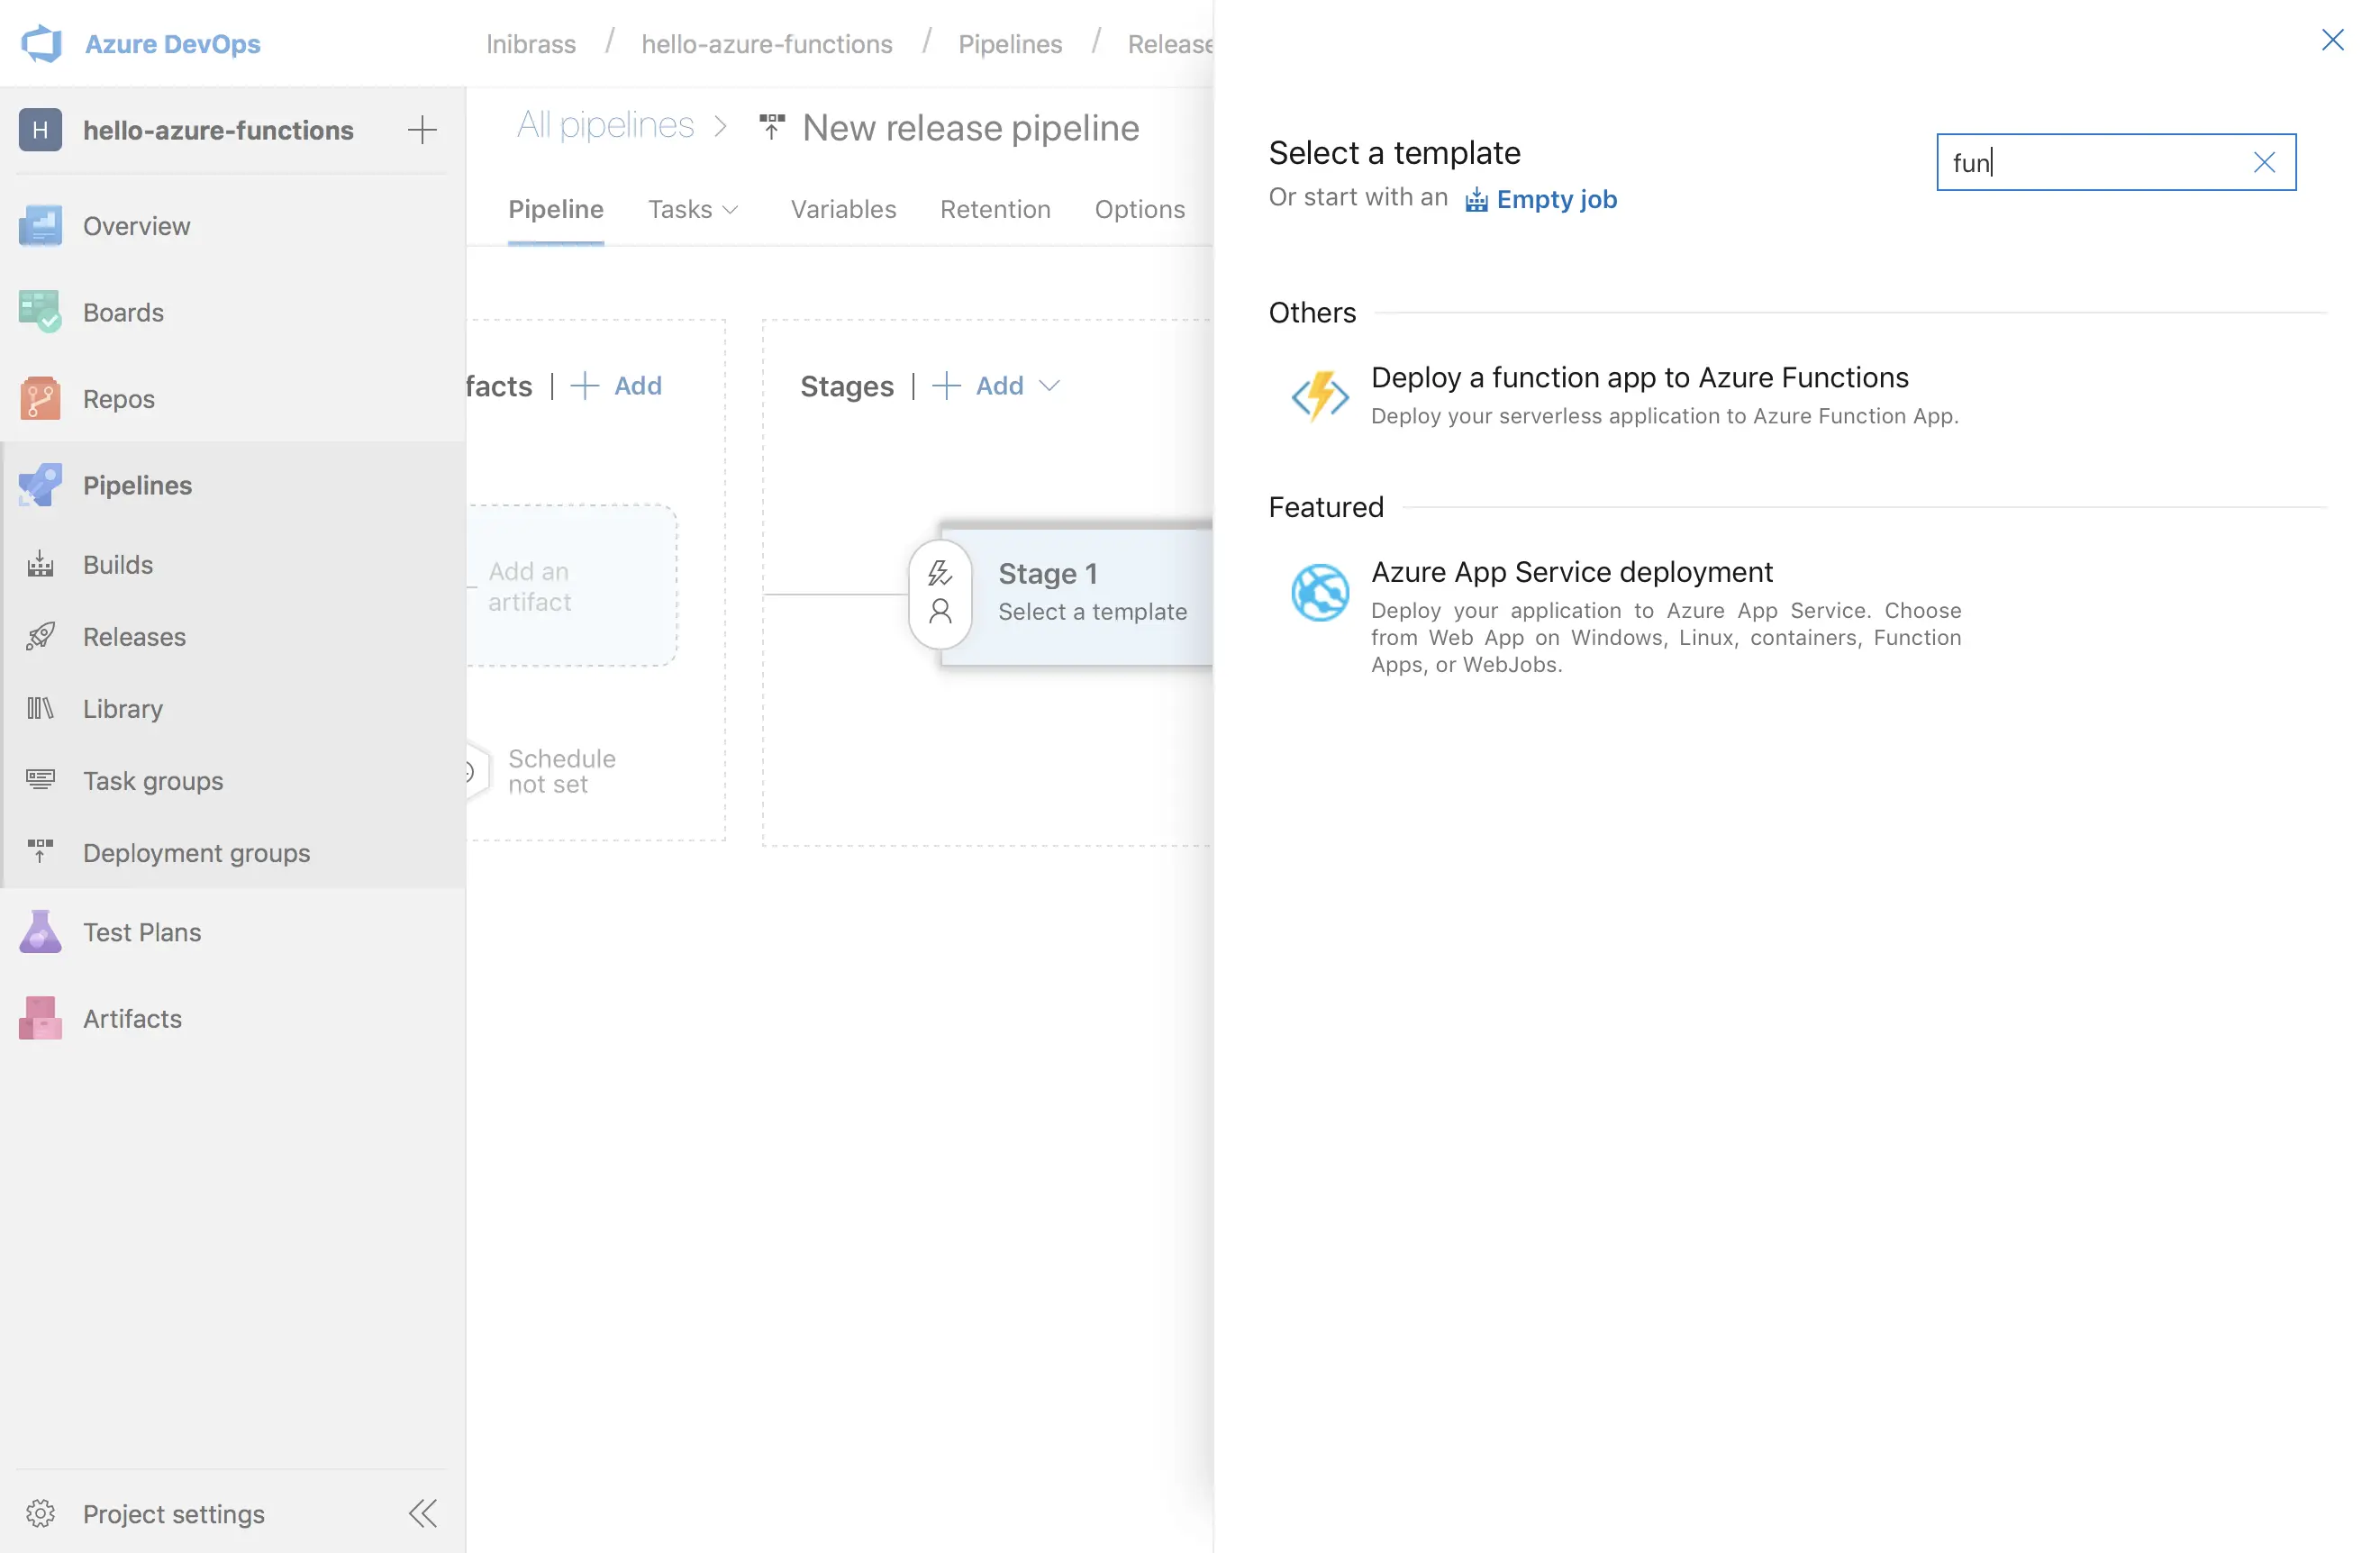
To create our first Release pipeline, just go to Pipelines 👉 Releases and click on New pipeline..
In the wizard, we will choose the Deploy a function app to Azure Functions..
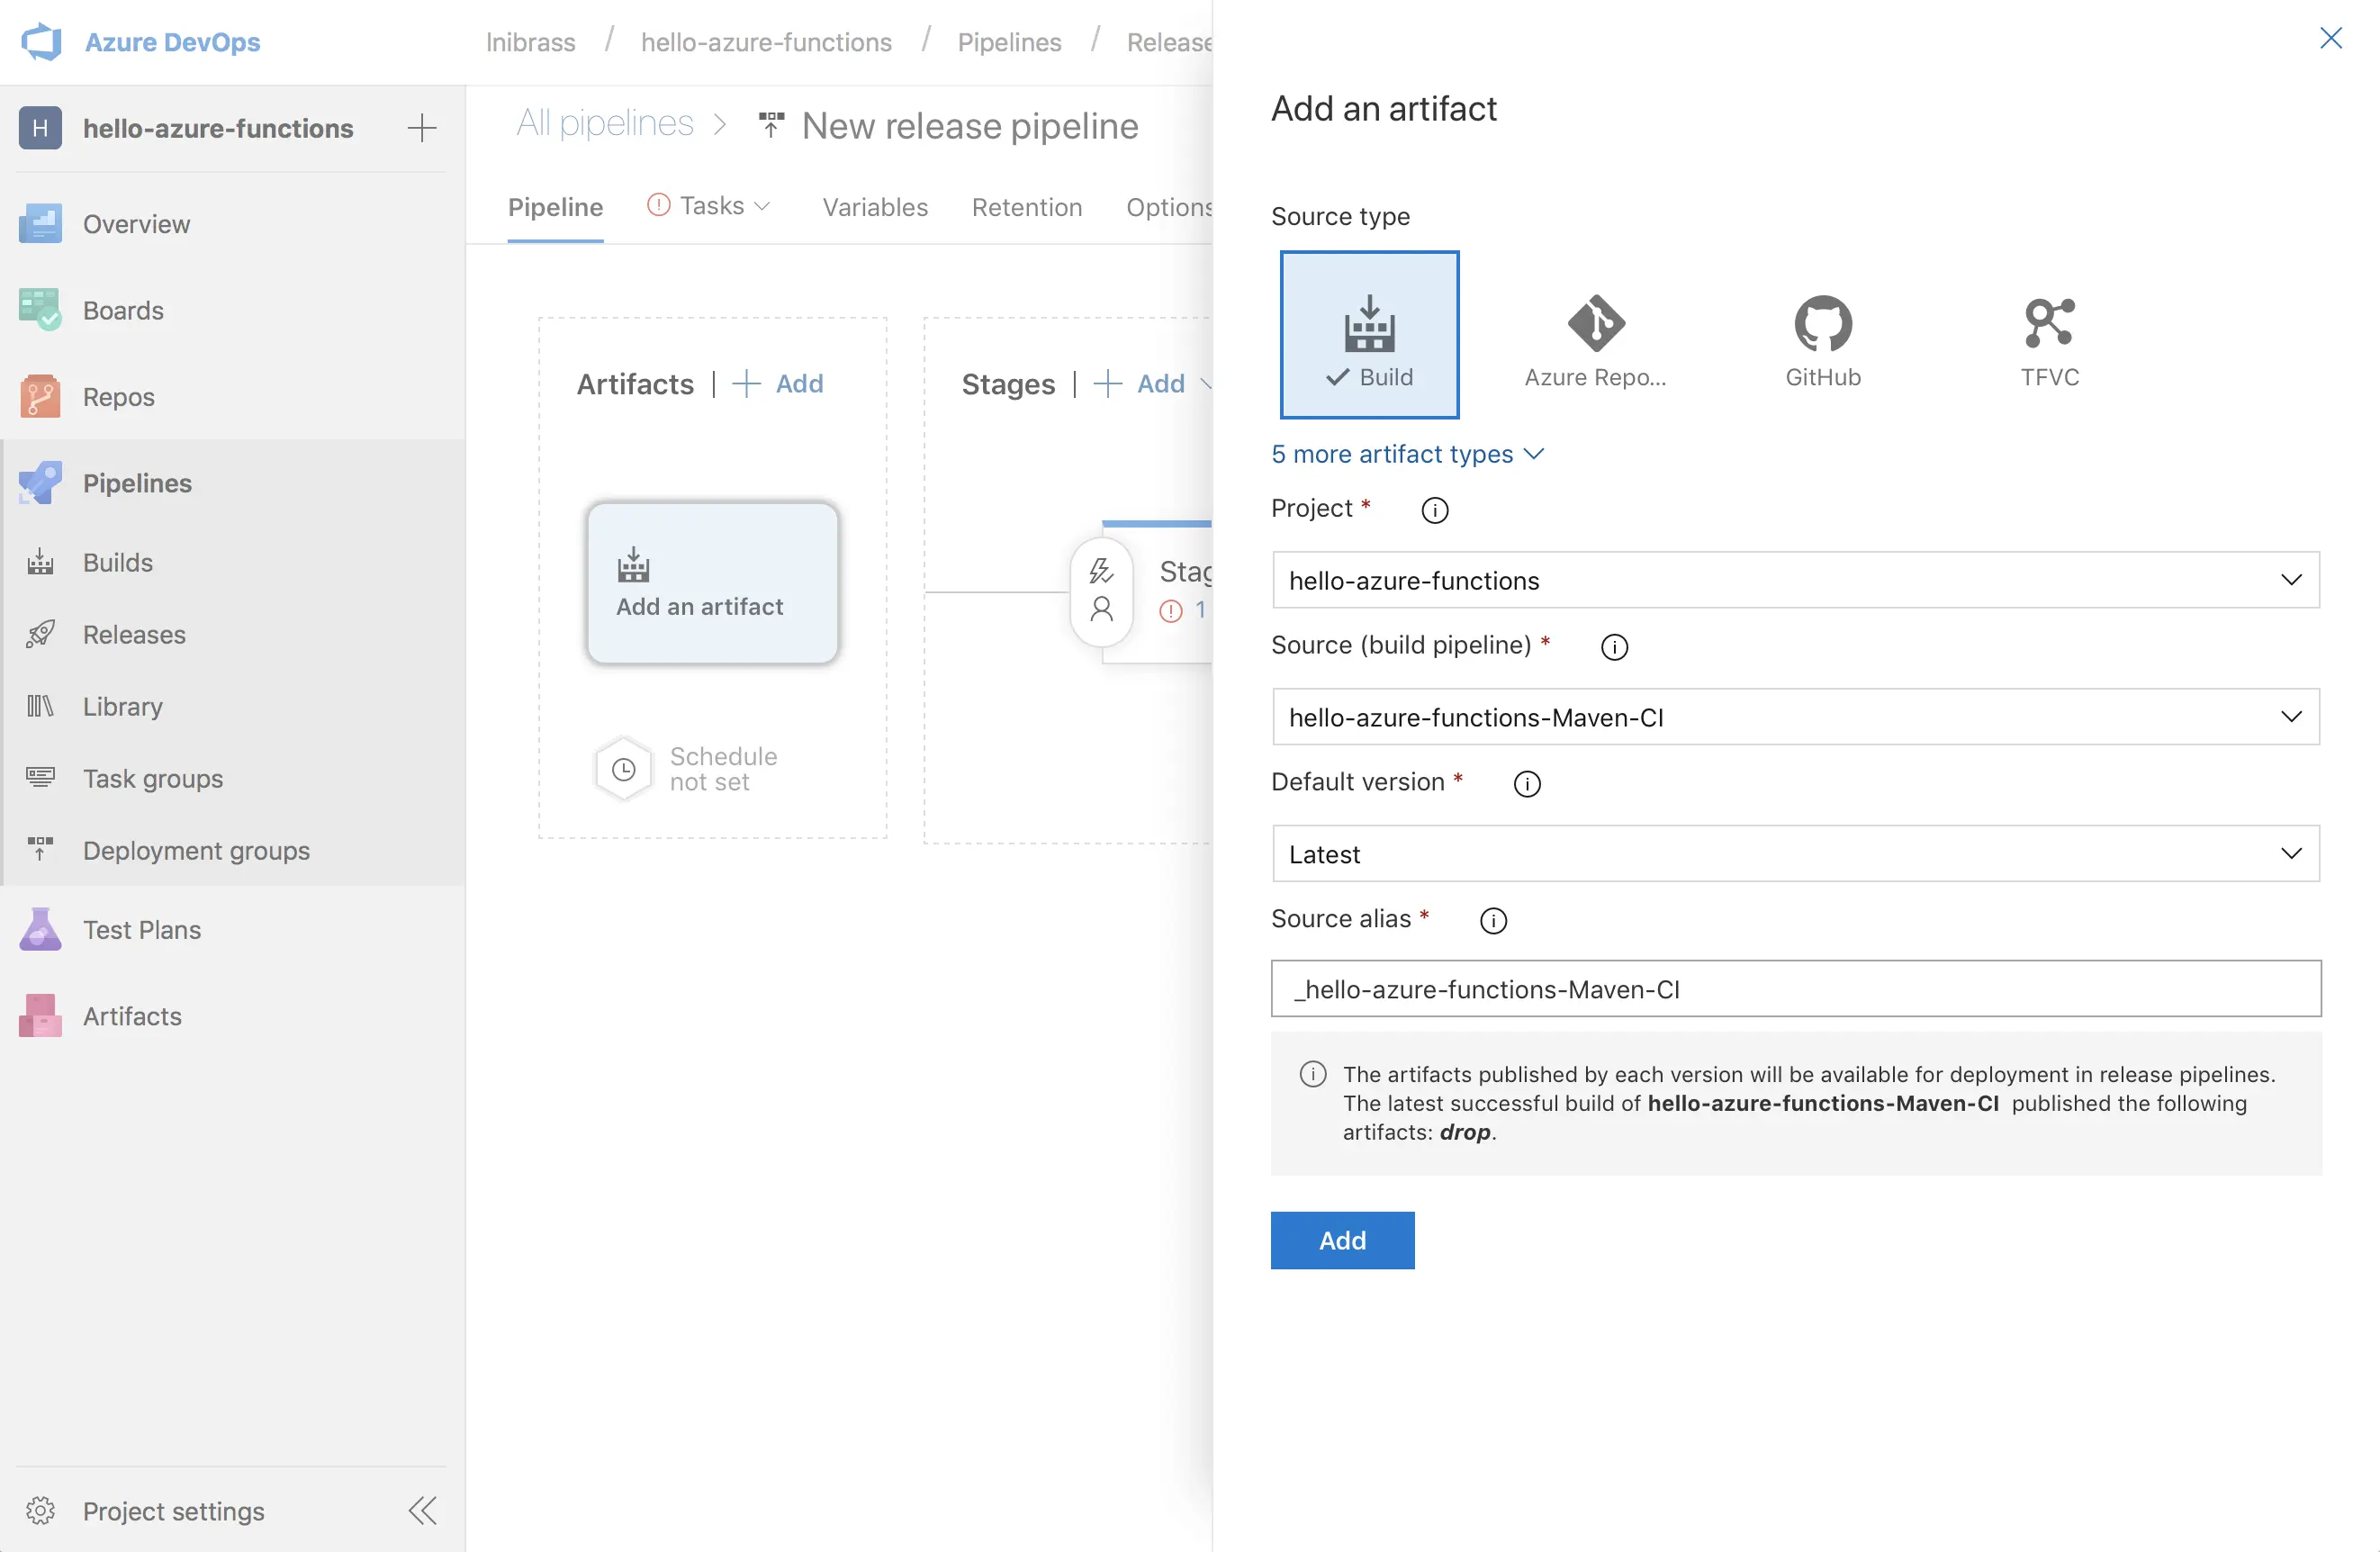
Next.. in the Artifacts source, we will define the Source (which is the Build pipeline) to the one that we created in the previous step:
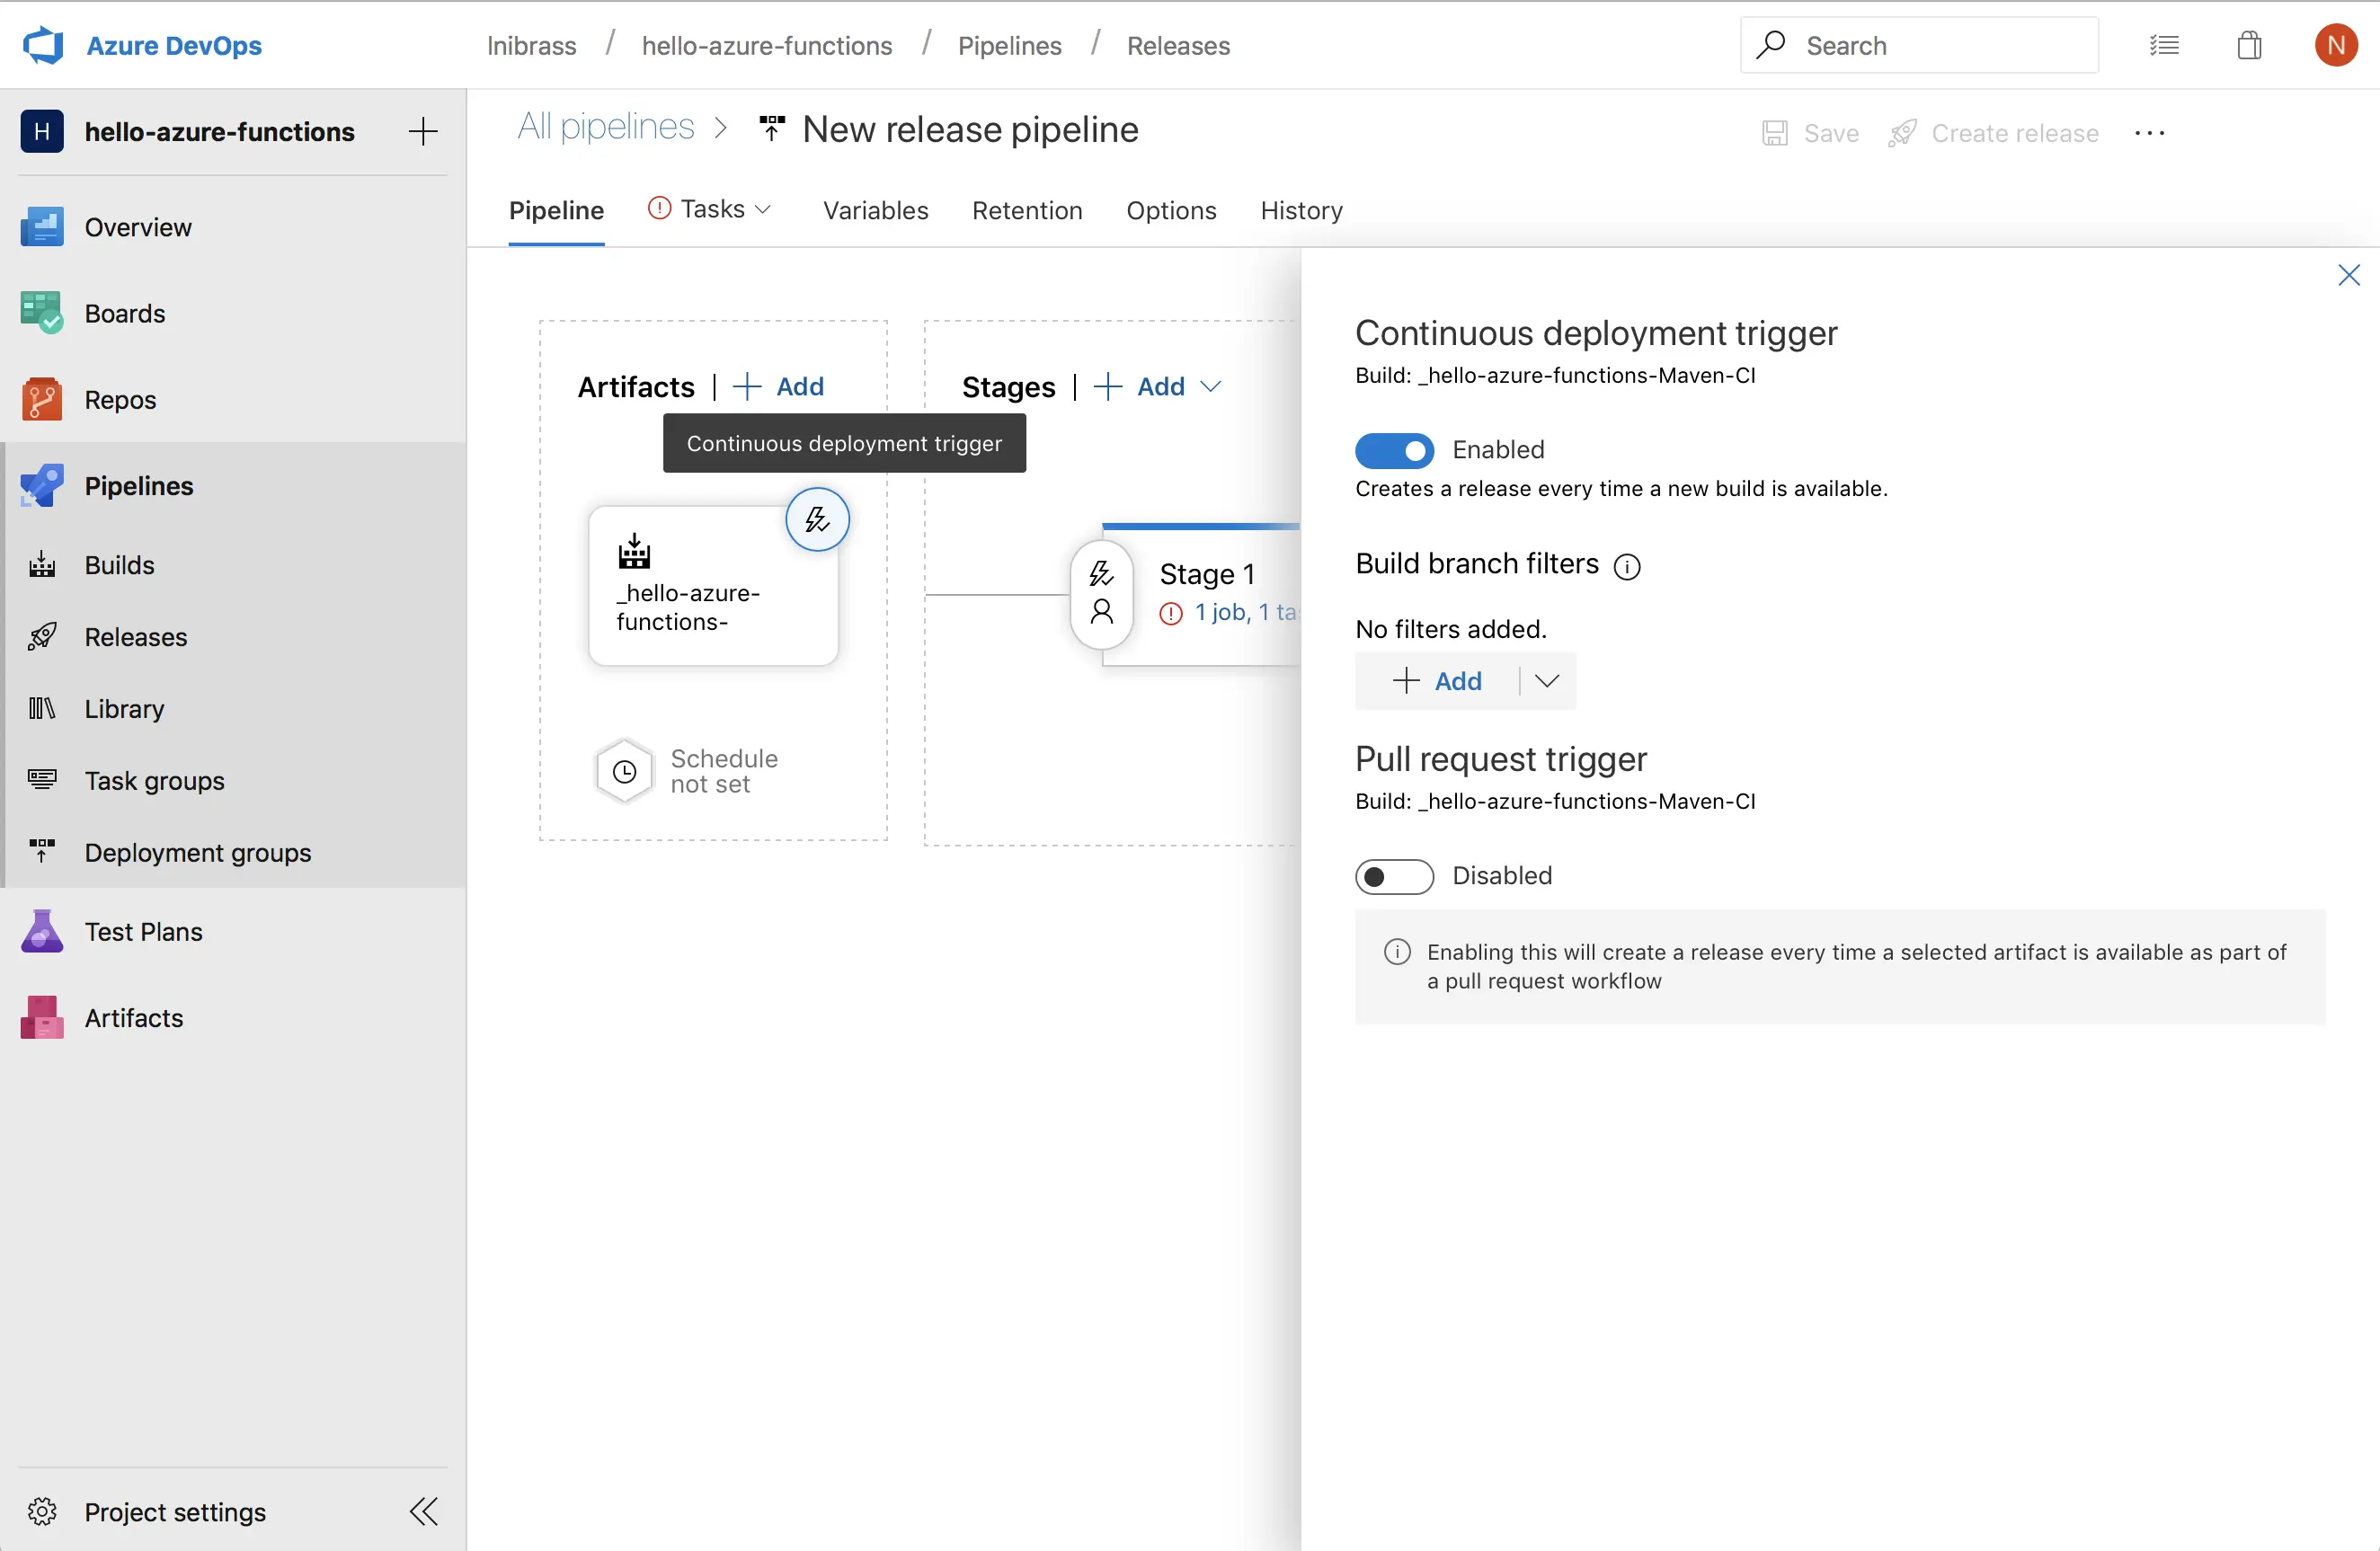
Next.. we need to enable the Continuous deployment trigger to create a release every time a new build is available:
Now, we will go to configure the Stage 1 of the Release Pipeline:
In this step, we need to give the access of the Azure DevOps Pipeline to the Azure Subscription:
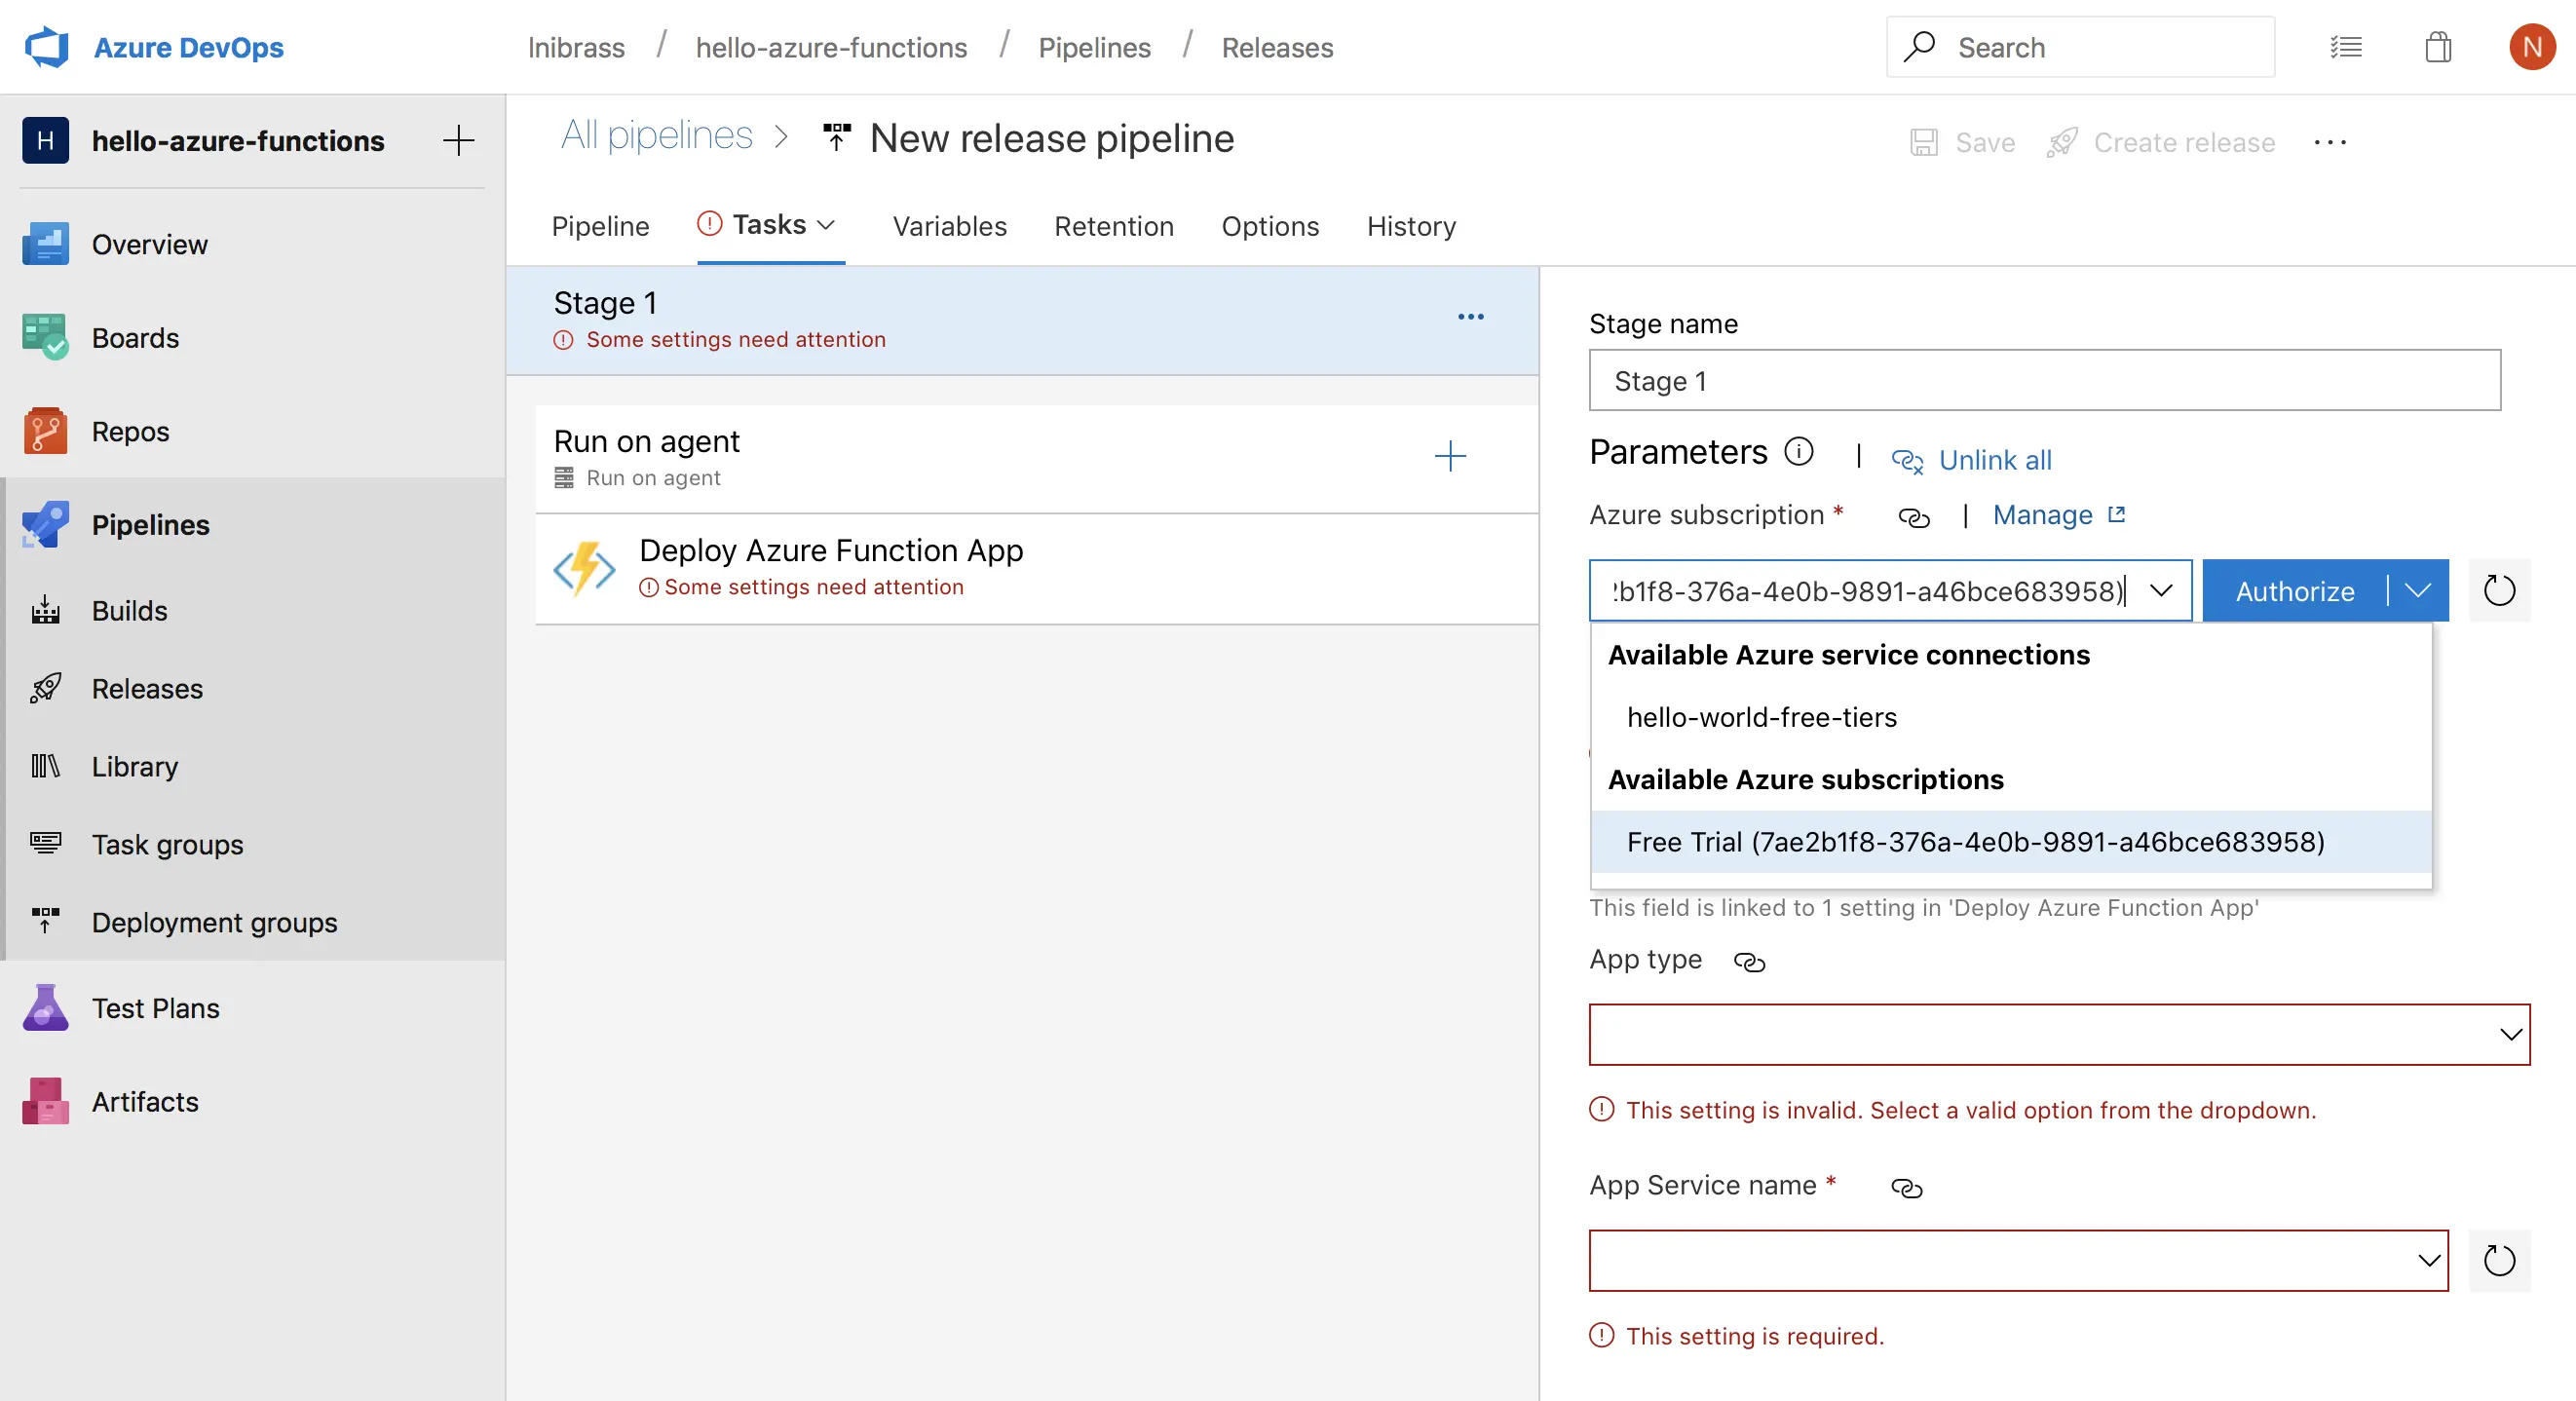
Choose your Azure Subscription, and next click on Authorize to configure an Azure service connection. A new Azure service principal will be created and added to the Contributor role, having access to all resources in the selected subscription.
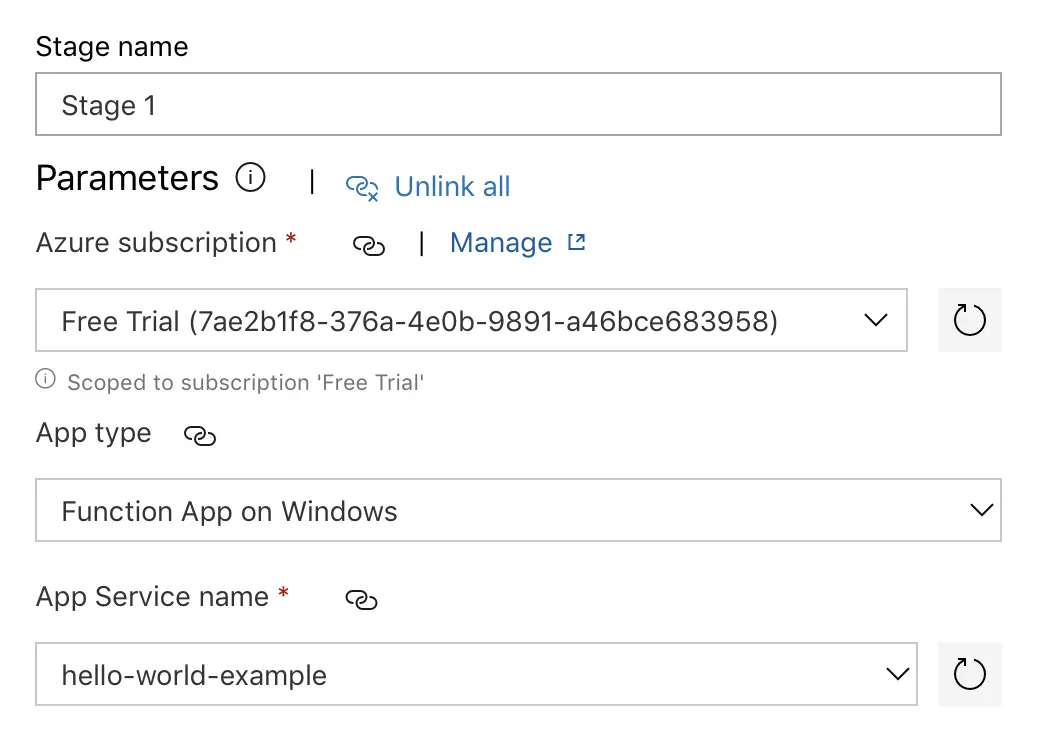
In the :
- App type, choose the Function App on Windows
- App Service name, enter the application name that we created in the beginning: hello-world-example
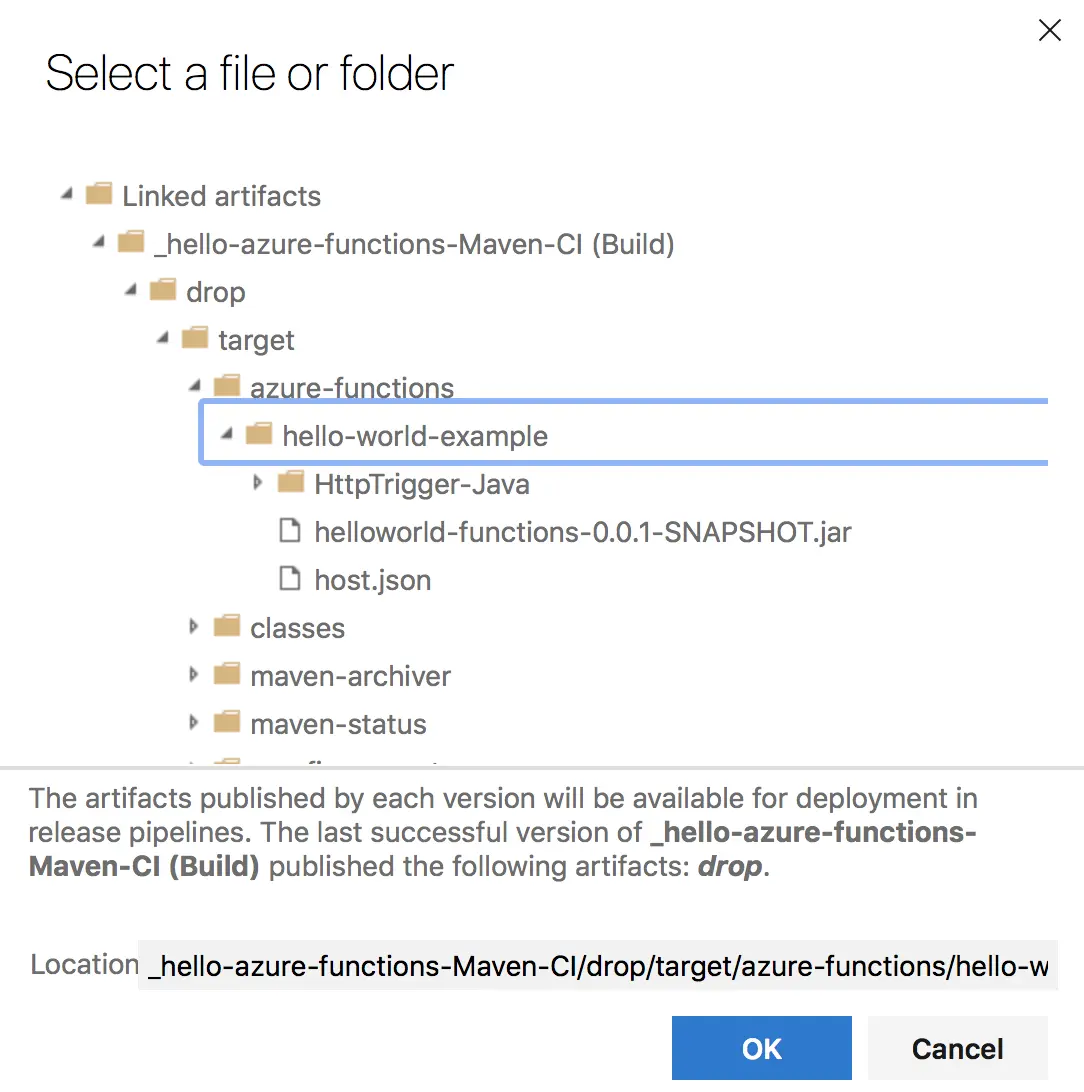
Next.. click on the Deploy Azure Function App step to configure it:
In the Package or Folder choose: $(System.DefaultWorkingDirectory)/_hello-azure-functions-Maven-CI/drop/target/azure-functions/hello-world-example
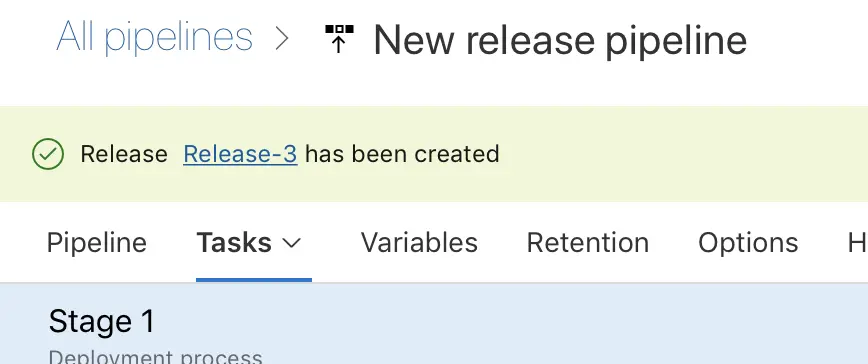
Next.. click on Create Release to create a new Release:
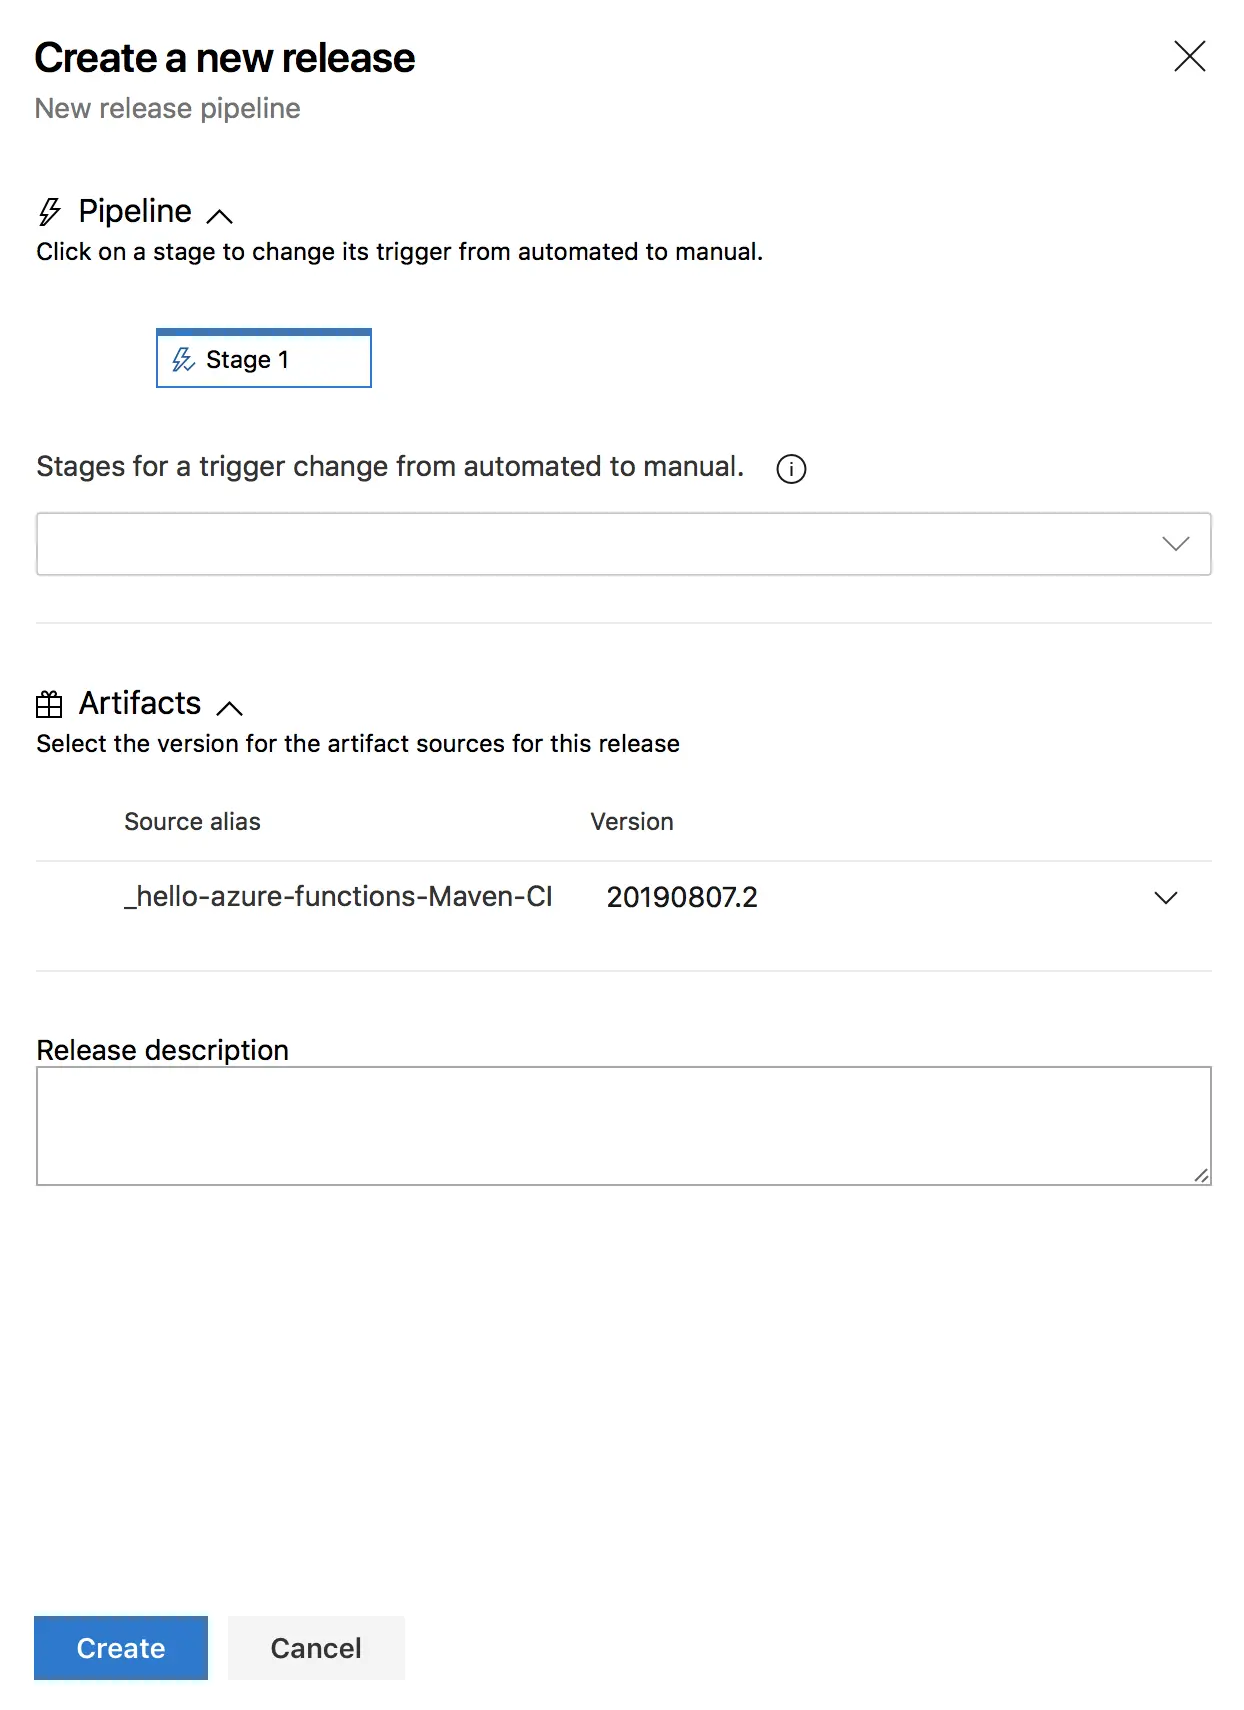
Click Create and click next on the Release name that is shown, to follow the build process:
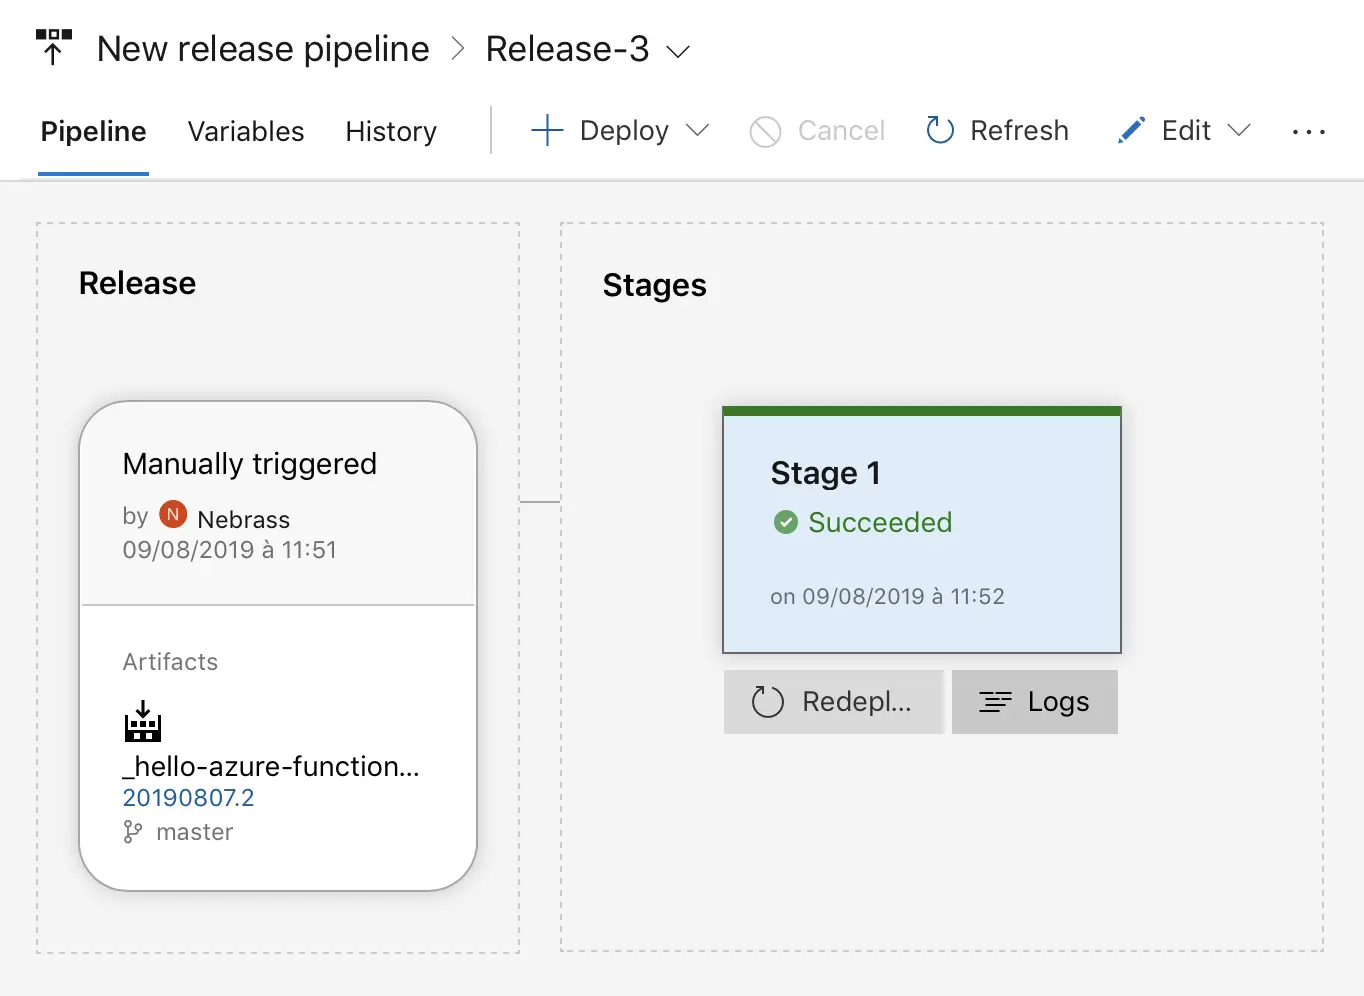
The Release build process will look like:
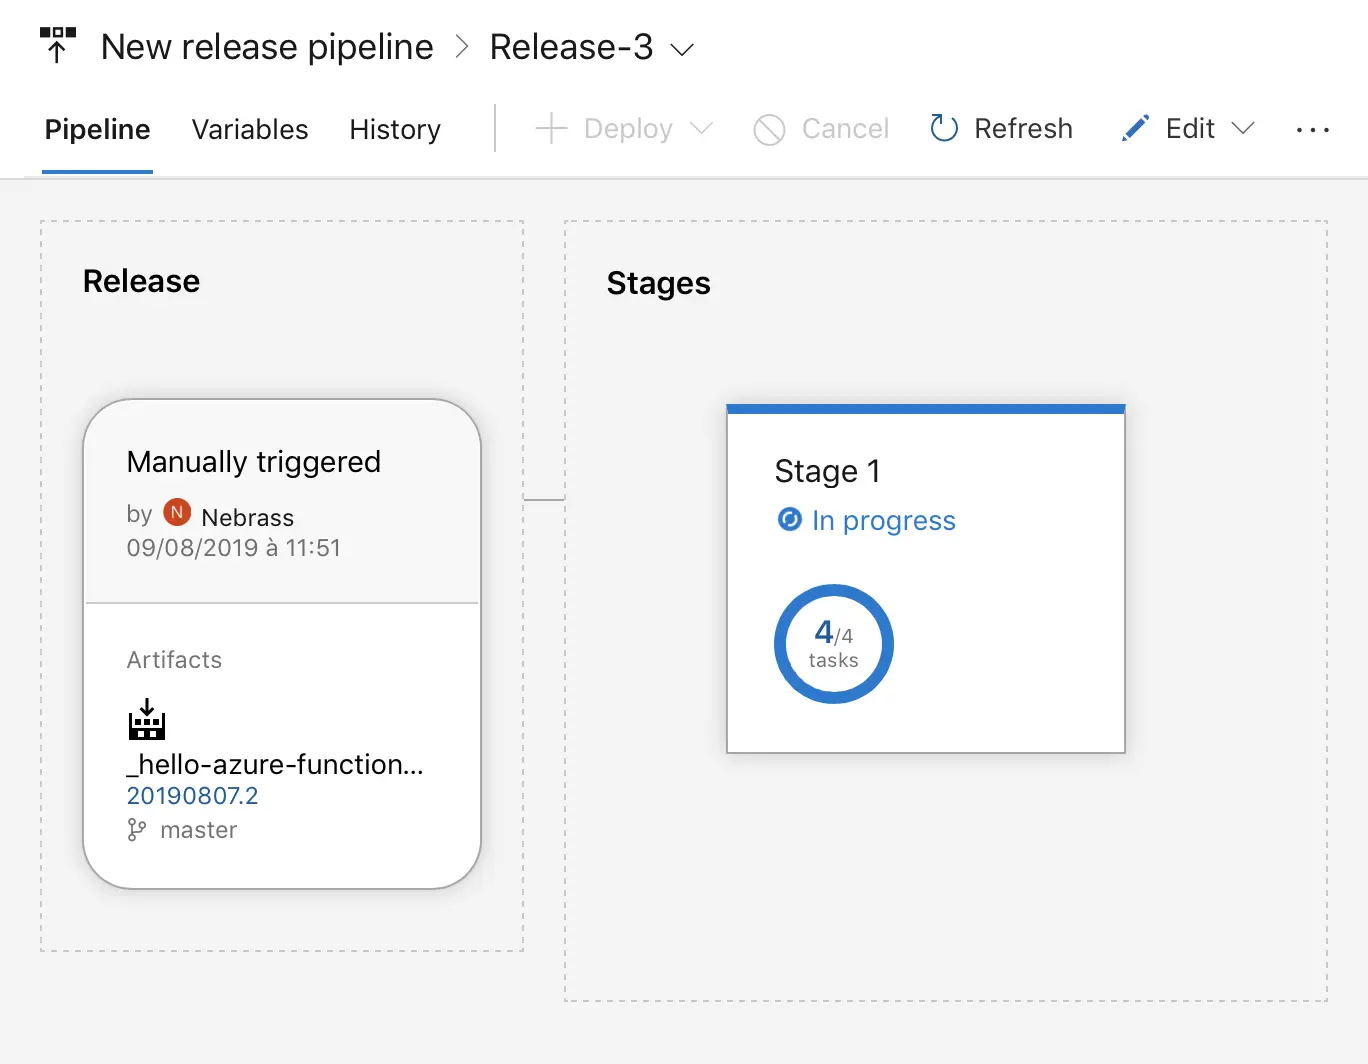
We need to wait until the Build succeeds:
Now.. go back to the Azure Portal 👉 Resource Groups called hello-world-example-rg👉 Function App called hello-world-example:
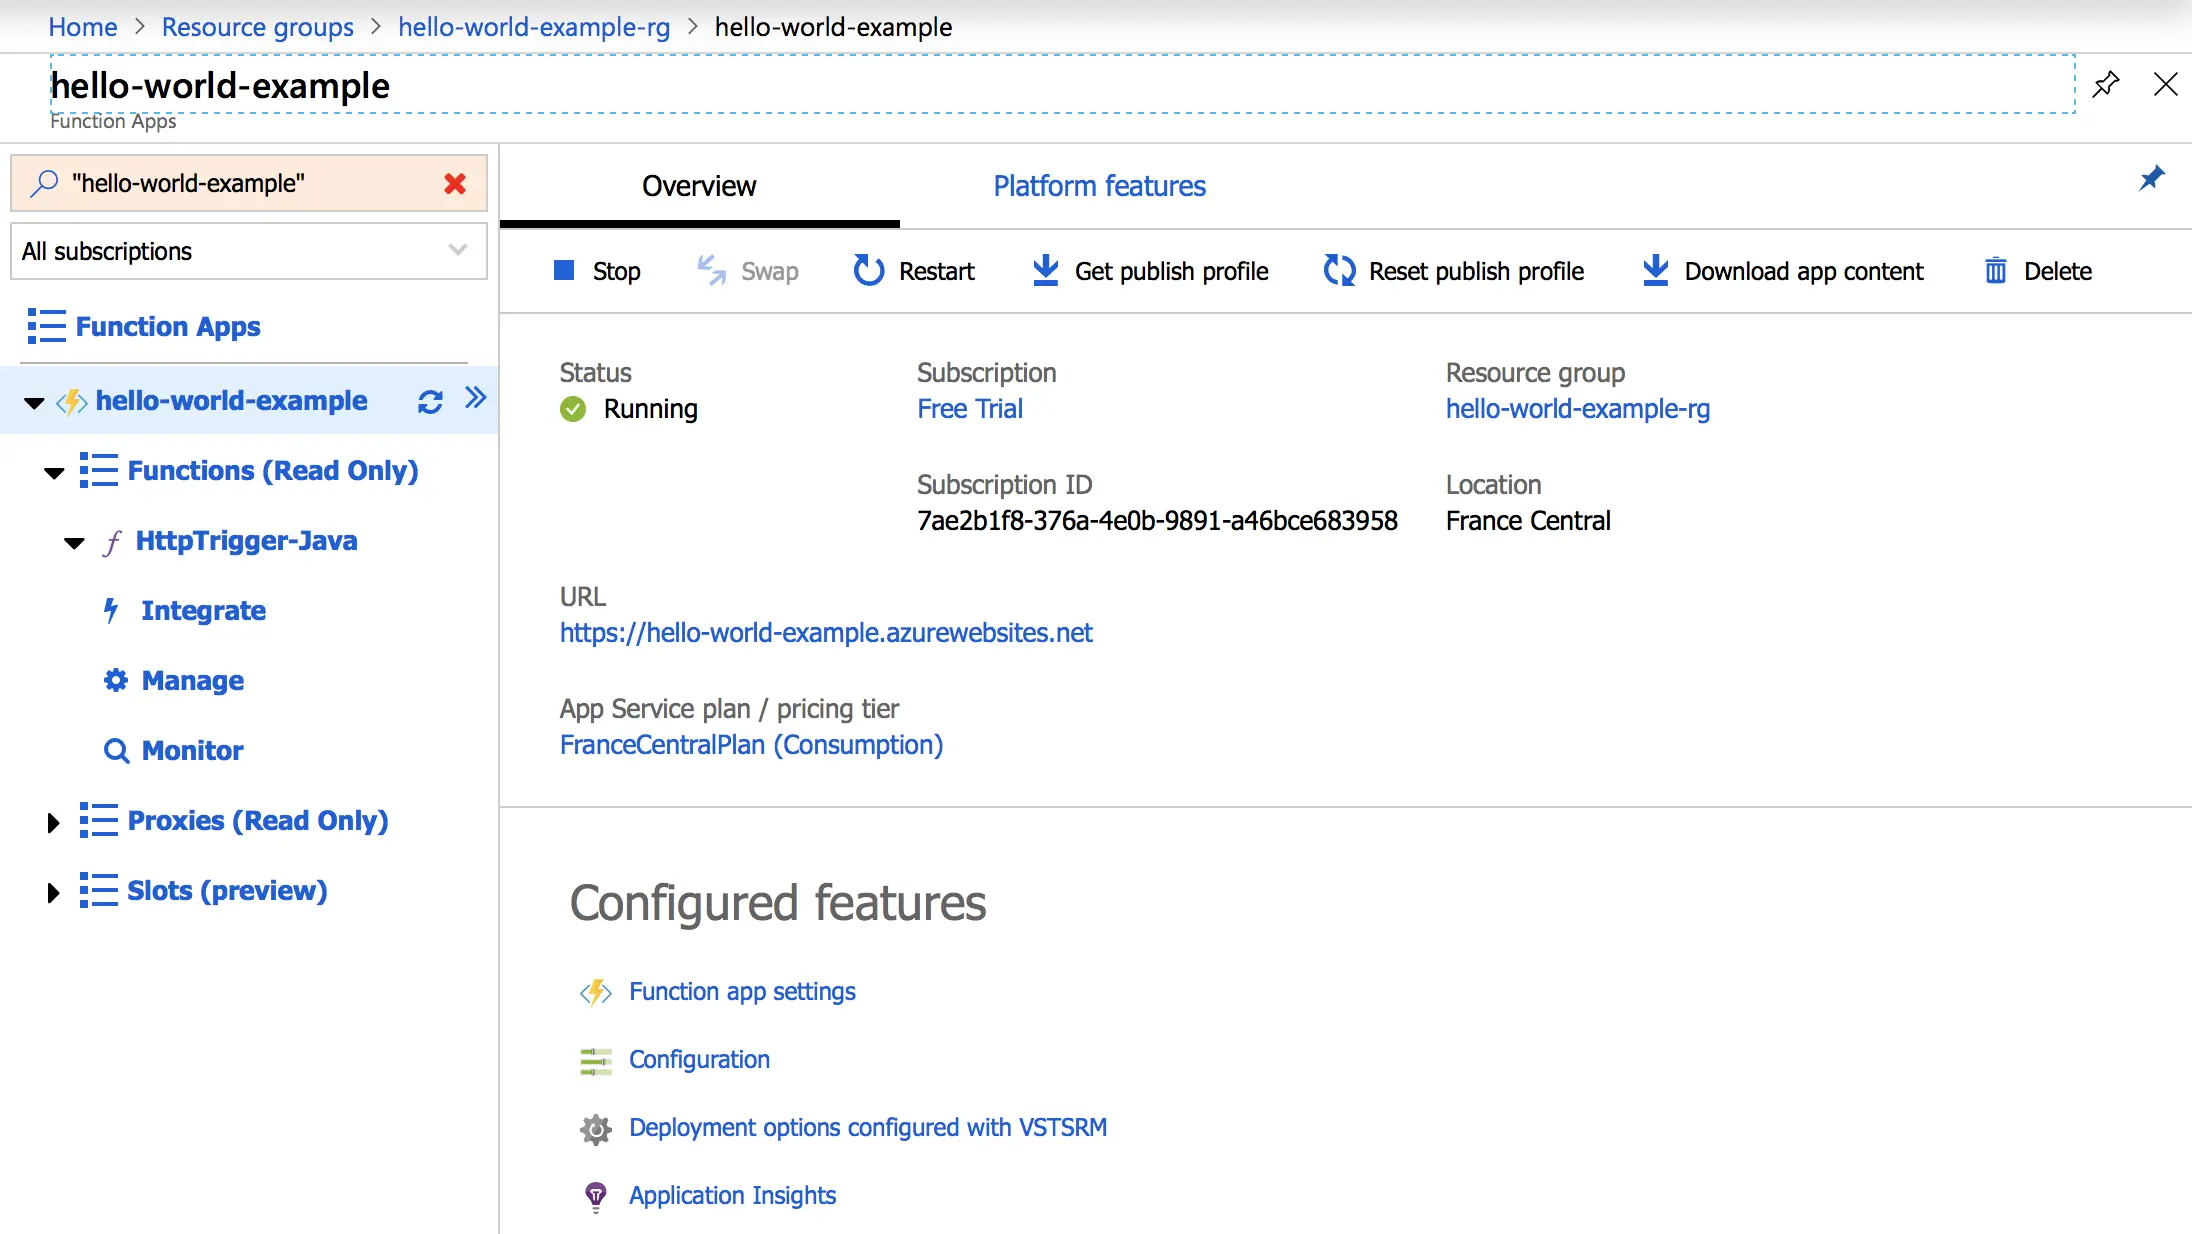
Under the Function Apps there are our hello-world-example application. In this tree there is a Functions (Read Only) section, which lists all the Functions that are included in our application.
If you click on the HttpTrigger-Java you will get something that looks like this:
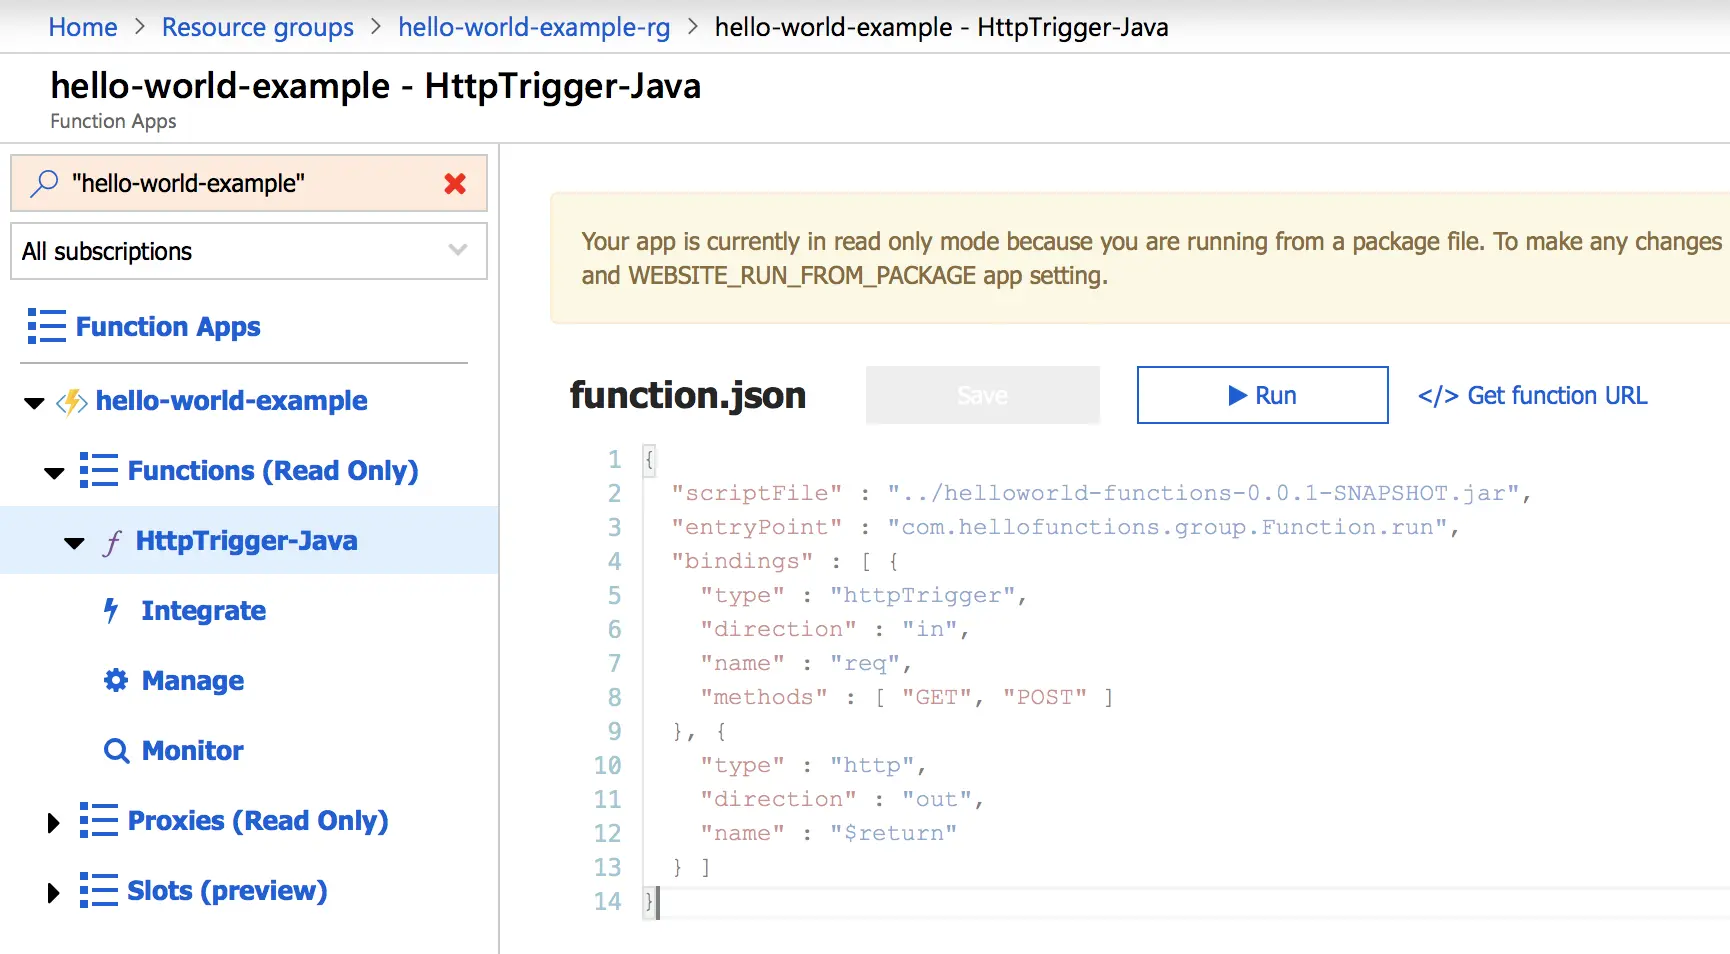
Click on </> Get function URL to get and test the function URL:
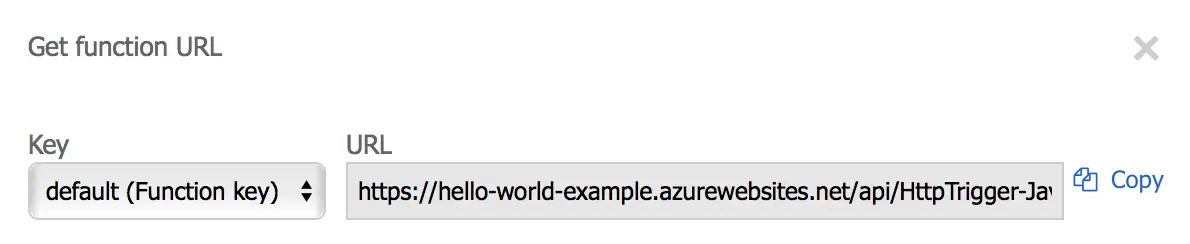
When you click Copy and you past it to a browser you can see the function response which looks like
Please pass a name on the query string or in the request body
WTF!! 😱😱😱😱
This is normal, the sample function needs some specific input to provide some response. So, now we will dive into the Java ecosystem 🥰
Let’s look to the sample project:
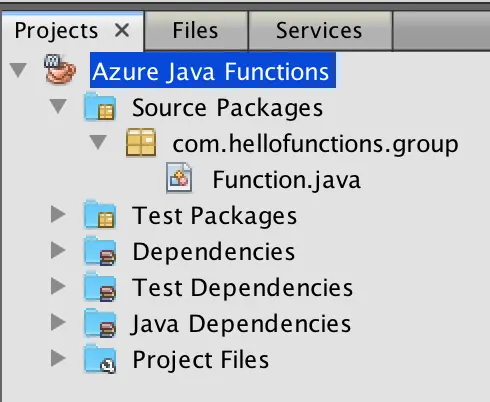
In the sample project, we have only one Java class called Function. It’s content looks like:
| |
In the line (5) we have the @FunctionName annotation that contains the HttpTrigger-Java which is the Function name. This indicates that this function will be available at the endpoint /api/HttpTrigger-Java.
There is only one method called run(...) which is the Function body; we pass to this method some arguments:
HttpRequestMessage<Optional<String>> request: This indicates that the body of the request will potentially contain a String value - this argument is annotated with the@HttpTriggerannotation. In this annotation you’ll note that it has been given a name req, as well as told what type of requests it supports (in this case, only HTTP GET and POST requests), and that theAuthorizationLevelis anonymous, allowing access to anyone who can call the endpoint.final ExecutionContext context: The execution context enables interaction with the Azure Functions execution environment. Used for accessing the Java Logger that will see output directed to Azure Portal, as well as any other configured output locations.
So based on this code, if I add a name parameter to the Function URL, I will get a response 😁
The old URL is :
The new URL with the name parameter will look like:
We will get a response like Hello, nebrass 🥳
Now, we can change a little bit the code of our HttpTrigger-Java function to be like:
| |
After you commit, the Build pipeline will be executed and when it succeeds, the Release pipeline will be started to deploy the new code.
If you go now to the function URL:
You will get the new output message: Hello World at 2019-08-09T12:25:24.035
Triggers and bindings
I will be covering more the Triggers and Bindings in my next post about the fabulous Azure Java Functions:
https://blog.nebrass.fr/playing-with-java-in-azure-functions-new-release/
Do more 😎
You can do more with Azure Functions:
Not final words
The Azure Functions is a very powerful product and it can be very useful in many use-cases when we are working with events-driven logic such as doing some business tasks when new file is uploaded in Azure Storage or when a new message is dispatched to Azure Event Hub.
Actually, Azure Functions support Java 8. To follow updates about the Java 11 and 12 support check this ticket and this one also.