Reactive programming ! Wow ! What a fancy buzzy word ! I waited so much to write a blog post about this trend 😃 I was waiting for the landscape to be mature to made a one-shot tutorial 😁
Today, I will show you how to make a Reactive Spring Boot application, with a Reactive CRUDs using Spring Data Reactive Relational Database Connectivity (R2DBC) with PostgreSQL and for sure the famous Webflux. Don’t be scared if you don’t know any of these topics. We will be introducing all of them smoothly ! 😊
But before digging into the practice, I will be making small story-telling about the fundamentals of the reactive programming. 😎
Let’s discover the reactive programming#
Reactive programming is development paradigm based around asynchronous data streams. I think this is the shortest complete definition.
In the reactive programming, data streams are the first class citizens. They can be events, messages, calls, and even failures that we can observe and we can react when a value is emitted. You subscribe to the event, and you will be notified when your event is fired. Moving to an events-driven style will make our application asynchronous and non blocking. Many frameworks and libraries are regularly appearing.. one of the most powerful projects is Reactor: a fourth-generation reactive library, based on the Reactive Streams specification, for building non-blocking applications on the JVM. Reactor is created and maintained by the Spring Framework teams 💪😁
 Reactor logo
Mastering the fundamentals of the reactive programming#
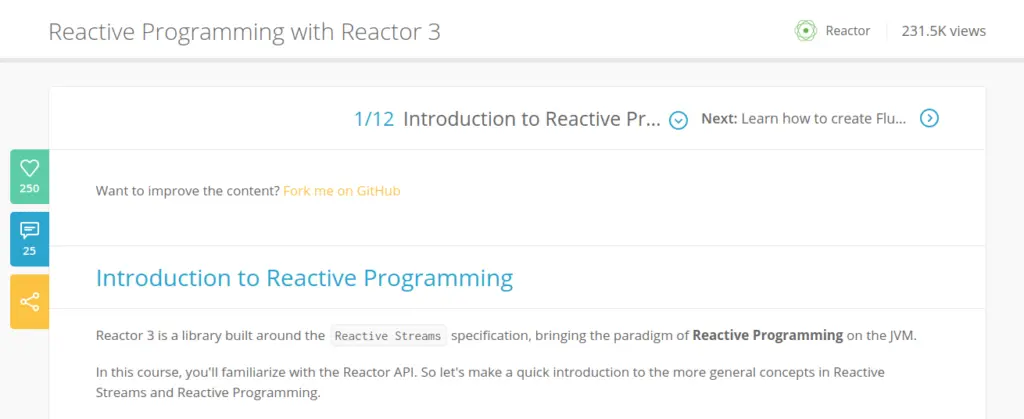
I found a FREE wonderful interactive tutorial about Reactive programming with Reactor 3. I highly recommend that you take it before continuing this tutorial 😁 the link.
 Free tutorial - Reactive Programming with Reactor 3
Building our First Reactive Application#
The full source code is available on my Github.
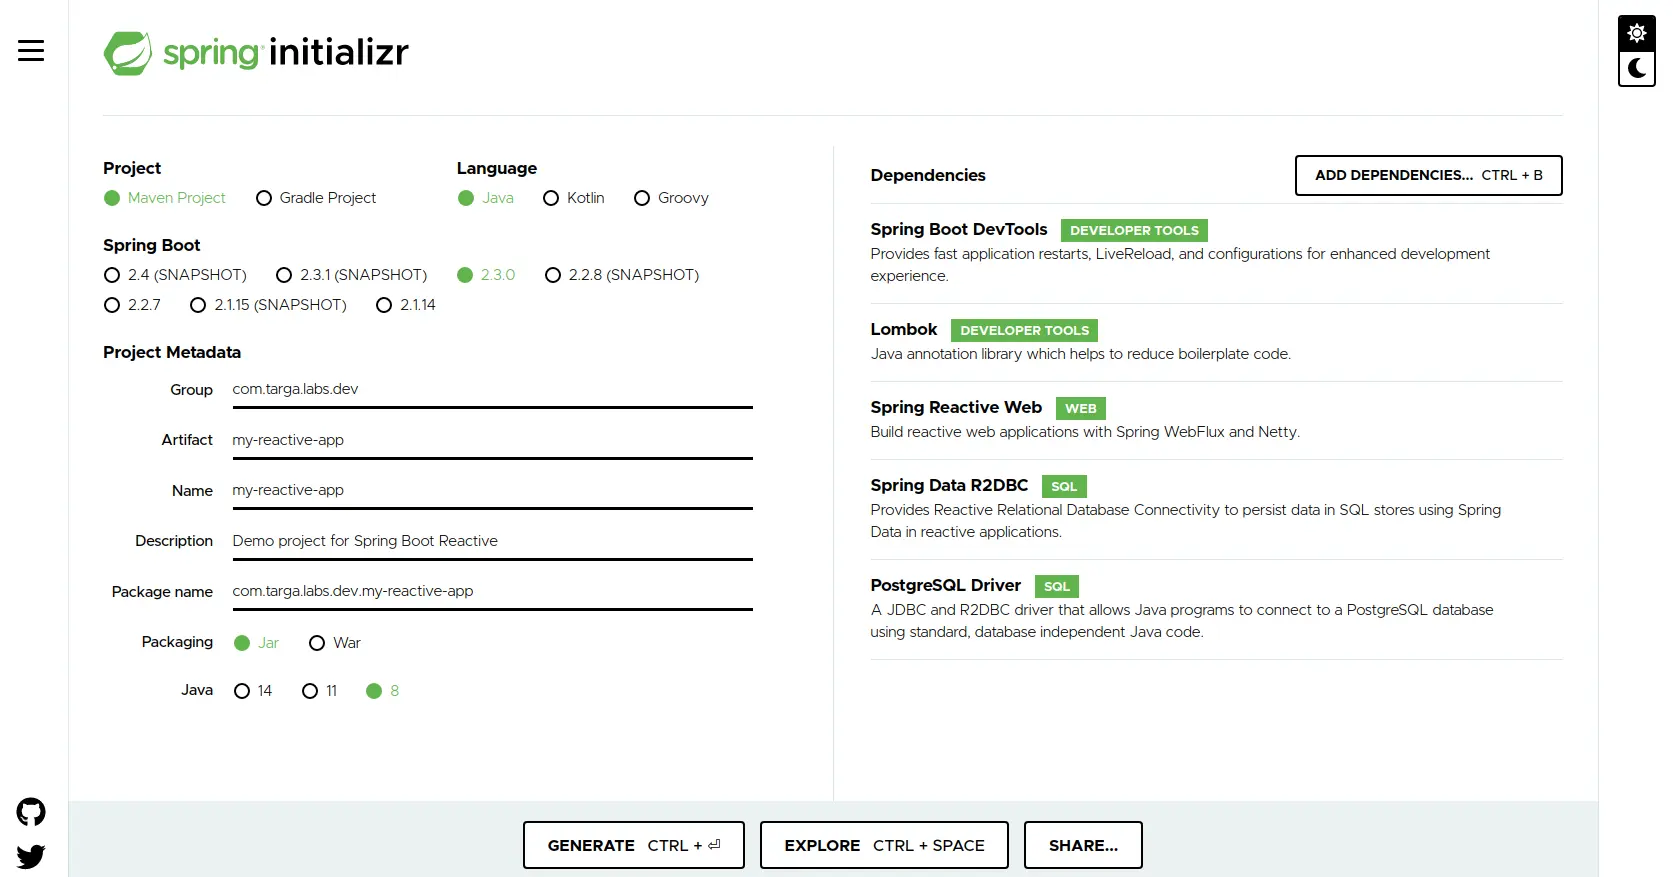
We will generate our project using the Spring Initializr. Our application will have 6 dependencies:
- Spring Boot DevTools
- Lombok
- Spring Reactive Web
- Spring Data R2DBC
- PostgreSQL Driver
- Flyway Migration
 Generating the project skull on Spring Initializr
Before digging into the code, we need to have a PostgreSQL database 😅 I will be using a Dockerized DB. Just run this command to have a local PostgreSQL DB running into a Docker container :
1
2
3
4
| $ docker run -d --name demo-postgres \
-e POSTGRES_USER=developer -e POSTGRES_PASSWORD=p4SSW0rd \
-e POSTGRES_DB=demo \
-p 5432:5432 postgres:latest
|
Good ! Now we can start working on my code. We will be developing a Reactive Books CRUD application.
First of all we need to create the Model class which will be used to map the table structure, which is the equivalent to an Entity in JPA.
 1
 2
 3
 4
 5
 6
 7
 8
 9
10
11
12
13
14
15
16
17
| @Data
@Table("book")
public class Book {
@Id
private Long id;
private String title;
private String isbn;
private String author;
private BigDecimal price;
public Book(String title, String isbn, String author, BigDecimal price) {
this.title = title;
this.isbn = isbn;
this.author = author;
this.price = price;
}
}
|
Next, we will create a Reactive Repository to manage our Books in our DB:
1
2
3
| @Repository
public interface BookRepository extends ReactiveCrudRepository<Book, Long> {
}
|
As you see here, we are not extending from a JpaRepository like in the classic Spring Data. But we are extending from the ReactiveCrudRepository interface from the Spring Data Reactive Relational Database Connectivity (R2DBC) library.
We can even create a custom method in our Repository using the Spring Data Pattern. For example I will need a findBy method using an Author name and I want that the request ignore the case and it will return a Reactive Stream of 0-N Books:
1
| Flux<Book> findBooksByAuthorContainingIgnoreCase(String author);
|
Next, we will create a Spring Service class that will be a glue layer between the Repository and the RestController, and where business logic will be living.
Our typical Service will look like:
 1
 2
 3
 4
 5
 6
 7
 8
 9
10
11
12
13
14
15
16
17
18
19
20
21
22
23
24
25
26
27
28
29
30
31
32
33
| @Service
@RequiredArgsConstructor
public class BookService {
private final BookRepository bookRepository;
public Flux<Book> findAll() {
return bookRepository.findAll();
}
public Mono<Book> findById(Long id) {
return bookRepository.findById(id);
}
public Mono<Book> save(BookDTO book) {
return bookRepository.save(
new Book(
book.getTitle(),
book.getIsbn(),
book.getAuthor(),
book.getPrice()
)
).subscribe();
}
public Flux<Book> findByAuthor(String author) {
return bookRepository.findBooksByAuthorContainingIgnoreCase(author);
}
public void deleteById(Long id) {
bookRepository.deleteById(id).subscribe();
}
}
|
As you see, we have findAll() method from the Repository that is used to grab “reactively” all the records from the DB, this why it’s return type is a Flux<Book> and not our classic List<Book>. But what is a Flux ? A Flux is an Asynchronous Sequence of 0-N Items. Good ! The same way, I think you already saw the Mono, which is an Asynchronous 0-1 Result, which’s somehow like the Optional Java 8 object.
As you see in the save() and deleteById() methods, we are calling subscribe(). This is always done with a reactive streams, because for many actions, we need to have a subscriber for an operation to be done.
Now, we need to create our RestController:
 1
 2
 3
 4
 5
 6
 7
 8
 9
10
11
12
13
14
15
16
17
18
19
20
21
22
23
24
25
26
27
28
29
30
31
32
33
| @RestController
@RequestMapping("/books")
@RequiredArgsConstructor
public class BookRestController {
private final BookService bookService;
@GetMapping(produces = MediaType.TEXT_EVENT_STREAM_VALUE)
public Flux<Book> list() {
return bookService.findAll();
}
@GetMapping("/{id}")
public Mono<Book> findById(@PathVariable Long id) {
return bookService.findById(id);
}
@PostMapping
@ResponseStatus(HttpStatus.CREATED)
public Mono<Book> create(@RequestBody BookDTO bookDTO) {
return bookService.save(bookDTO);
}
@GetMapping("/author")
public Flux<Book> findByAuthor(@RequestParam String name) {
return bookService.findByAuthor(name);
}
@DeleteMapping("/{id}")
public void deleteById(@PathVariable Long id) {
bookService.deleteById(id);
}
}
|
We have introduced a BookDTO class that will be a wrapping the records sent/received while interacting with the REST consumers:
1
2
3
4
5
6
7
| @Data
public class BookDTO {
private String title;
private String isbn;
private String author;
private BigDecimal price;
}
|
Now, before running our code, we need to configure PostgreSQL for R2DBC:
 1
 2
 3
 4
 5
 6
 7
 8
 9
10
11
12
13
14
15
16
17
18
19
20
21
22
23
24
25
26
27
28
29
| @Configuration
@EnableR2dbcRepositories
public class PostgresConfiguration extends AbstractR2dbcConfiguration {
@Value("${spring.r2dbc.url}")
private String url;
@Value("${spring.r2dbc.username}")
private String username;
@Value("${spring.r2dbc.password}")
private String password;
@Bean
@Override
public ConnectionFactory connectionFactory() {
return new PostgresqlConnectionFactory(
PostgresqlConnectionConfiguration.builder()
.host(JdbcParser.getJdbcHost(url))
.port(JdbcParser.getJdbcPort(url))
.username(username)
.password(password)
.database(JdbcParser.getDbName(url))
.build());
}
@Bean
ReactiveTransactionManager transactionManager(ConnectionFactory connectionFactory) {
return new R2dbcTransactionManager(connectionFactory);
}
}
|
Our application.properties file needs to have our DB credentials:
1
2
3
| spring.r2dbc.url=jdbc:postgresql://localhost:5432/demo
spring.r2dbc.username=developer
spring.r2dbc.password=p4SSW0rd
|
The JdbcParser utility class looks like:
 1
 2
 3
 4
 5
 6
 7
 8
 9
10
11
12
13
14
15
16
17
18
19
| public class JdbcParser {
public static String getJdbcHost(String jdbc) {
return getUri(jdbc).getHost();
}
public static int getJdbcPort(String jdbc) {
return getUri(jdbc).getPort();
}
public static String getDbName(String jdbc) {
return getUri(jdbc).getPath().substring(1);
}
private static URI getUri(String jdbc) {
String substring = jdbc.substring(5);
return URI.create(substring);
}
}
|
I already added Flyway to my Spring Boot dependencies. I will now configure the Flyway execution on startup using a CommandRunner:
 1
 2
 3
 4
 5
 6
 7
 8
 9
10
11
12
13
14
15
16
17
18
| @Component
public class FlywayConfiguration implements CommandLineRunner {
@Value("${spring.r2dbc.url}")
private String url;
@Value("${spring.r2dbc.username}")
private String username;
@Value("${spring.r2dbc.password}")
private String password;
@Override
public void run(String... args) {
Flyway.configure()
.dataSource(url, username, password)
.load()
.migrate();
}
}
|
I just did this to avoid retyping PostgreSQL credentials under the spring.r2dbc.* and flyway.*
Good ! Now we need to have the V1_0__init.sql script in the src/main/resources/db/migration folder, where Flyway is seeking SQL scripts. This initialization script will create the tables and insert some sample data:
 1
 2
 3
 4
 5
 6
 7
 8
 9
10
11
12
| CREATE TABLE book(
id SERIAL NOT NULL PRIMARY KEY,
title VARCHAR (100),
isbn VARCHAR (20),
author VARCHAR (100),
price NUMERIC(6, 2)
);
INSERT INTO book (title, isbn, author, price)
values ('Pairing Apache Shiro and Java EE 7', '9781365124044', 'Nebrass Lamouchi', 0);
INSERT INTO book (title, isbn, author, price)
values ('Playing with Java Microservices on Kubernetes and OpenShift', '9782956428510', 'Nebrass Lamouchi', 9.18);
|
Now, let’s run the application and request the findAll() REST API:
1
2
3
4
5
6
7
8
9
| http http://localhost:8080/books
HTTP/1.1 200 OK
Content-Type: text/event-stream;charset=UTF-8
transfer-encoding: chunked
data:{"id":1,"title":"Pairing Apache Shiro and Java EE 7","isbn":"9781365124044","author":"Nebrass Lamouchi","price":0.00}
data:{"id":2,"title":"Playing with Java Microservices on Kubernetes and OpenShift","isbn":"9782956428510","author":"Nebrass Lamouchi","price":9.18}
|
Now, we will add the Swagger support to our application. First of all we need to add the SpringFox Swagger 3.0-Snapshot dependencies, as the final version is not yet released:
 1
 2
 3
 4
 5
 6
 7
 8
 9
10
11
12
13
14
15
| <dependency>
<groupId>io.springfox</groupId>
<artifactId>springfox-swagger2</artifactId>
<version>3.0.0-SNAPSHOT</version>
</dependency>
<dependency>
<groupId>io.springfox</groupId>
<artifactId>springfox-spring-webflux</artifactId>
<version>3.0.0-SNAPSHOT</version>
</dependency>
<dependency>
<groupId>io.springfox</groupId>
<artifactId>springfox-swagger-ui</artifactId>
<version>3.0.0-SNAPSHOT</version>
</dependency>
|
These dependencies are not available on the Maven Central repository, but in JFrog OSS Snapshot repository. We need just to add it to you pom.xml:
1
2
3
4
5
6
7
| <repositories>
<repository>
<id>jcenter-snapshots</id>
<name>jcenter</name>
<url>http://oss.jfrog.org/artifactory/oss-snapshot-local/</url>
</repository>
</repositories>
|
Now, we need to configure Swagger in our application:
 1
 2
 3
 4
 5
 6
 7
 8
 9
10
11
12
13
14
15
16
17
18
19
20
21
22
23
24
25
26
27
28
29
| @Configuration
@EnableSwagger2WebFlux
public class SwaggerConfiguration {
@Bean
RouterFunction<ServerResponse> swaggerRouterFunction() {
Mono<ServerResponse> build = ServerResponse.temporaryRedirect(URI.create("swagger-ui.html")).build();
return RouterFunctions.route(RequestPredicates.GET("/swagger"), request -> build);
}
@Bean
public Docket api() {
return new Docket(DocumentationType.SWAGGER_2)
.apiInfo(apiInfo())
.select()
.apis(RequestHandlerSelectors.any())
.paths(PathSelectors.any())
.build();
}
private ApiInfo apiInfo() {
return new ApiInfoBuilder()
.title("Playing with Spring Webflux")
.description("Sample application for my blog post 'Playing with Reactive Spring Boot'")
.contact(new Contact("Nebrass Lamouchi", "https://blog.nebrass.fr", "[email protected]"))
.version("1.0")
.build();
}
}
|
There is some new stuff here. Keep calm 👻 we will cover everything:
- The
@EnableSwagger2Webflux annotation Indicates that Swagger support for Webflux should be enabled. - The
swaggerRouterFunction() method is used to define a RouterFunction for the Swagger UI ressources. A RouterFunction represents a function that routes an HTTP request to a Handling Function that will be dealing with that request.
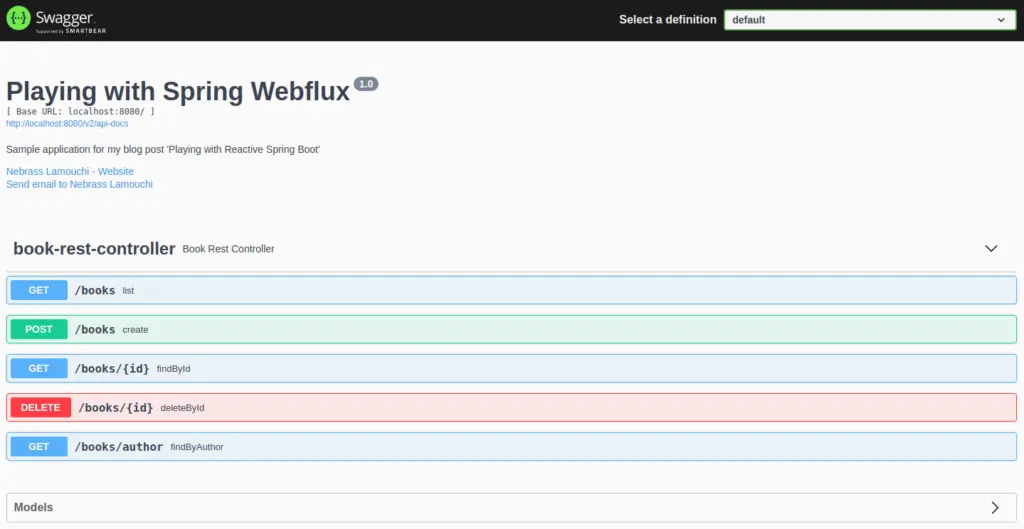
Good ! Now our application has Swagger enabled. Just run the application and visit the http://localhost:8080/swagger-ui.html:
 Swagger UI
Good 😊 We made our first Spring WebFlux application ! You can now dig more into the Reactive Programming style and you can for example try to create some Websockets to stream some of your data reactively from a REST API and a Websocket 🤩
If you have questions, please feel free to get in touch with me 😎
 Reactor logo
 Free tutorial - Reactive Programming with Reactor 3
 Generating the project skull on Spring Initializr
 Swagger UI