In this tutorial you will learn how to write a Java EE application using two of the trendiest technologies: Spring Boot and Docker in NetBeans IDE.
Spring Boot is an innovative project that aims to make it easy to create Spring applications by simplifying the configuration and deployment actions through its convention over configuration based setup. Docker is an open source project that automates the deployment of applications inside software containers.
Today I’d like to make a tutorial in which a simple Spring Boot application is deployed using Docker.
Requirements
- JDK 8 recommended
- We need Docker, which only runs on 64-bit machines. See https://docs.docker.com/installation/#installation for details on setting Docker up for your machine. Before proceeding further, verify you can run docker commands from the shell. If you are using boot2docker you need to run that first.
- NetBeans IDE Development build, to be downloaded from http://bits.netbeans.org/download/trunk/nightly/latest/
For this tutorial I will be using the Development build of NetBeans IDE, as the Docker integration will be in the next release of NetBeans.

Grab the Java EE bundle from the download section.
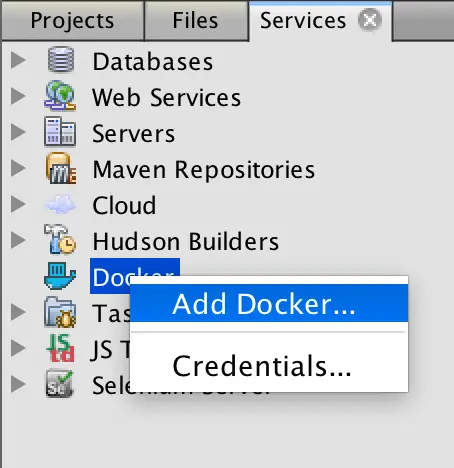
Docker support
The Docker node is available in the Services window. To connect to a Docker instance, make sure that the Docker daemon is working.
On NetBeans go to the Services window:
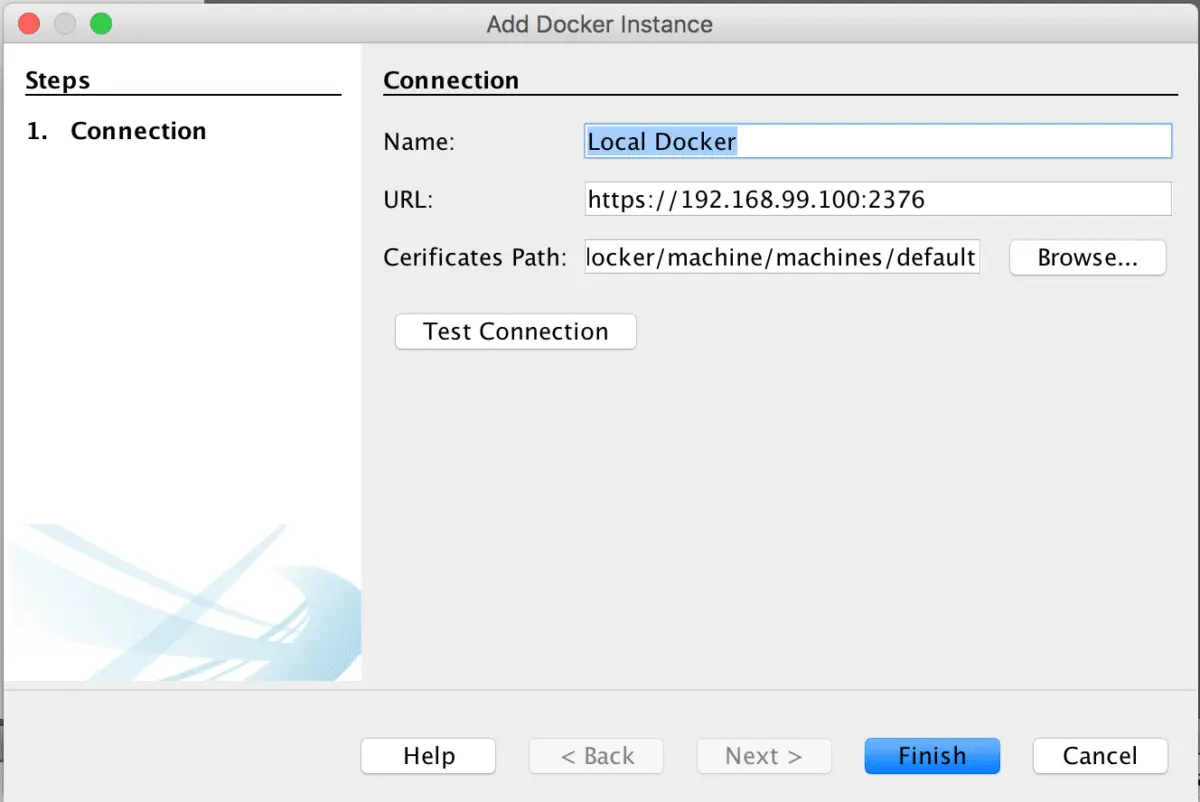
Next…
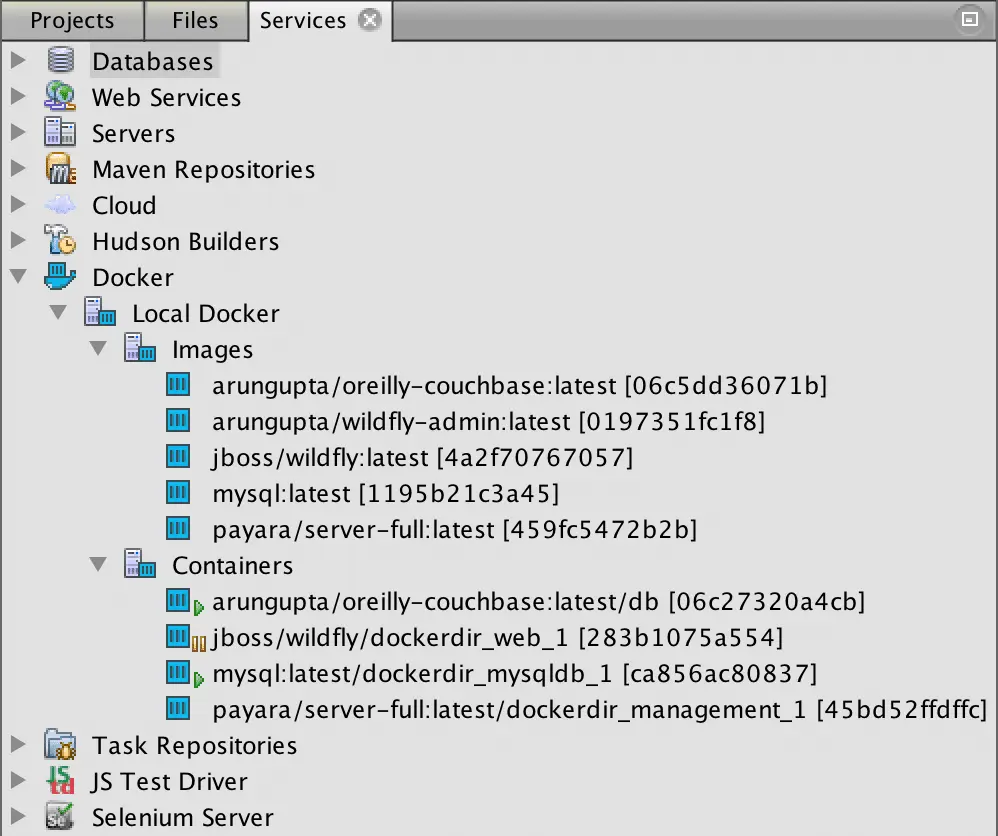
After configuring the Docker instance, you can see all your images and containers, as well as the state of each container:
The Docker integration in NetBeans supports many Docker operations such as running or pushing images, or starting and stopping containers:


Spring Boot support
I recently found a great Spring Boot plugin: NB-SpringBoot created by Alex Falappa
The features provided by the plugin:
- Spring Boot new Maven project wizards:
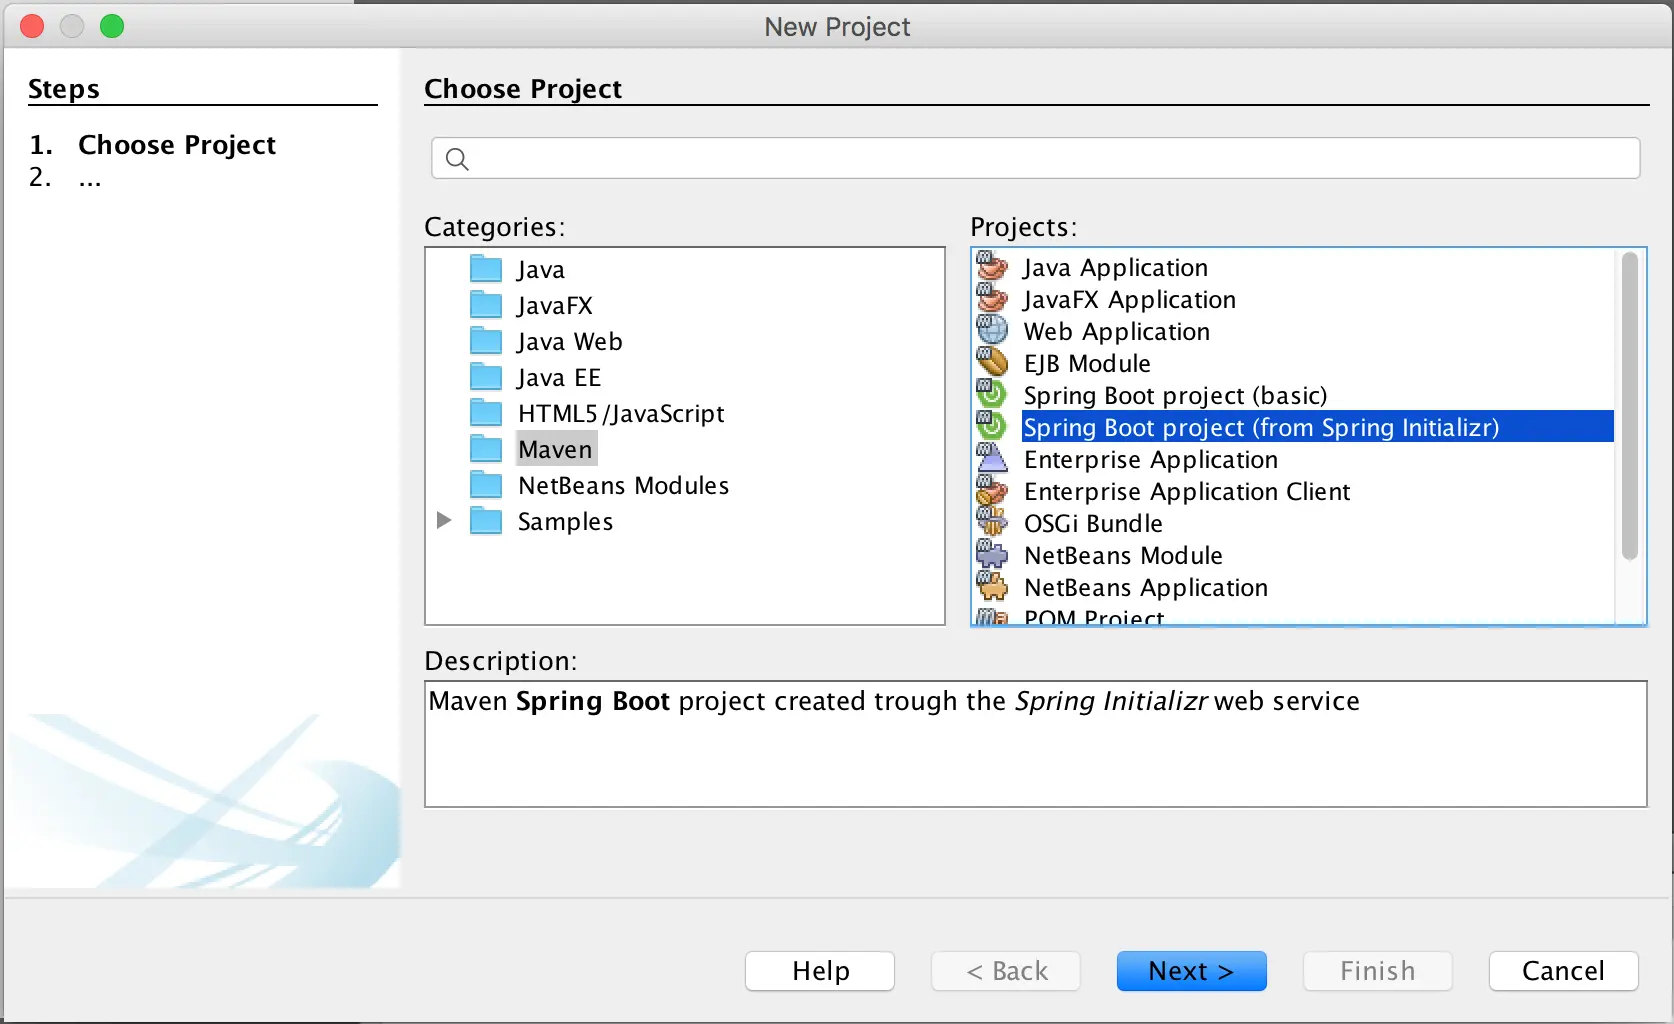
- Basic project
- Project generated by Spring Initializr service
- Enhanced properties file editor:
- completion and documentation of configuration properties names
- completion and documentation of configuration properties values (hints in configuration metadata)
- Spring Boot file templates:
- CommandlineRunner annotated classes
- ApplicationRunner annotated classes
- application.properties files
- ConfigurationProperties annotated classes
- additional-spring-configuration-metadata.json files
- Spring file templates:
- Component annotated classes
- Configuration annotated classes
- Service annotated classes
- Spring MVC file templates:
- Controller annotated classes
- RestController annotated classes
- Spring Data file templates:
- interfaces extending Repository
- Code generators in pom.xml files:
- Add spring configuration processor dependency
- Add spring-devtools & spring-actuator dependencies
Creating our Boot application
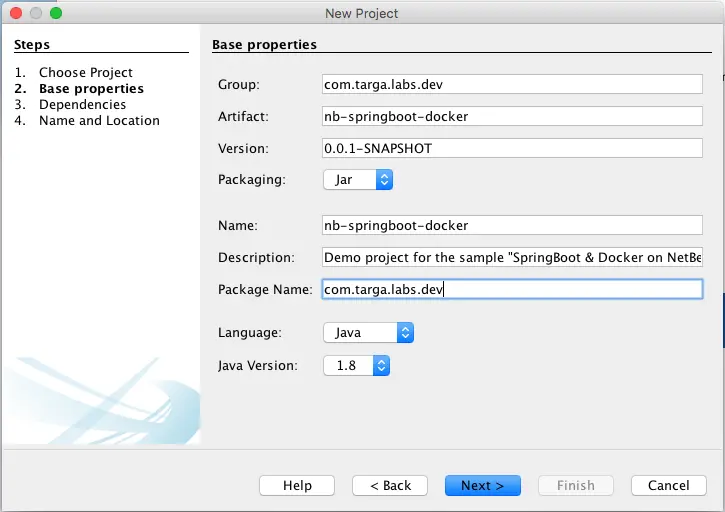
After installing the plugin, we can create a new project using the Spring Initializr directly from NetBeans:
Next…
Next, select the Spring Boot version and the needed dependencies.
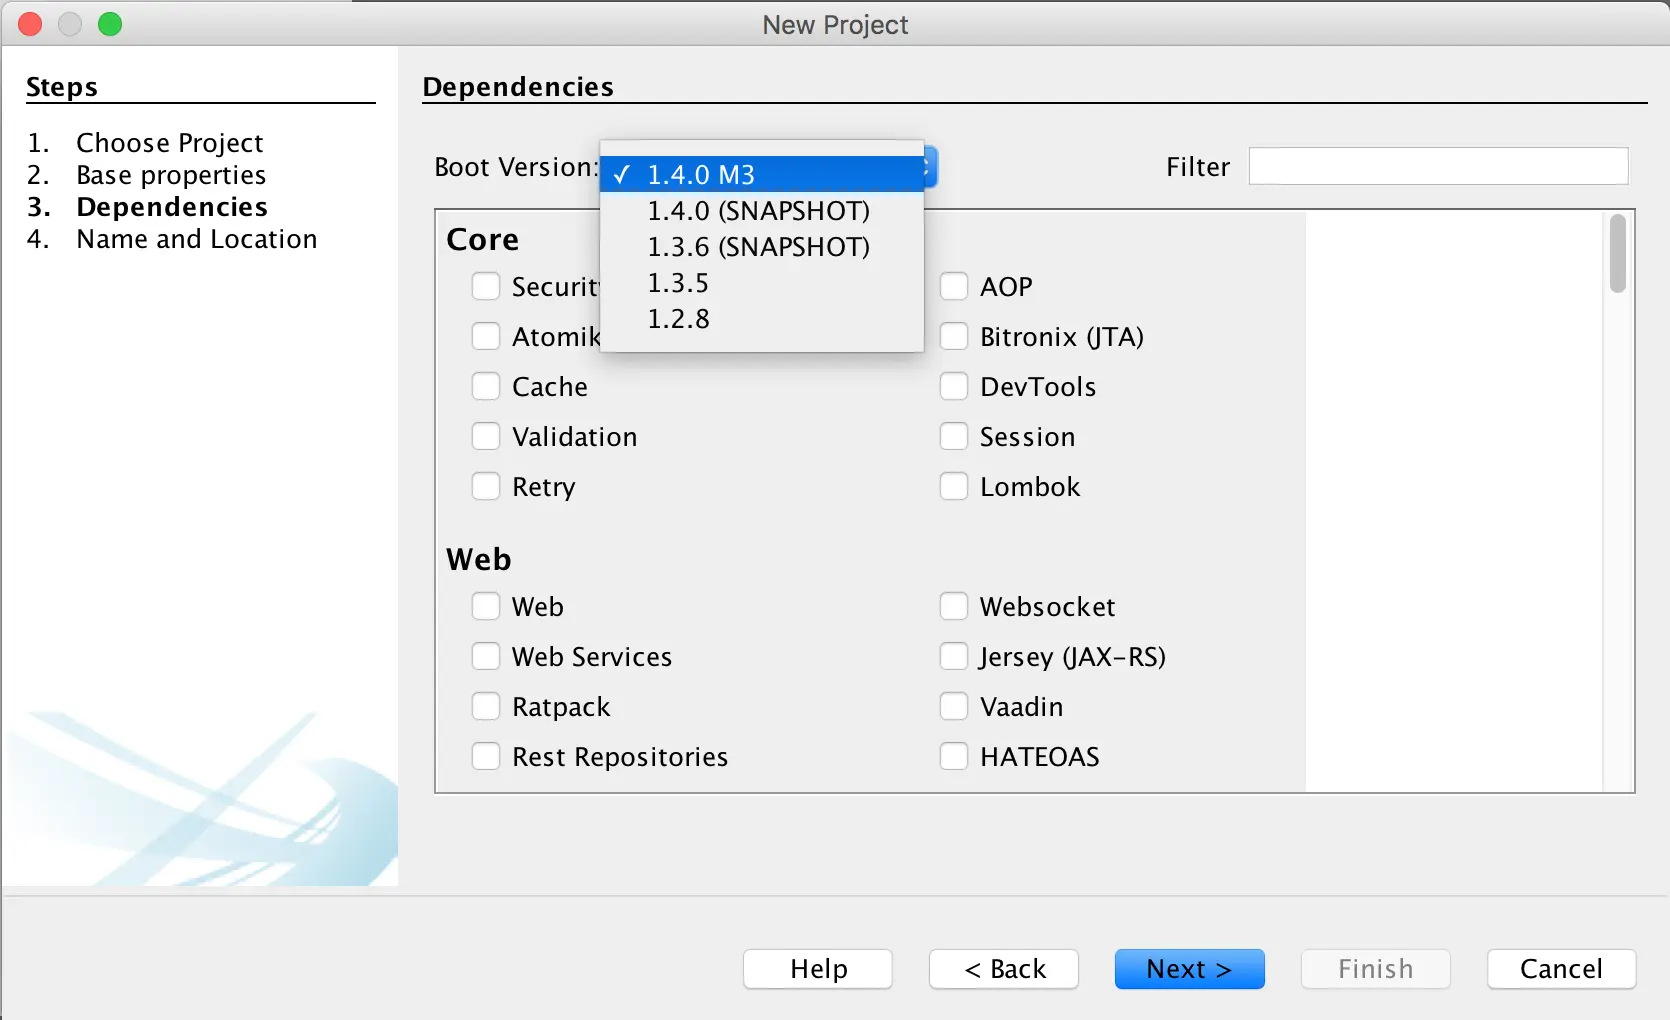
I just picked the Web and Actuator dependencies for my sample project.
Next…
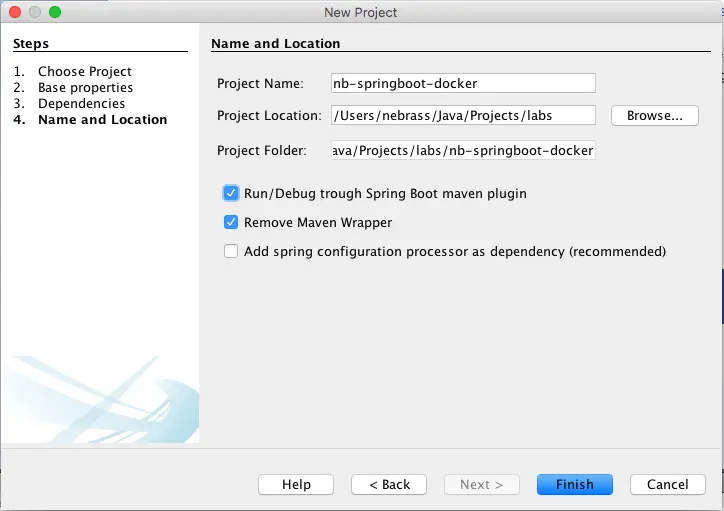
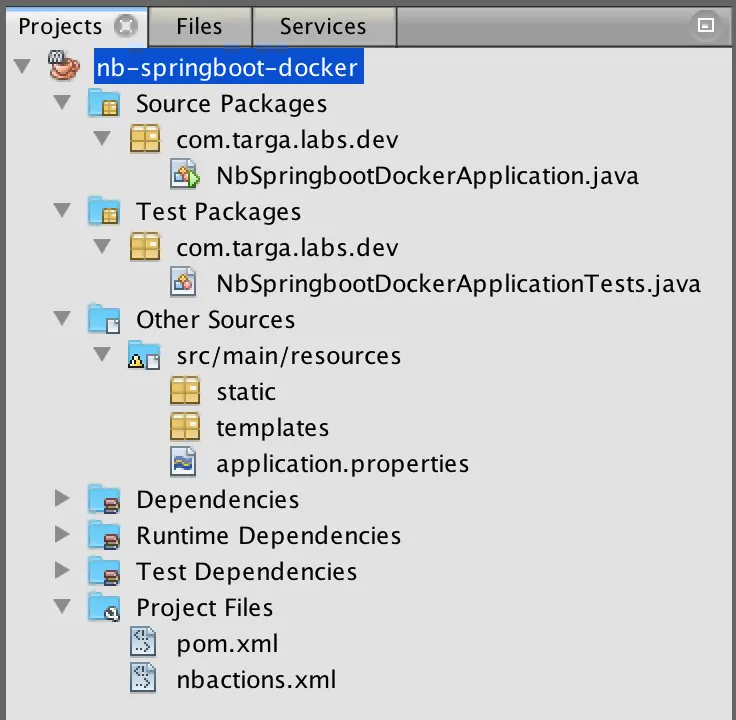
So now we have created our project base using Spring Initializer. The structure of the created project would be:
Now we create a new RestController:
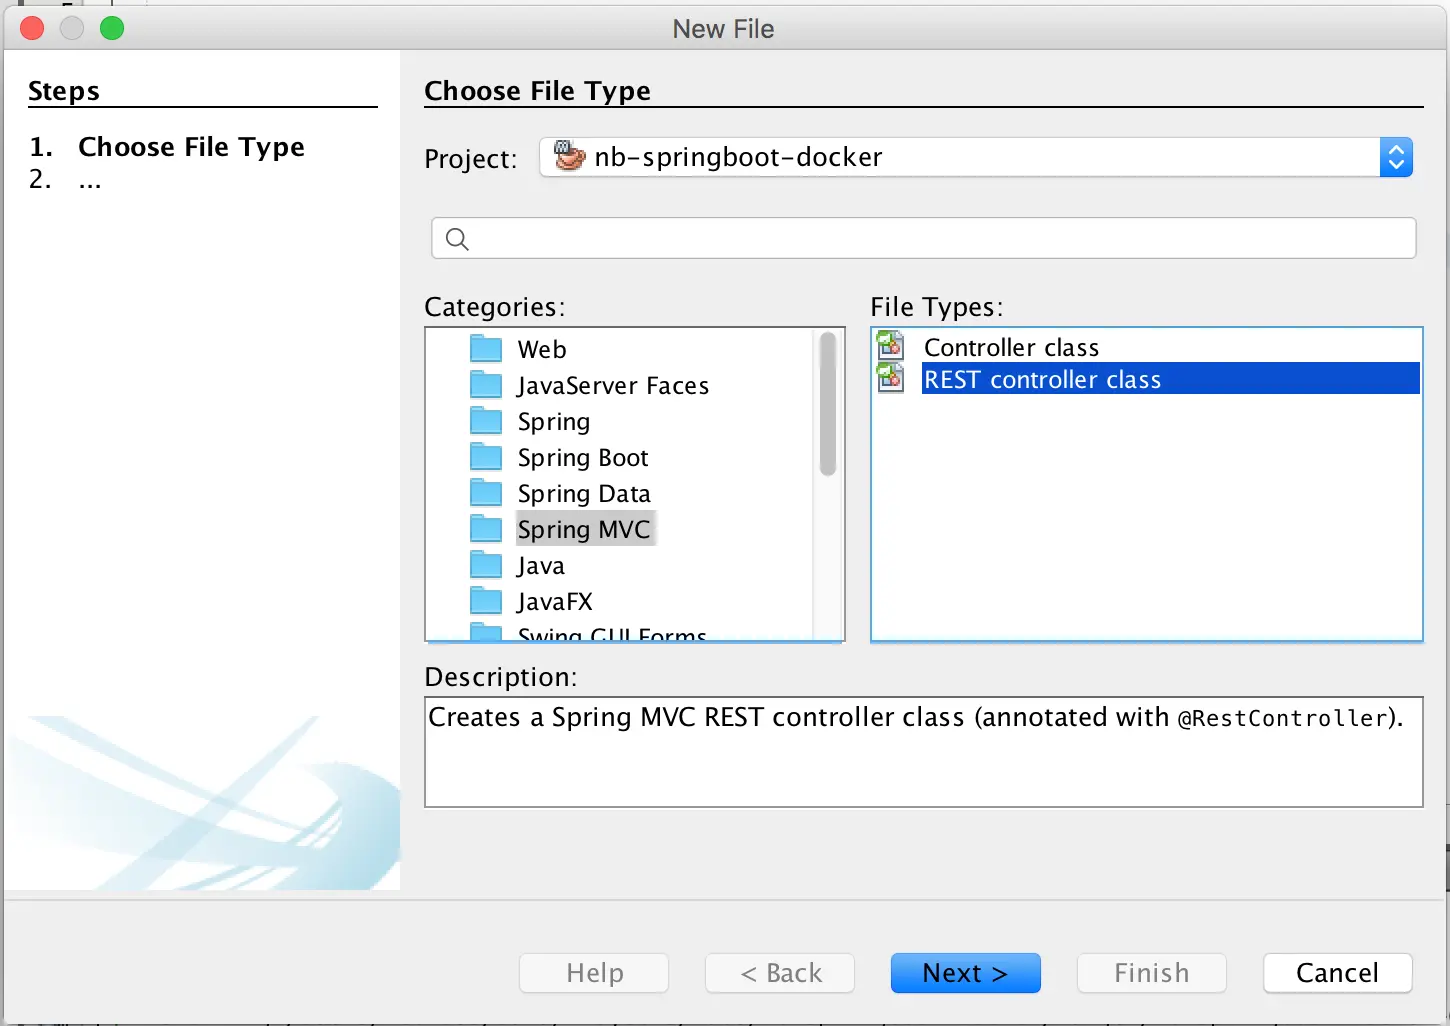
The controller will be a classic “Hello World” Rest boundary:
| |
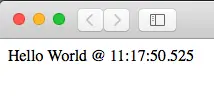
Run the project and go to http://localhost:8080/time to test the application:
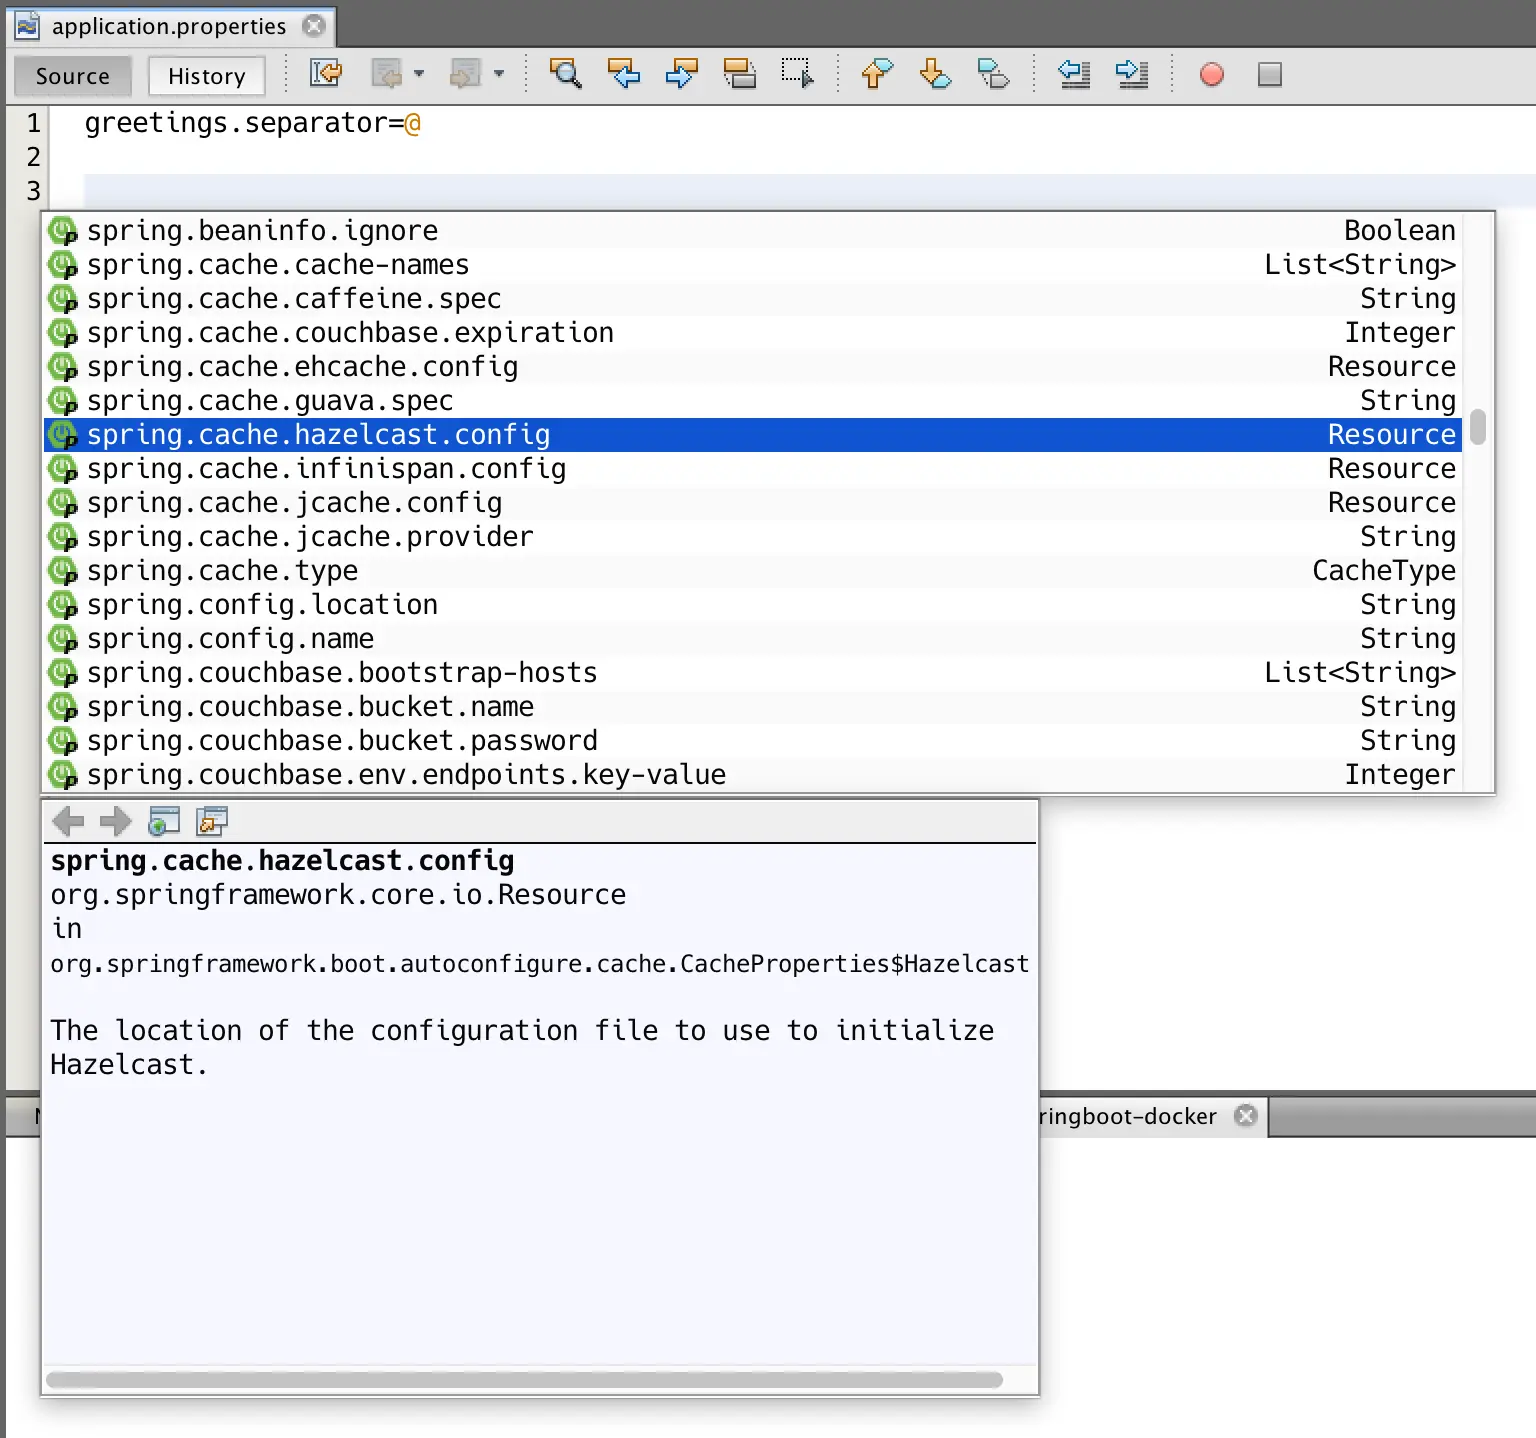
Another great feature of the SpringBootPlugin is the powerful code completion especially on properties files, decorated with the Javadoc of the suggested item:
To deploy our application using Docker, we will need to prepare our container.
Now we need to build our first container, which will run our sample microservice. We do this by defining the Dockerfile, which is a text file containing series of commands that tell Docker how to build an image. Once we write a Dockerfile, we can then repeatedly build an image by running the docker buildcommand.
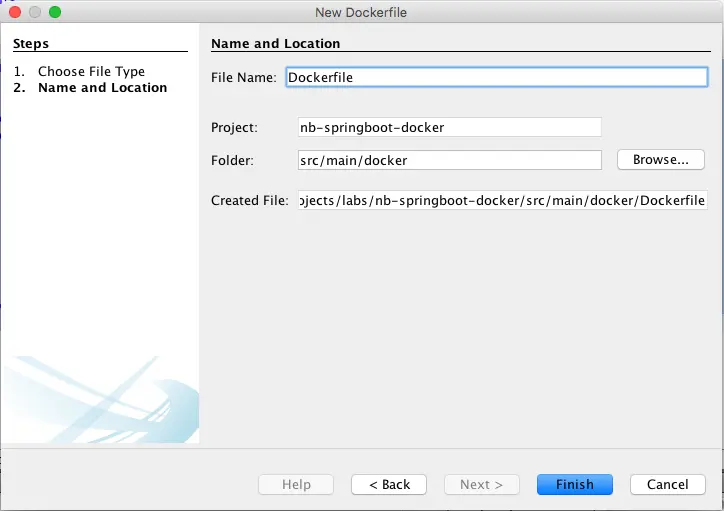
In NetBeans, create the new Dockerfile:

Create the “Dockerfile” in the “src/main/docker” folder.
An example of a Dockerfile content that we can use :
| |
As you can see, the Dockerfile is very simple. It consists of the following instructions:
- FROM – the FROM instruction specifies the starting image. In this example, it is the Java 8 image mentioned above. The first time you build this image, Docker will download the Java 8 image from the central Docker registry
- VOLUME – define that a volume named /tmp should exist
- MAINTAINER – this instruction simply specifies the author
- ADD – this instruction copies the JAR file to the specified location in the image. Note that working directory for the dockerfile/java image is /data so that’s why we are putting the JAR file there.
- EXPOSE – this instruction tells Docker that this server process will listen on port 8080
- RUN – used to “touch” the jar file so that it has a file modification time (Docker creates all container files in an “unmodified” state by default). This actually isn’t important for the simple app that we wrote, but any static content (e.g. “index.html”) would require the file to have a modification time.
- ENTRYPOINT – is the “what to run to ‘start’” command — we run Java, setting properties, for example, a quick additional property to reduce Tomcat startup time we added a system property pointing to “/dev/urandom” as a source of entropy, and then point it at our jar.
To build the image you can use some tooling for Maven (Spotify) or Gradle (Transmode).
For our example we will be using Maven.
Build a Docker Image with Maven
In the Maven pom.xml you should add a new plugin like this (see the Docker-Maven-Plugin documentation for more options):
| |
The plugin configuration is simple:
- imageName: The name of the generated Docker image
- dockerDirectory: The directory where you can find the Dockerfile
- resources: The resources files to copy from the target directory to the Docker build (alongside the Dockerfile)
You can build an image with the configurations mentioned above by running this command:
| |
After the execution of the command, when you check the list of Docker images, you will discover that the built image is added to the list :
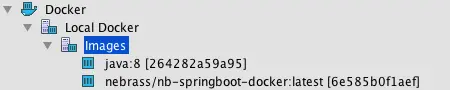
There is also the java:8 image added to the list of images. This is because the nebrass/nb-springboot-docker is based on the java:8 image.
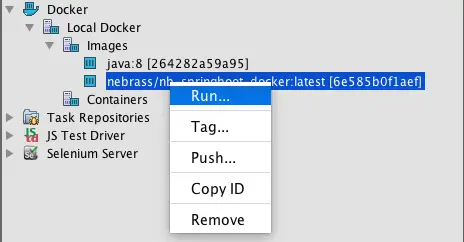
You can run the built image just by clicking the Run button.
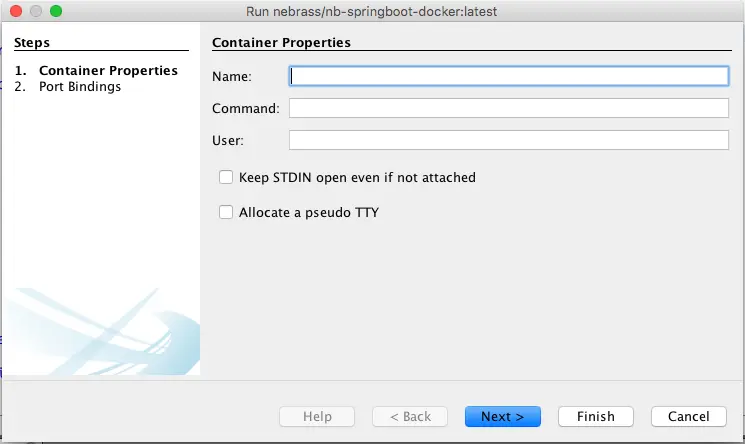
Next, configure your container :
Next, configure the ports binding :
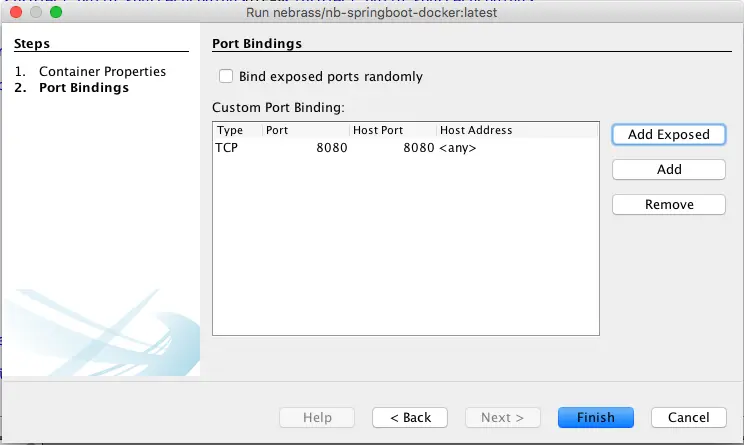
A great feature is provided by NetBeans: « Add Exposed » will bind the exposed ports automatically in the created container.
By clicking the « Finish » button, the container will be launched, and a log window will appear in NetBeans to show you how your container is executed:

Now, we check the application at http://192.168.99.100:8080/time
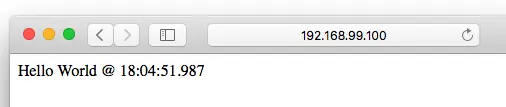
Great ! This is working !
Next, we add a Maven Task that we will be used to run the container. It can be used for example to bind the task to some Maven Phase (package, deploy…).
The command line used to launch the container :
| |
So our Maven Task will execute the same command. We will use the exec-maven-plugin to launch the same command:
| |
So to run the container from Maven:
| |
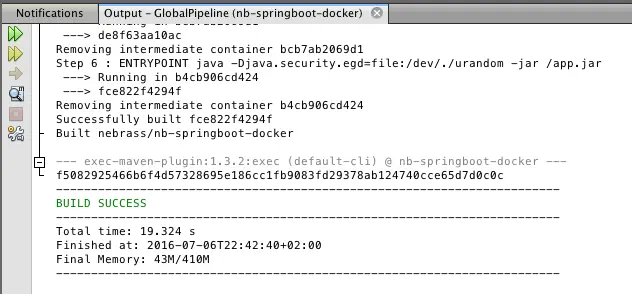
The output:
| |
The app now is deployed and running in the created Docker container and our Greetings service is accessible at http://DOCKER_HOST:8080/time (to see your running container docker ps)
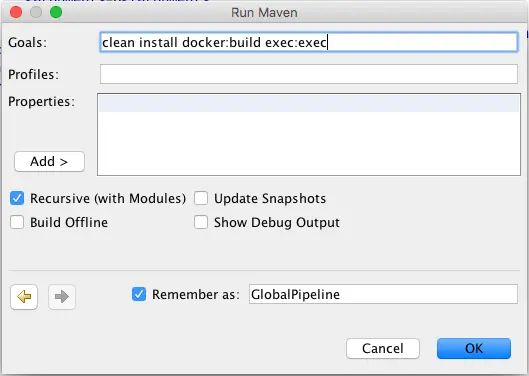
The global Maven command that does the build, tests, creates the Docker image and runs it:
| |
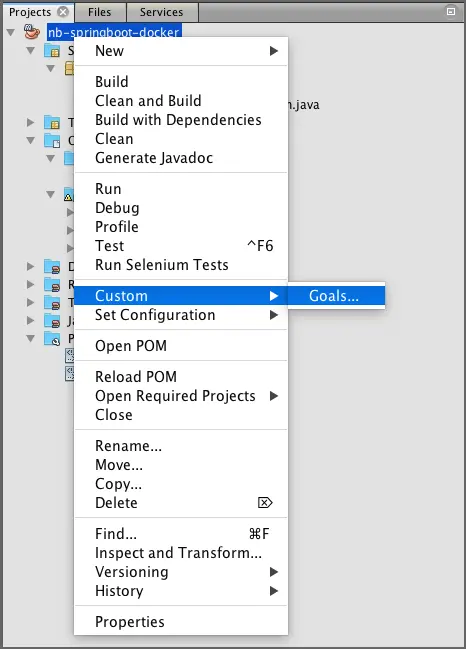
This is the command that I added to my NetBeans as custom Maven Goal:
Next..
The output in NetBeans:
Summary
Congratulations! You have created a Spring Boot microservice that is executed and deployed in a Docker containerwhich can be configured and managed in the same place where we handle the Spring Boot application.
The Spring Boot plugin developed by Alex Falappa is a great add-on and it’s worth trying it, you will love it for sure.