
I. Introduction
In this tutorial I will show you how to write a small Spring Boot CRUD application and how to deploy it on Kubernetes.
Spring Boot is an innovative project that aims to make it easy to create Spring applications by simplifying the configuration and deployment actions through its convention over configuration based setup.
Kubernetes (commonly referred to as “K8s”) is an open-source system for automating deployment, scaling and management of containerized applications that was originally designed by Google and now maintained by the Cloud Native Computing Foundation. It aims to provide a “platform for automating deployment, scaling, and operations of application containers across clusters of hosts”. It works with a range of container tools, including Docker.
Docker is an open source project that automates the deployment of applications inside software containers.
This tutorial is a getting started point to the Spring Boot & K8s Stack.
II. Writing the application
1. Creating the skull
Here we go ! We will start using the great features and options offered by the Spring Framework Teams at Pivotal Software, Inc.
To avoid the hard parts when creating new project and getting it started, the Spring Team has created the Spring Initializr Project.
The Spring Initializr is a useful project that can generate a basic Spring Boot project structure easily. You can choose either your project to be based on Maven or Gradle, to use Java or Kotlin or Groovy, and to choose which version of Spring Boot you want to pick.
Spring Initializr can be used:
- Using a Web-based Interface http://start.spring.io
- Using Spring Tool Suite or other different IDEs like NetBeans & IntelliJ
- Using the Spring Boot CLI
Spring Initializr gives you the ability to add the core dependencies that you need, like JDBC drivers or Spring Boot Starters.
⚠️ Hey! What is Spring Boot Starters?
Spring Boot Starters are a set of convenient dependency descriptors that you can include in your application. You get a one-stop-shop for all the Spring and related technology that you need, without having to hunt through sample code and copy paste loads of dependency descriptors. For example, if you want to get started using Spring and JPA for database access, just include the
spring-boot-starter-data-jpadependency in your project,and you are good to go.The starters contain a lot of the dependencies that you need to get a project up and running quickly and with a consistent, supported set of managed transitive dependencies.
ℹ️ Note
You can learn more about Spring Boot Starters here: https://docs.spring.io/spring-boot/docs/current/reference/htmlsingle/#using-boot-starter
For our case we will be using:
- Maven
- Java 8
- Spring Boot 1.5.x
And for the Dependencies we will choose:
- JPA
- H2
- Rest Repositories
- Actuator
- Lombok
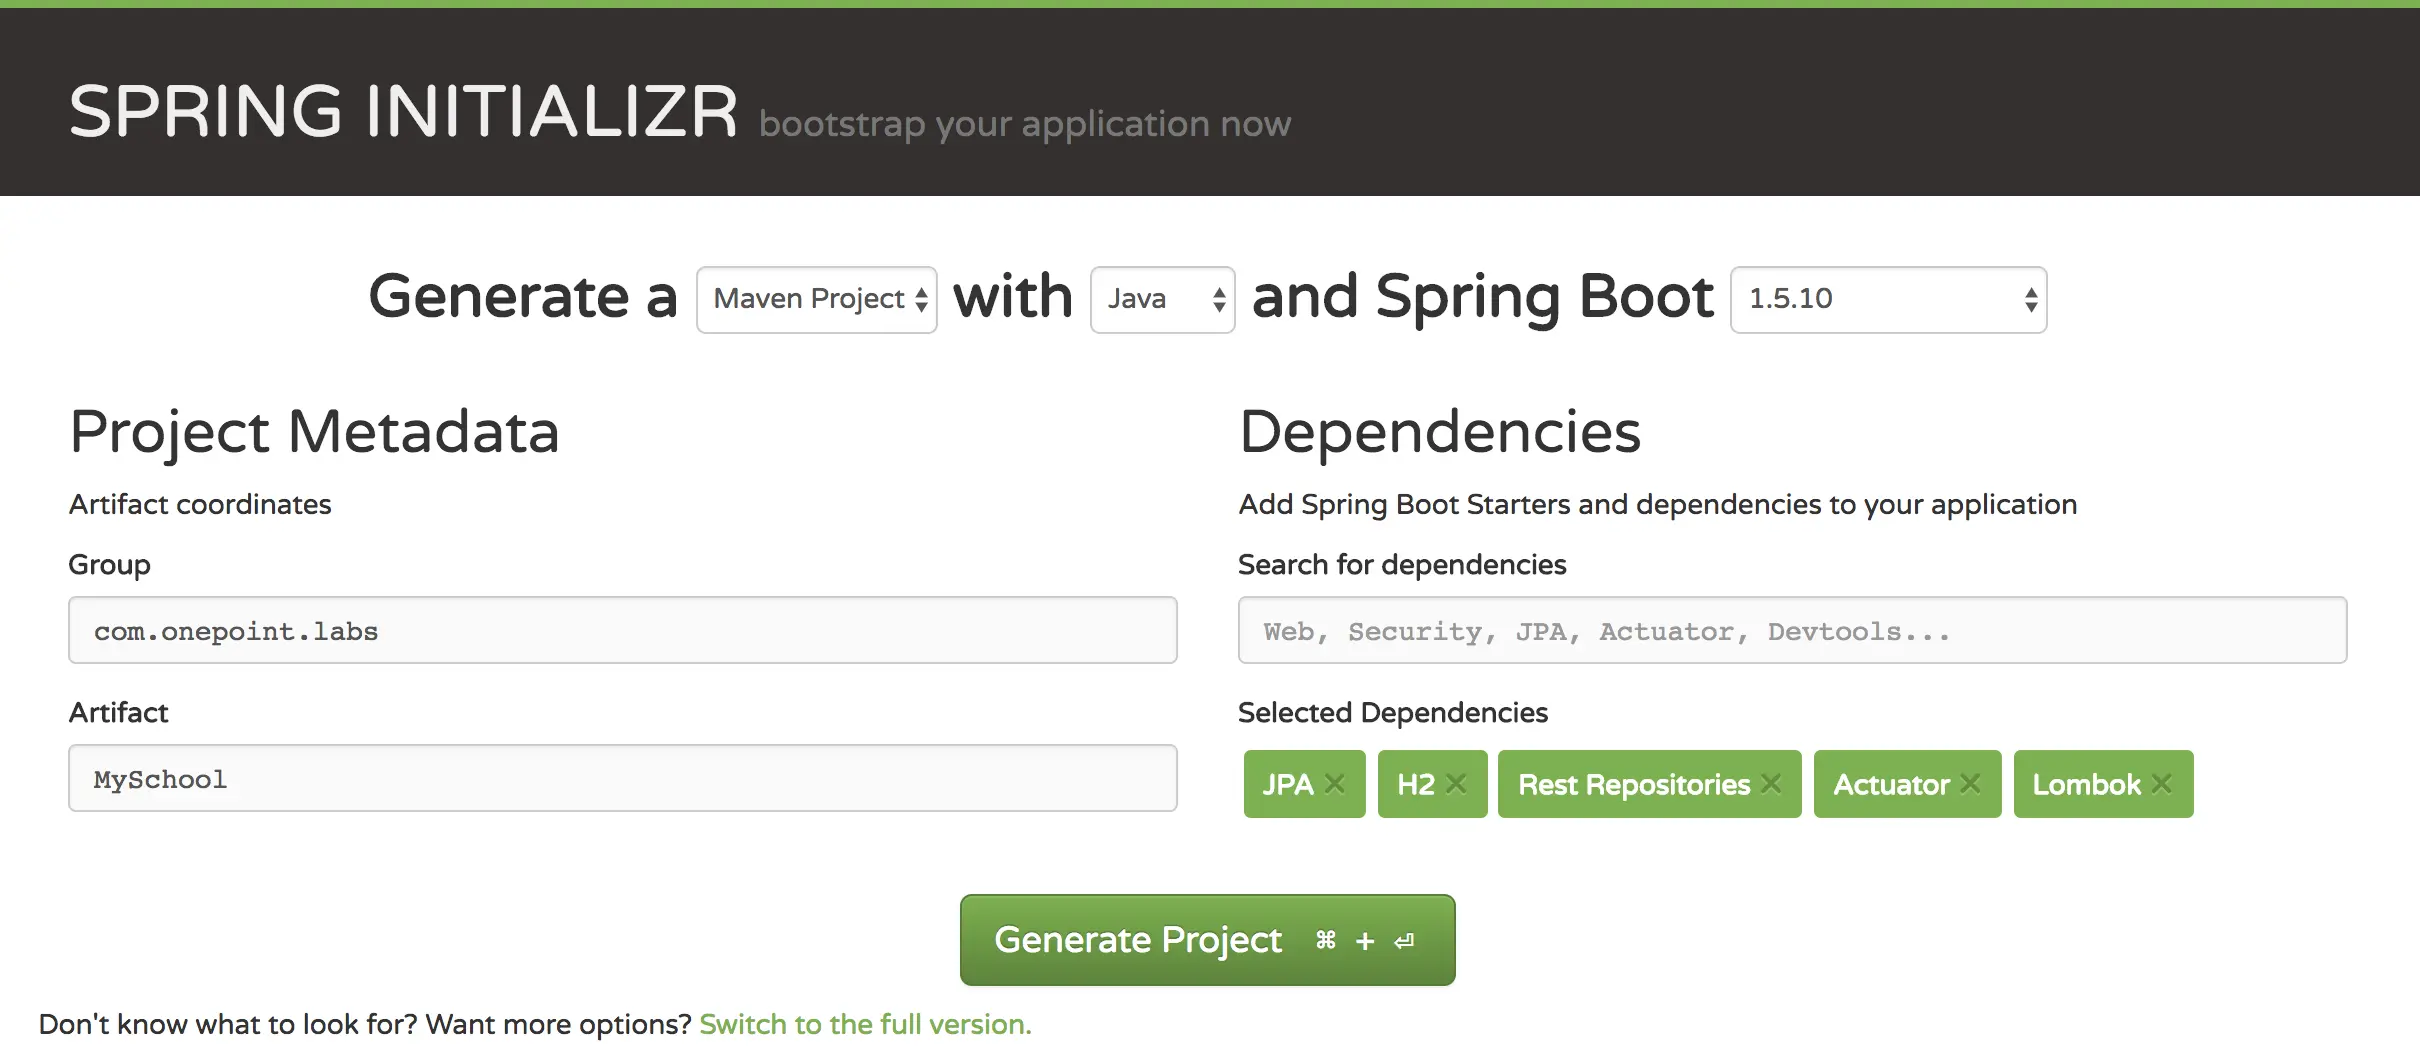
The resulting pom will be like:
| |
Now, we need to add the embedded databse configuration to the application.properties:
| |
Next, we will start the implementation of our Java components.
2. Presenting the domain
The domain of our application will just contain only one entity: Student.
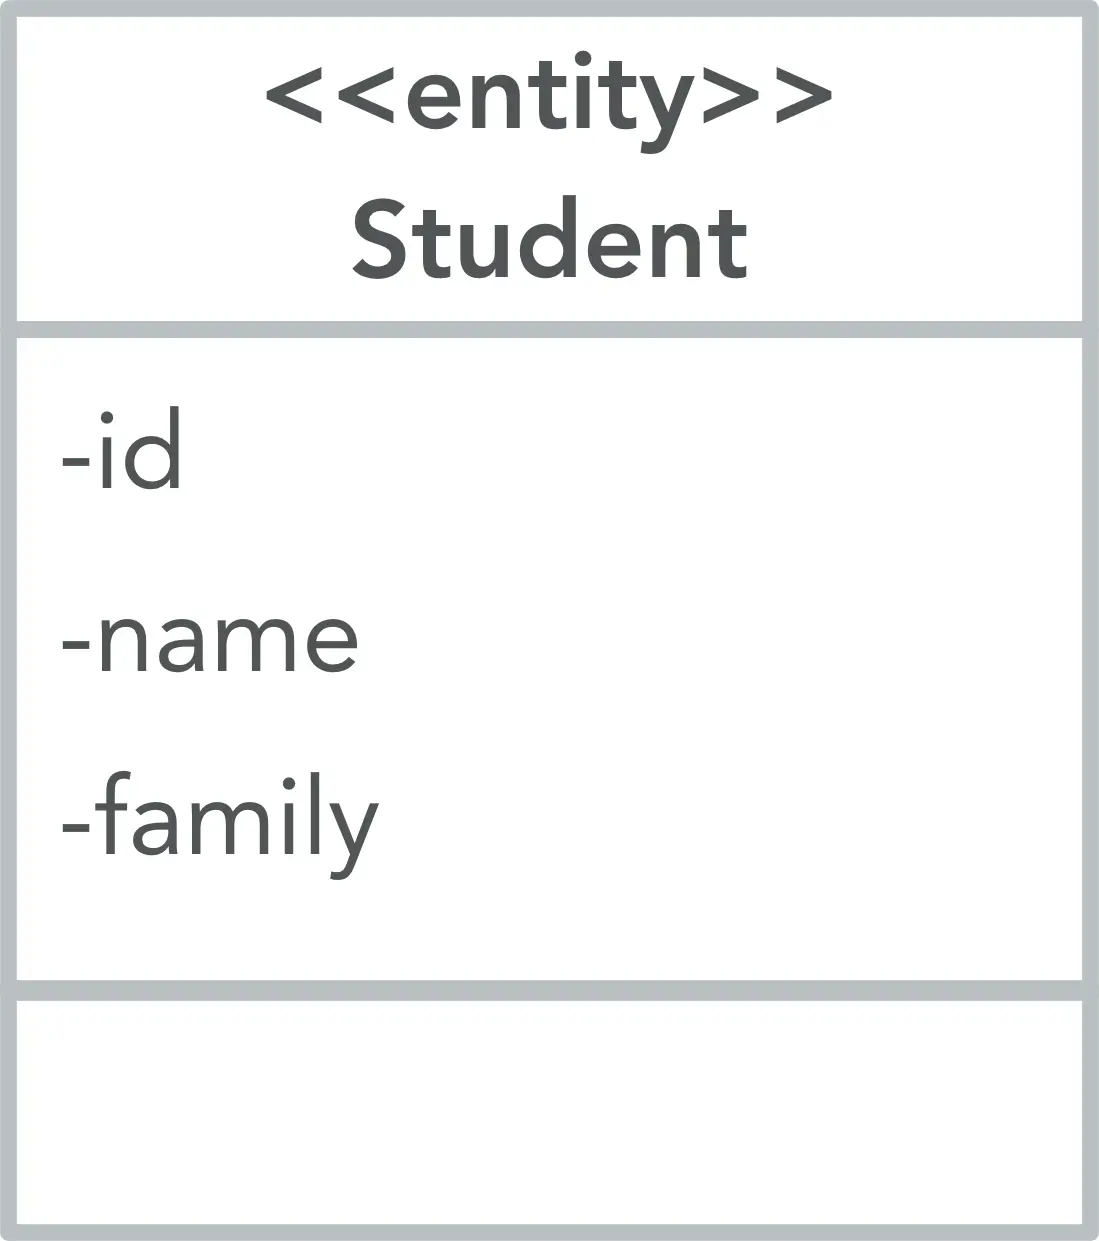
3. Implementing the domain
The Student entity will look like this:
| |
@Datagenerates all the boilerplate that is normally associated with simple POJOs (Plain Old Java Objects) and beans: getters for all fields, setters for all non-final fields, and appropriate toString, equals and hashCode implementations.
Next, we will implement the JPA Repository:
| |
- We are using this annotation to customize the REST endpoint.
- We are extending the
PagingAndSortingRepositoryInterface to get the paging & sorting features. - We are implementing custom JPA Repository methods using the special Spring Data Query DSL.
4. Adding the Swagger 2 Capabilities
Swagger 2 is an open source project used to describe and document RESTful APIs. Swagger 2 is language-agnostic and is extensible into new technologies and protocols beyond HTTP. The current version defines a set HTML, JavaScript and CSS assets to dynamically generate documentation from a Swagger-compliant API. These files are bundled by the Swagger UI project to display the API on browser. Besides rendering documentation, Swagger UI allows other API developers or consumers to interact with the API’s resources without having any of the implementation logic in place.
The Swagger 2 specification, which is known as OpenAPI specification has several implementations. We will be using the Springfox implementation in our project.
To enable the Swagger capabilities to our project, we will be:
- Adding the Maven Dependencies
- Adding the Java Configuration
The Maven Dependencies:
| |
For the Java Configuration, we need to create a Spring @Bean that configure Swagger in the application context.
| |
Also, we need to add the @EnableSwagger2 annotation to the SpringBootApplication Main Class. We also have to add the @Import({springfox.documentation.spring.data.rest.configuration.SpringDataRestConfiguration.class}) annotation, that enables the Springfox implementation to scan and parse the generated methods by Spring Data REST.
5. Run it !
To run the Spring Boot Application, you just run: mvn spring-boot:run
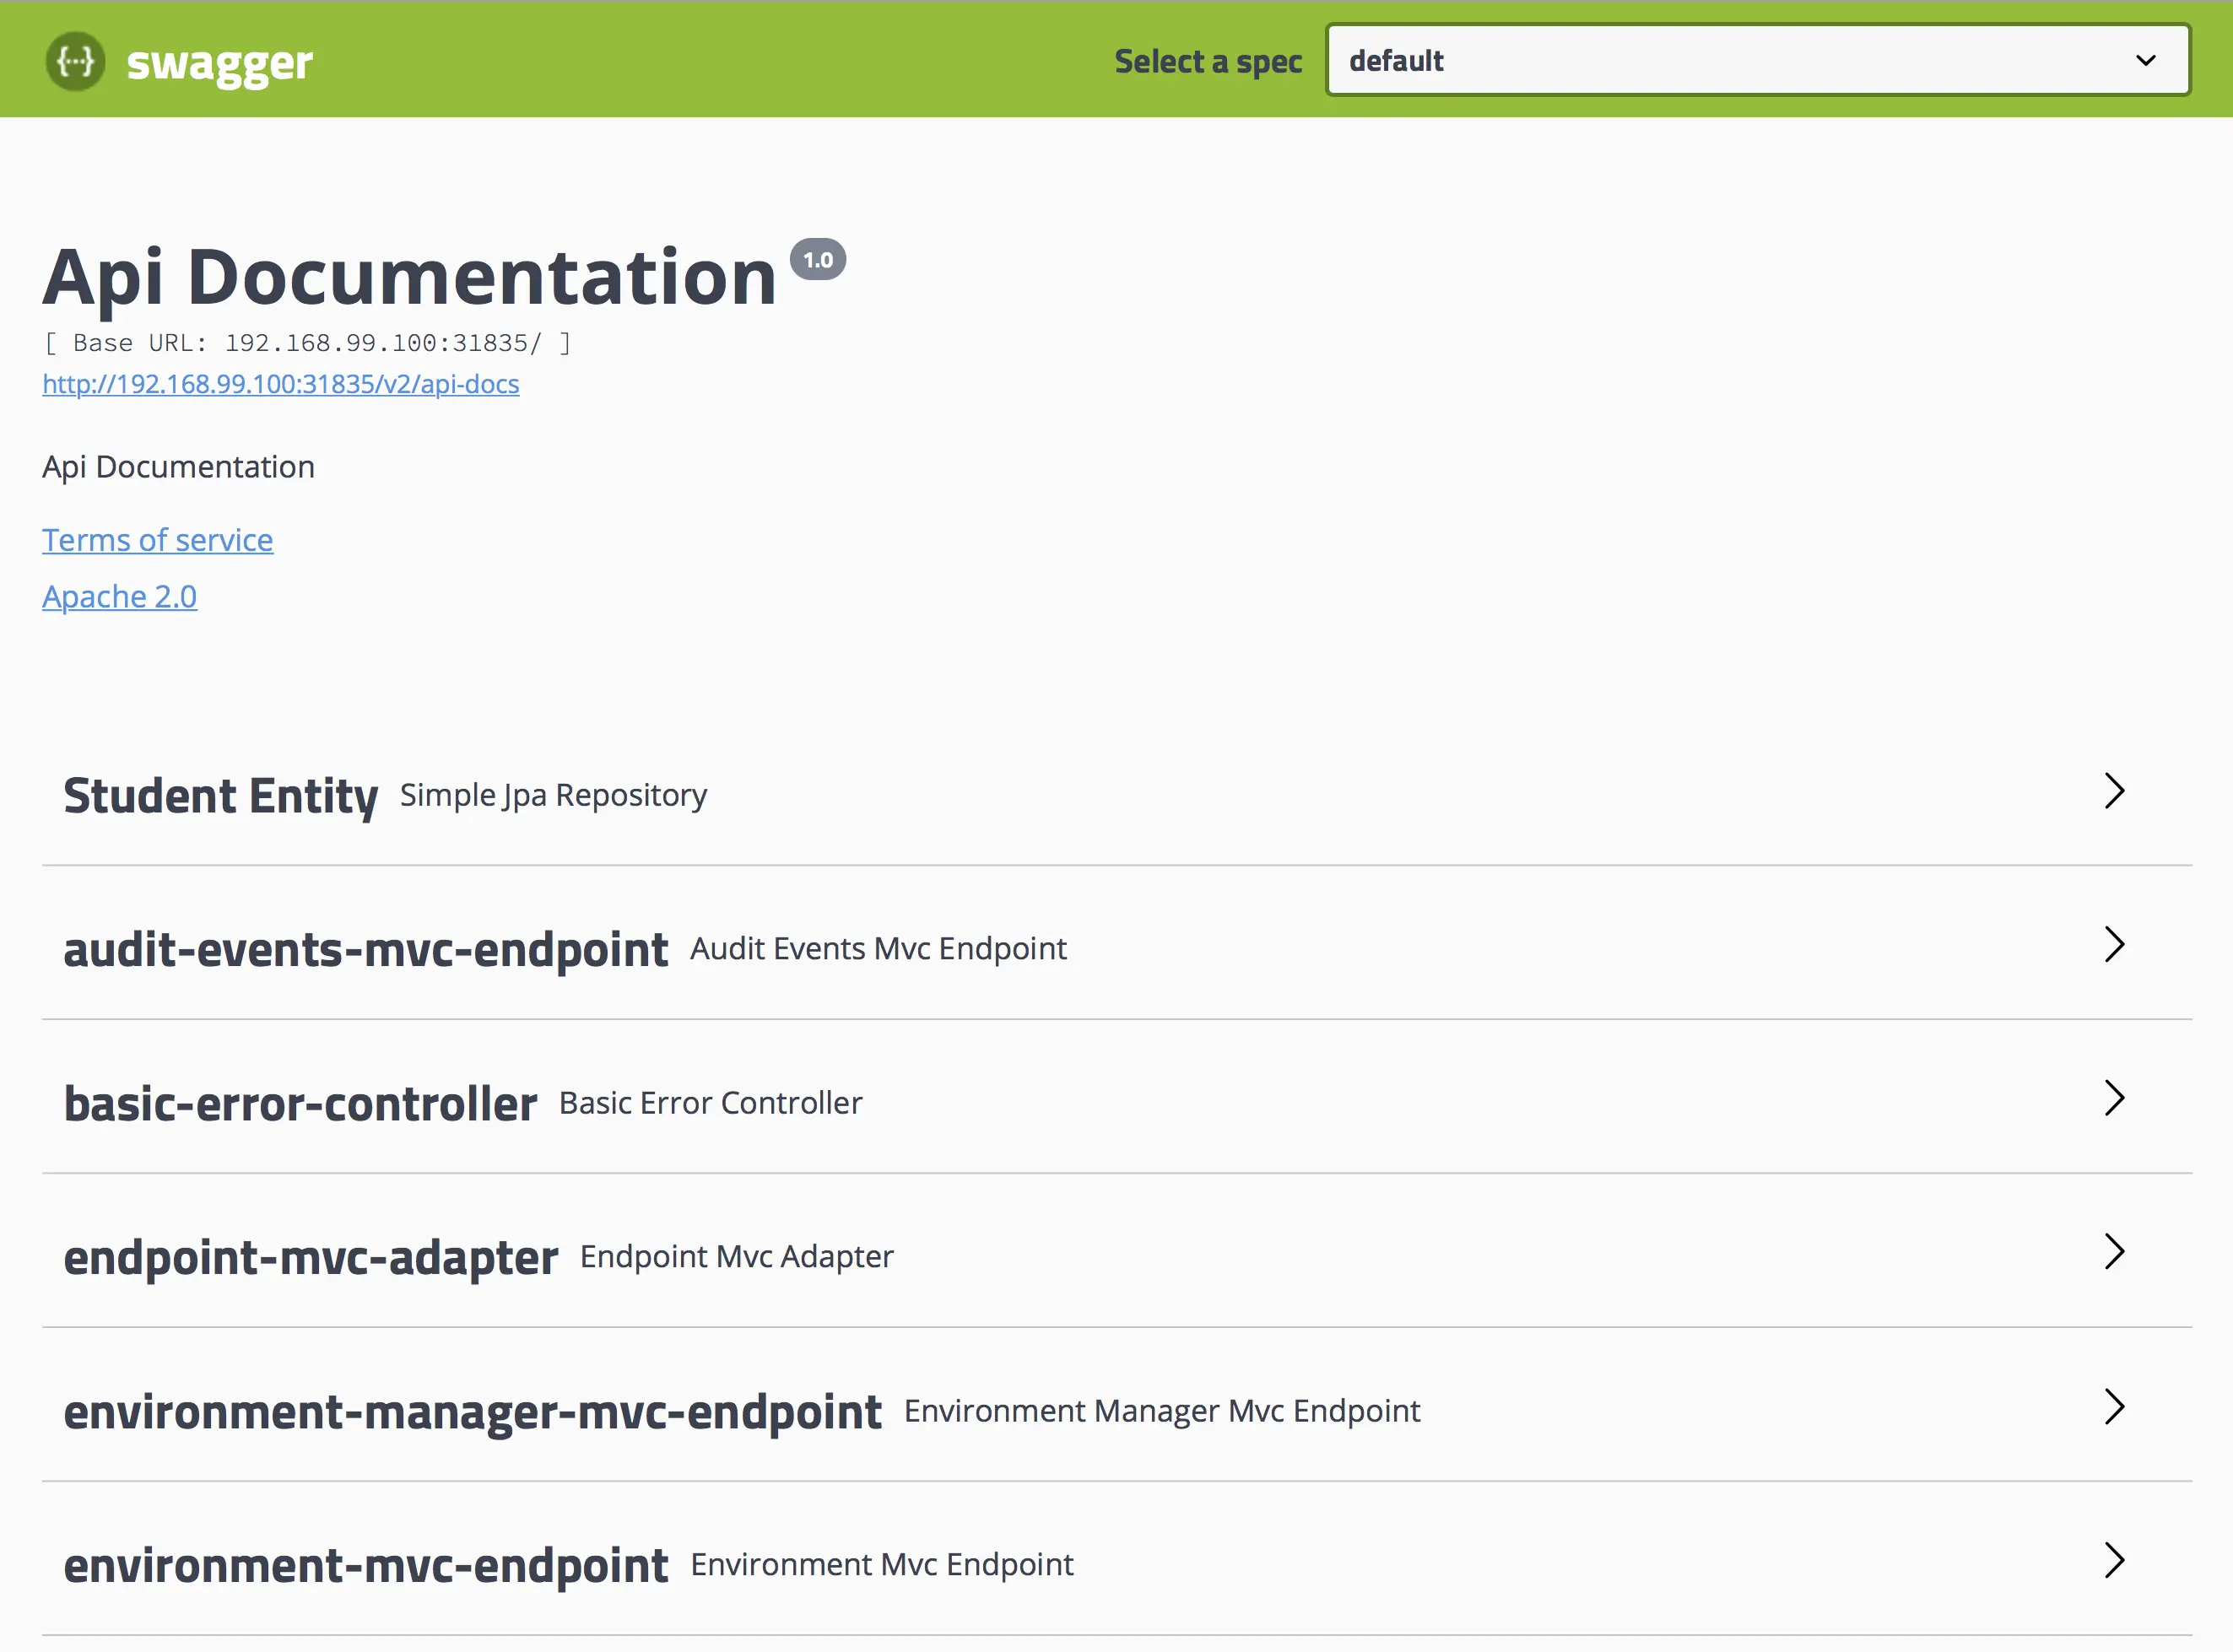
The application will be running on the 8080 port. To access the application, just go to http://localhost:8080, you will see this:
We will enjoy the game now: we will be using Swagger forms to insert some records.
To access the Swagger UI, just go to http://localhost:8080/swagger-ui.html#/

We will be using the Student Entity menu → POST operation called saveStudent → Try it out → in the form just mention the name and the family data that you want to store. For example:
| |
The screen will be like this:
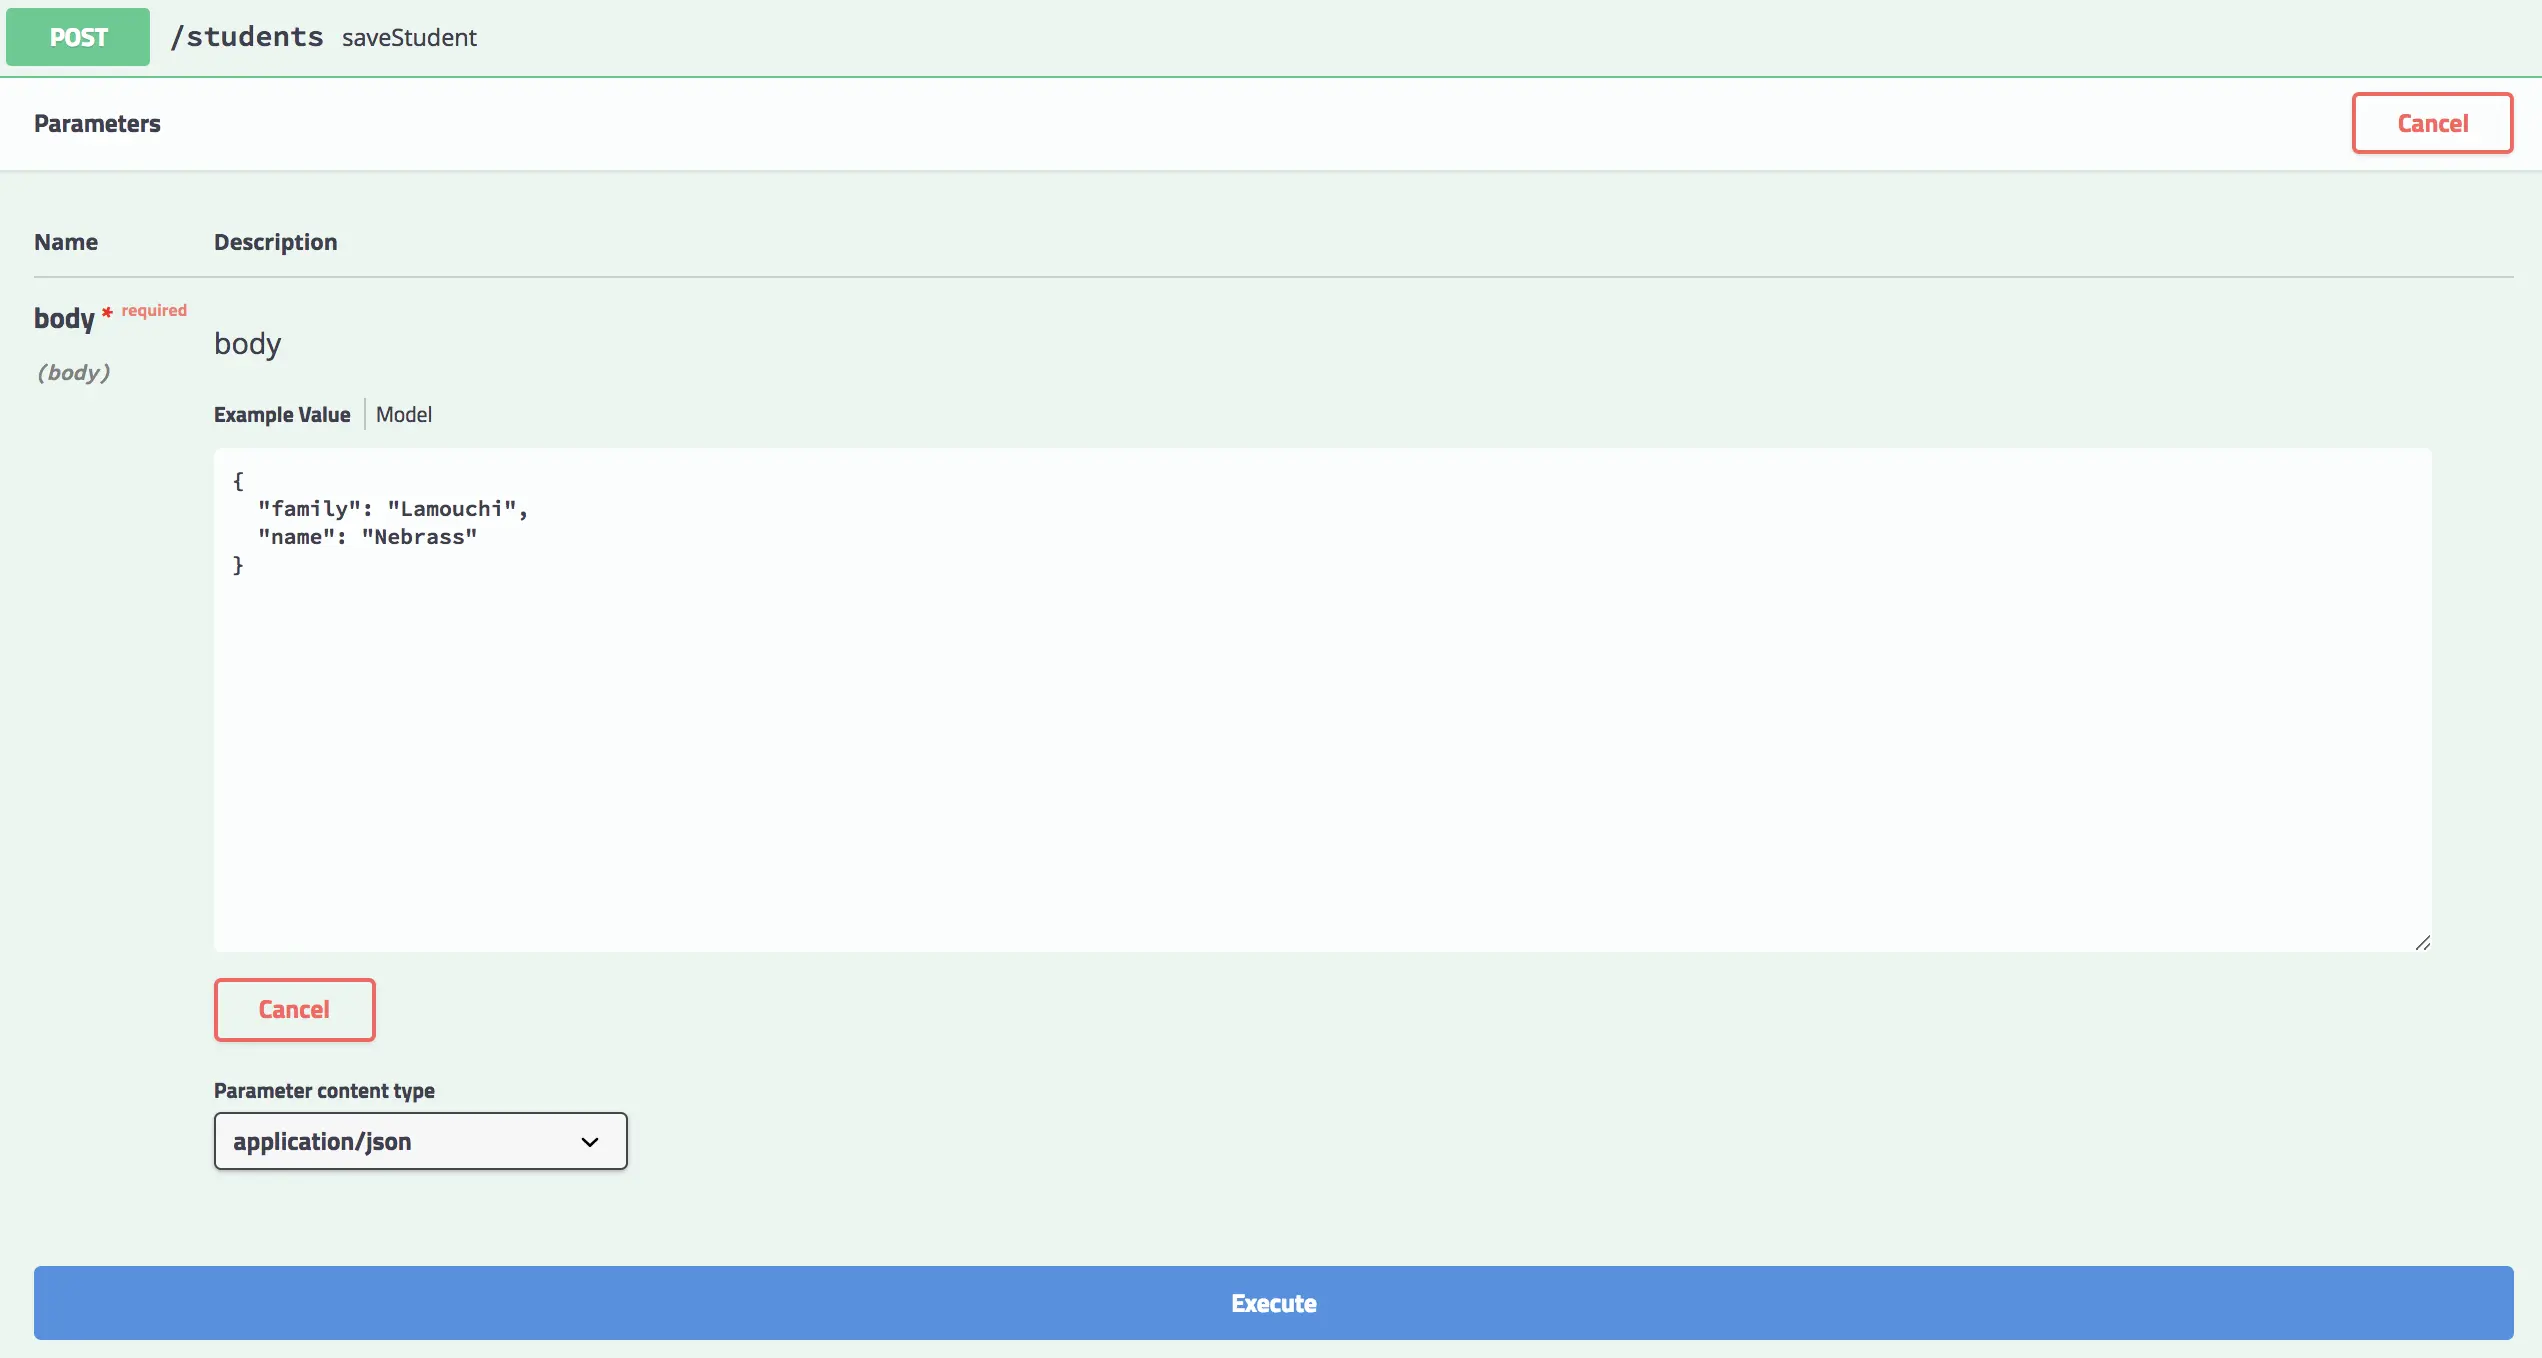
Just hit Execute and the Responde body will be somthing like this:
| |
And the Response headers will look like this:
| |
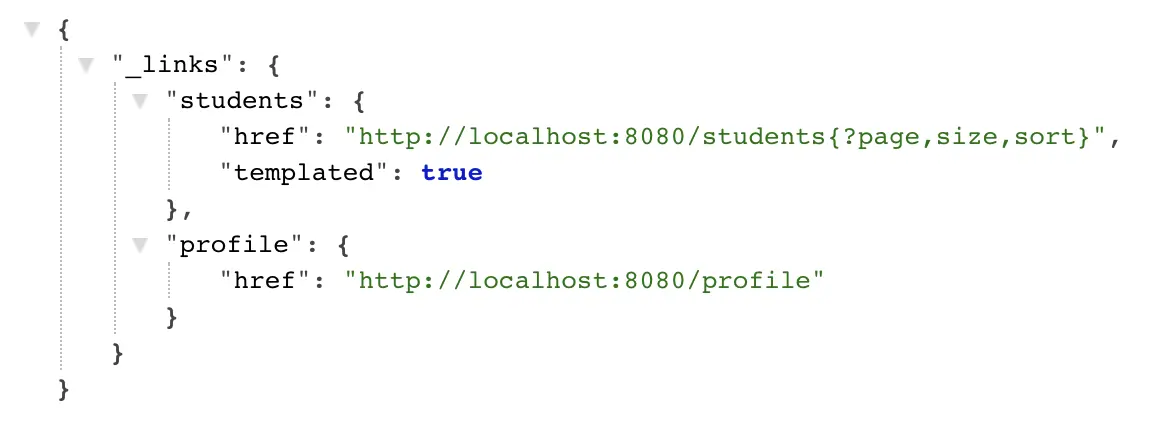
We can use the findAllStudents menu of the Swagger UI to list all the students in the DB, to be sure that the record has been successfully created:
The Response body of the findAll operation will look like:
| |
💡 Tip
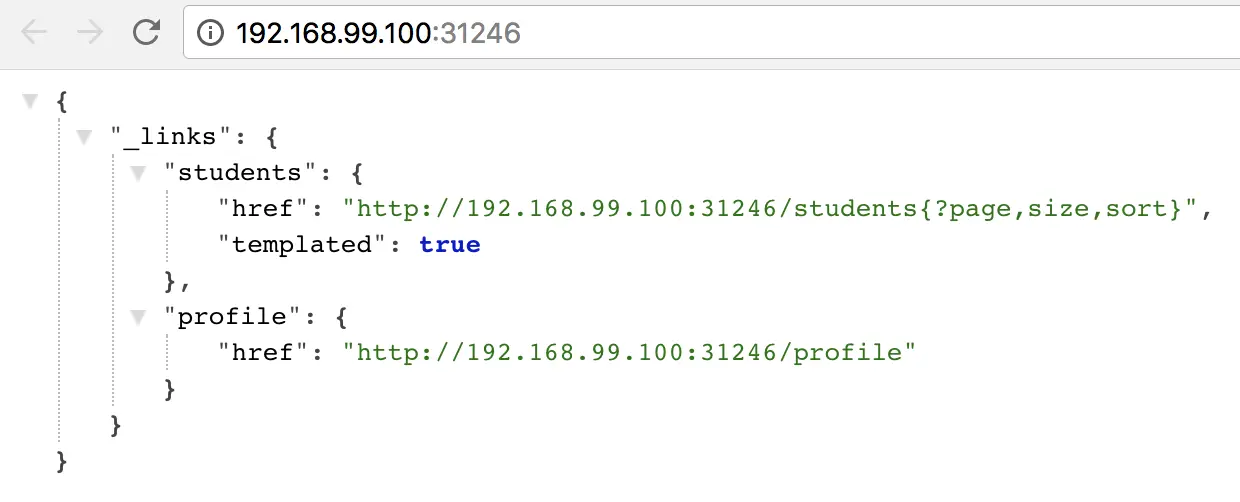
You can simply go to http://localhost:8080/students and you will get all the students persisted to the DB.
III. Moving to the Containers Era
To deploy our (so huge, so big) application 😂, we will be using Docker. We will deploy our code in a container so we can enjoy the great feature provided by Docker.
Docker has become the standard to develop and run containerized applications.
This is great ! Using Docker is quitely simple, especially in development stages. Deploying containers in the same server (docker-machine) is simple, but when start thinking to deploy many containers to many servers, things become complicated (managing the servers, managing the container state, etc.).
Here come the orchestration system, which provides many features like orchestrating computing, networking and storage infrastructure on behalf of user workloads
- Scheduling: matching containers to machines based on many factors like resources needs, affinity requirements…
- Replications
- Handling failures
- Etc…
For our tutorial, we will choose Kubernetes, the star of container orchestration.
1. What is Kubernetes ?
Kubernetes (Aka K8s) was a project spun out of Google as a open source next-gen container scheduler designed with the lessons learned from developing and managing Borg and Omega.
Kubernetes is designed to have loosely coupled components centered around deploying, maintaining and scaling applications. K8s abstracts the underlying infrastructure of the nodes and provides a uniform layer for the deployed applications.
1.1 Kubernetes Architecture
In the big plan, a Kubernetes cluster is composed of two items:
- Master Nodes: The main control plane for Kubernetes. It contains an API Server, a Scheduler, a Controller Manager (K8s cluster manager) and a datastore to save the cluster state called Etcd.
- Worker Nodes: A single host, physical or virual machine, capable of running POD. They are managed by the Master nodes.
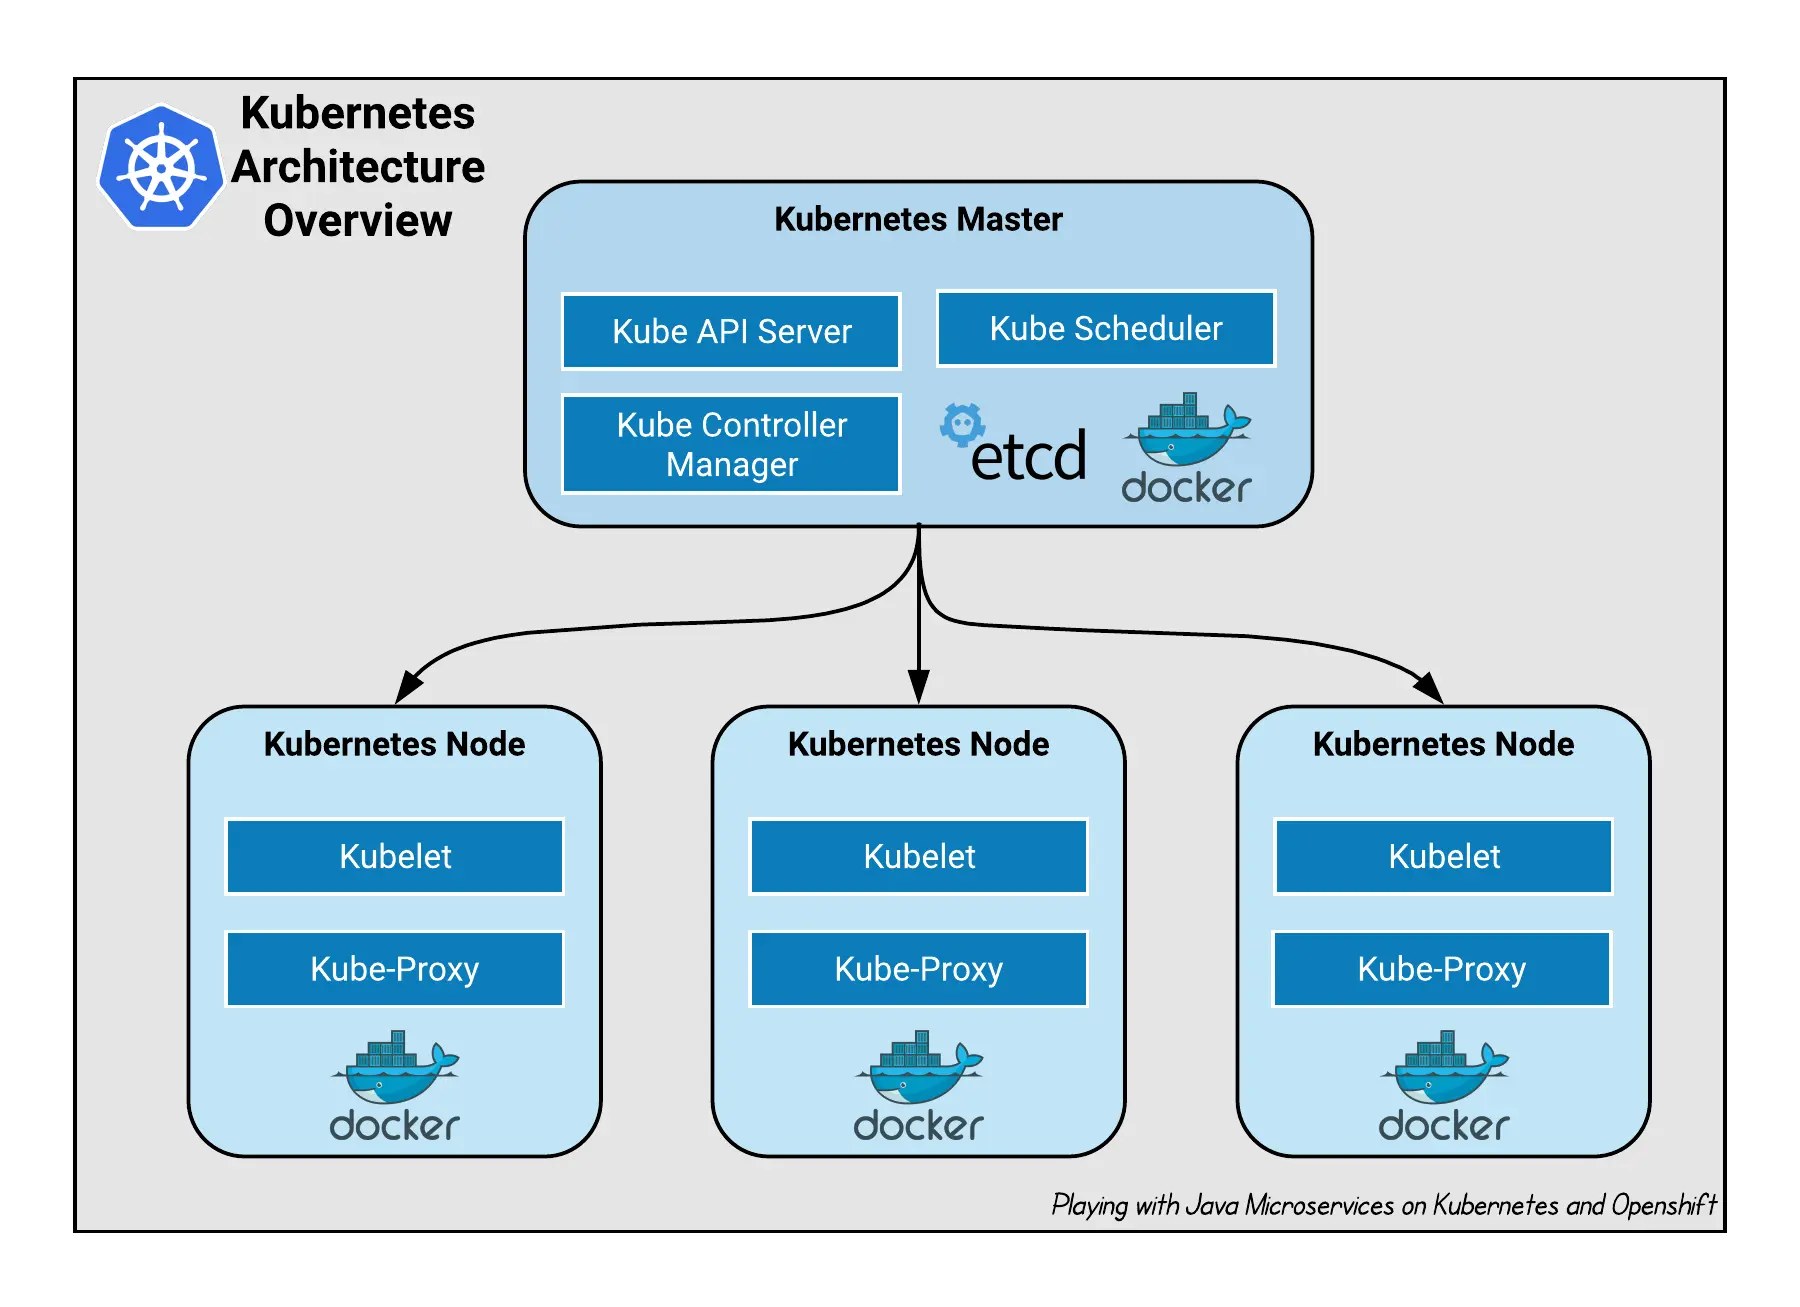
Let’s have a look inside a Master node:
- (Kube) API-Server: allows the communication, thru REST APIs, between the Master node and all its clients such as Worker Nodes, kube-cli, …
- (Kube) Scheduler: a policy-rich, topology-aware, workload-specific function that significantly impacts availability, performance, and capacity to assign a Node to a newly created POD.
- (Kube) Controller Manager: a daemon that embeds the core control loops shipped with Kubernetes. A control loop is a permenent listener that regulates the state of the system. In Kubernetes, a controller is a control loop that watches the shared state of the cluster through the API-Server and makes changes attempting to move the current state towards the desired state.
- Etcd: a strong, consistent and highly available key-value store used for persisting the cluster state.
Then, what about a Worker node?
- Kubelet: an agent that runs on each node in the cluster. It makes sure that containers are running in a POD.
- Kube-Proxy: enables the Kubernetes service abstraction by maintaining network rules on the host and perform networking actions.
💡 Tip
The Container Runtime that we will user is Docker. Kubernetes is compatible with many others like Cri-o, Rkt, …
1.2 Kubernetes Core Concepts
The K8s ecosystem covers many concepts and components. We will try to introduce them briefly.
Kubectl
The kubectl is a command line interface for running commands against Kubernetes clusters.
Cluster
A collection of hosts that aggregate their resources (CPU, Ram, Disk, …) into a usable pool.
Namespace
A logical partitioning capability that enable one Kubernetes cluster to be used by multiple users, teams of users, or a single user with multiple applications without concern for undesired interaction. Each user, team of users, or application may exist within its Namespace, isolated from every other user of the cluster and operating as if it were the sole user of the cluster.
List all Namespace:
| |
Label
Key-value pairs that are used to identify and select related sets of objects. Labels have a strict syntax and defined character set.
Annotation
Key-value pairs that contain non-identifying information or metadata. Annotations do not have the the syntax limitations as labels and can contain structured or unstructured data.
Selector
Selectors use labels to filter or select objects. Both equality-based (=, ==, !=) or simple key-value matching selectors are supported.
Use case of Annotations, Labels and Selectors.
| |
Pod
It is the basic unit of work for Kubernetes. Represent a collection of containers that share resources, such as IP addresses and storage.
Pod Example.
| |
To list all Pods:
| |
ReplicationController
A framework for defining pods that are meant to be horizontally scaled. A replication controller includes a pod definition that is to be replicated, and the pods created from it can be scheduled to different nodes.
ReplicationController Example.
| |
List all ReplicationControllers:
| |
ReplicaSet
An upgraded version of ReplicationController that supports set-based selectors.
ReplicaSet Example.
| |
List all ReplicaSets:
| |
Deployment
Includes a Pod template and a replicas field. Kubernetes will make sure the actual state (amount of replicas, Pod template) always matches the desired state. When you update a Deployment it will perform a “rolling update”.
Deployment Example.
| |
List all Deployments:
| |
StatefulSet
A controller tthat aims to manage Pods that must persist or maintain state. Pod identity including hostname, network, and storage will be persisted.
StatefulSet Example.
| |
List all StatefulSets:
| |
DaemonSet
Ensures that an instance of a specific pod is running on all (or a selection of) nodes in a cluster.
DaemonSet Example.
| |
List all DaemonSets:
| |
Service
Define a single IP/port combination that provides access to a pool of pods. It uses label selectors to map groups of pods and ports to a cluster-unique virtual IP.
Service Example.
| |
List all Services:
| |
Ingress
An ingress controller is the primary method of exposing a cluster service (usually http) to the outside world. These are load balancers or routers that usually offer SSL termination, name-based virtual hosting etc…
Ingress Example.
| |
List all Ingress:
| |
Volume
Storage that is tied to the Pod Lifecycle, consumable by one or more containers within the pod.
PersistentVolume
A PersistentVolume (PV) represents a storage resource. PVs are commonly linked to a backing storage resource, NFS, GCEPersistentDisk, RBD etc. and are provisioned ahead of time. Their lifecycle is handled independently from a pod.
List all PersistentVolumes:
| |
PersistentVolumeClaim
A PersistentVolumeClaim (PVC) is a request for storage that satisfies a set of requirements. Commonly used with dynamically provisioned storage.
List all PersistentVolumeClaims:
| |
StorageClass
Storage classes are an abstraction on top of an external storage resource. These will include a provisioner, provisioner configuration parameters as well as a PV reclaimPolicy.
List all StorageClasses:
| |
Job
The job controller ensures one or more pods are executed and successfully terminates. It will do this until it satisfies the completion and/or parallelism condition.
List all Jobs:
| |
CronJob
An extension of the Job Controller, it provides a method of executing jobs on a cron-like schedule.
List all CronJobs:
| |
ConfigMap
Externalized data stored within Kubernetes that can be referenced as a commandline argument, environment variable or injected as a file into a volume mount. Ideal for implementing the External Configuration Store pattern.
List all ConfigMaps:
| |
Secret
Functionally identical to ConfigMaps, but stored encoded as base64, and encrypted at rest (if configured).
List all Secrets:
| |
2. Run Kubernetes locally
For our tutorial we will not build a real Kubernetes Cluster. We will use Minikube.
Minikube is a tool that makes it easy to run Kubernetes locally. Minikube runs a single-node Kubernetes cluster inside a VM on your laptop for users looking to try out Kubernetes or develop with it day-to-day.
For Minikube installation : https://github.com/kubernetes/minikube
After the installation, to start Minikube:
| |
The minikube start command creates a kubectl context called minikube. This context contains the configuration to communicate with your minikube cluster.
Minikube sets this context to default automatically, but if you need to switch back to it in the future, run:
kubectl config use-context minikube
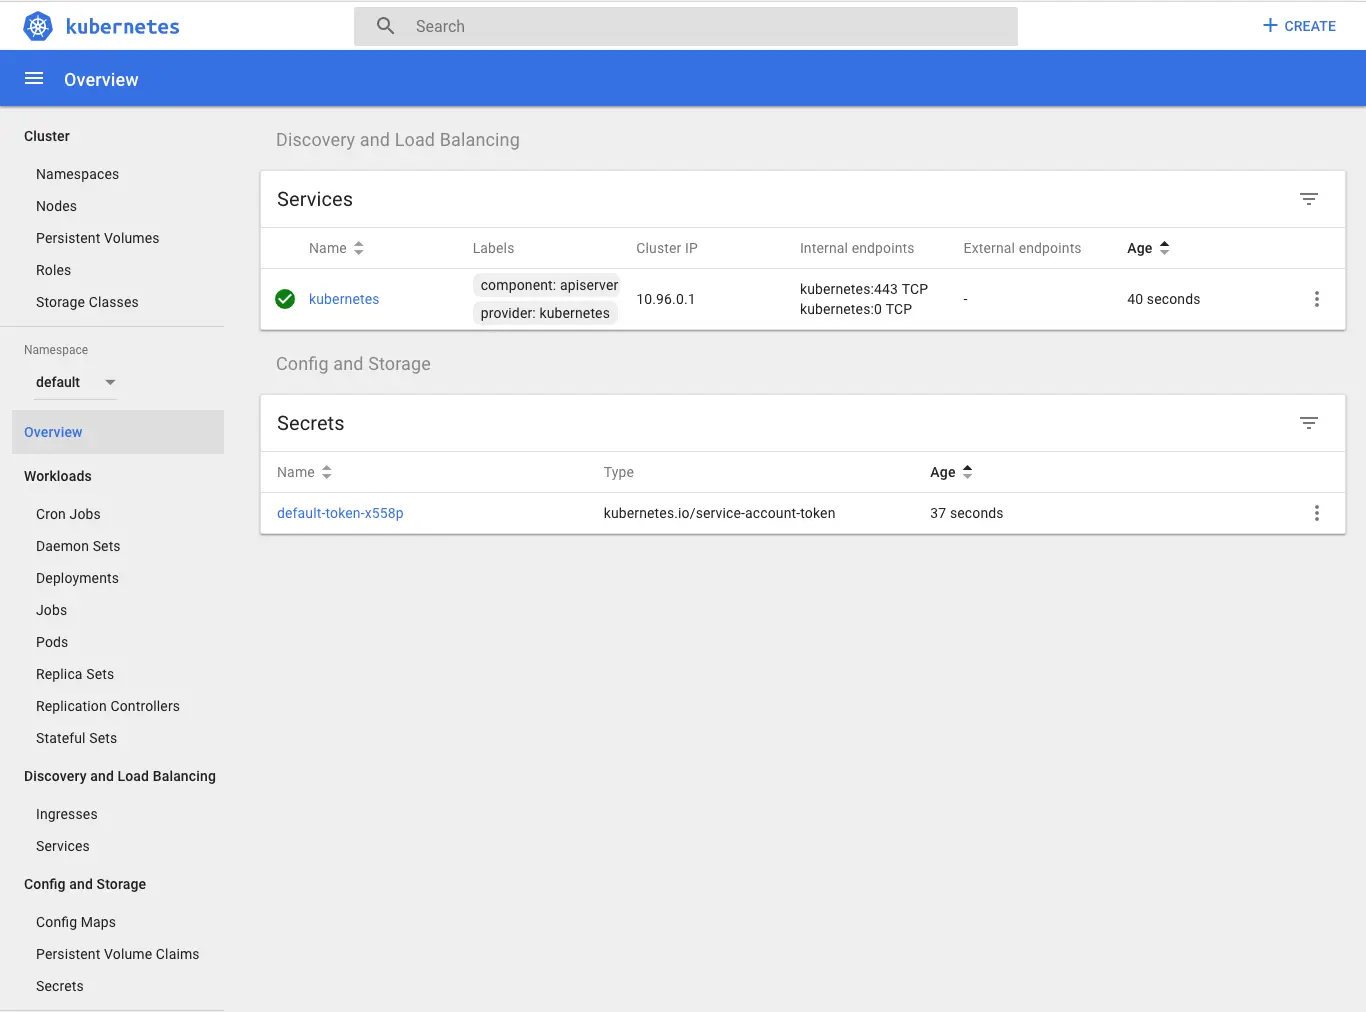
To access the Kubernetes Dashboard:
| |
The Dashboard will be opened in your default browser:
The minikube stop command can be used to stop your cluster. This command shuts down the minikube virtual machine, but preserves all cluster state and data. Starting the cluster again will restore it to it’s previous state.
The minikube delete command can be used to delete your cluster. This command shuts down and deletes the minikube virtual machine. No data or state is preserved.
3. Refactoring the application
Now we want to move from H2 Databse to PostgreSQL. So we have to configure the application to use it by mentioning some properties like JDBC driver, url, username, password… in the application.properties file and to add the PostgreSQL JDBC Driver in the pom.xml.
First of all, we start by adding this dependency to our pom.xml:
| |
Next, we do some modifications to the application.properties:
| |
We have used environment properties placeholders:
POSTGRES_SERVICE: Host of PostgreSQL DB ServerPOSTGRES_DB_NAME: PostgreSQL DB NamePOSTGRES_DB_USER: PostgreSQL UsernamePOSTGRES_DB_PASSWORD: PostgreSQL Password
We will extract these values from a Kubernetes ConfigMap and Secret objects.
Create the ConfigMap
We need to create the ConfigMap:
| |
We can check the created ConfigMap:
| |
The output will look like this:
| |
Create the Secret
Next we create the Secret:
| |
We can check the created Secret:
| |
The output will look like this:
| |
- The credentials are encoded as base64. This is to protect the secret from being exposed accidentally to someone looking or from being stored in a terminal log.
- From kubernetes’s point of view the contents of this Secret is unstructured: it can contain arbitrary key-value pairs.
Deploy PostgreSQL to Kubernetes
As the configuration is centralized and stored in the Kubernetes Cluster, we can share them between the Spring Boot Application and the PostgreSQL Service that we will create now.
I already prepared the PostgreSQL resource file, in the src/main/assets/. This YAML file contains a Deployment and a Service resources.
We loaded the properties from our ConfigMap and Secret.
The content of postgres.yml:
| |
- We will use the postgres:9.6.5 image
- The
envblock is used to load data in the container environment. - Create an environment variable with a value loaded from a
keycalleddb.user.namein thesecretcalleddb-security. - Create an environment variable with a value loaded from a
keycalleddb.user.passwordin thesecretcalleddb-security. - Create an environment variable with a value loaded from a
keycalledpostgres.db.namein theconfigMapcalledpostgres-config.
To apply this resource file to Kubernetes, we can do:
| |
The output will be:
| |
We can check the created Deployment:
| |
The output will look like this:
| |
We can check the created Service:
| |
The output will look like this:
| |
In this output, there is something interesting: the port and the target port:
- The port this service will be available on
- The container port the service will forward to
We already mentionned the port in the spring.datasource.url property.
- What do you think if we use the powerful features of Kubernetes to resolve this port dynamically?
- Ok but how? :)
After creating these resources, the effective properties will like this :
| |
The Datasource URL is pointing to a host called postgresql. The resolution of the hostname to IP is done by Kubernetes.
If we check the postgresql service:
| |
There is an other cool feature in Kubernetes, we can fetch data related to the service itself. We can for example get the port associated to this service.
For example:
${postgresql.service.host}will be resolved to10.111.244.143.${postgresql.service.port}will be resolved to5432.
We can do it better ^^) we can merge the environment variables in the great holders that will be resolved by Kubernetes. They will become:
${postgresql.service.host}can be written${${POSTGRES_SERVICE}.service.host}${postgresql.service.port}can be written${${POSTGRES_SERVICE}.service.port}
In this way, the internal placeholder will be resolved by the environment variable provided by the ConfigMap, and the external placeholder will be resolved by Kubernetes.
The resulting application.properties will look like:
| |
Now, we are ConfigMaps addicts :) we will host our application.properties in a ConfigMap in Kubernetes. To do it, just do:
| |
Now that the application.properties, how can our Spring Boot application use them?
The answer is so easy: the Spring Cloud Kubernetes plugin.
What is Spring Cloud Kubernetes
The Spring Cloud Kubernetes plug-in implements the integration between Kubernetes and Spring Boot. It provides access to the configuration data of a ConfigMap using the Kubernetes API.
It make so easy to integrate Kubernetes ConfigMap directly with the Spring Boot externalized configuration mechanism, so that Kubernetes ConfigMaps behave as an alternative property source for Spring Boot configuration.
To enable the great features of the plugin:
Add the Maven Dependency:Add this dependency to the
pom.xml:1 2 3 4 5<dependency> <groupId>io.fabric8</groupId> <artifactId>spring-cloud-starter-kubernetes</artifactId> <version>0.1.6</version> </dependency>Create the Bootstrap file:Create a new file
bootstrap.propertiesundersrc/main/resources:1 2spring.application.name=${project.artifactId} spring.cloud.kubernetes.config.name=app-config- The
${project.artifactId}will be parsed and populated bymaven-resources-plugin, that you will find in thepom.xmlof the sample project hosted in the Github repository of this tutorial. - The name of the ConfigMap where we stored our great
application.properties.
- The
That’s it! The Spring Cloud Kubernetes is correctly integrated to our application. When we deploy our application to Kubernetes, it will use the application.properties stored in the ConfigMap app-config.
You say deploy? Ok but how to do it?
Deploy it to Kubernetes
The deployment?! A dedicated full story, that can have many chapters. But we will try to keep it short and simple.
By definition, Kubernetes is a container orchestration solution. So deploying an application to Kubernetes means :
- Containerizing the application: creating an image embedding the application.
- Preparing the deployment resources (Deployment, ReplicaSet, etc…).
- Deploying the container to Kubernetes.
These steps can take some time to be done, even if we try to automate this process, it will take us long time to implement it, and it will take more time to cover all the cases and variants of the apps.
As these tasks are so heavy, we need some tool that do all of this for easy.
Here comes the super powerfull tool: Fabric8-Maven-Plugin.
![]()
Fabric8-Maven-Plugin is a one-stop-shop for building and deploying Java applications for Docker, Kubernetes and OpenShift. It brings your Java applications on to Kubernetes and OpenShift. It provides a tight integration into maven and benefits from the build configuration already provided. It focuses on three tasks:
- Building Docker images
- Creating OpenShift and Kubernetes resources
- Deploy application on Kubernetes and OpenShift
The plugin will do all the heavy tasks ! Yes ! He will ! :)
It can be configured very flexibly and supports multiple configuration models for creating:
- Zero Configuration for a quick ramp-up where opinionated defaults will be pre-selected.
- Inline Configuration within the plugin configuration in an XML syntax.
- External Configuration templates of the real deployment descriptors which are enriched by the plugin.
- Docker Compose Configuration provide Docker Compose file and bring up docker compose deployments on a Kubernetes/OpenShift cluster.
To enable fabric8-maven-plugin on your project just add this to the plugins sections of your pom.xml:
| |
Now in order to use fabric8-maven-plugin to build or deploy, make sure you have a Kubernetes cluster up and running.
The fabric8-maven-plugin supports a rich set of goals for providing a smooth Java developer experience. You can categorize these goals as follows:
- Build goals are used to create and manage the Kubernetes build artifacts like Docker images.
fabric8:build: Build Docker imagesfabric8:resource: Create Kubernetes resource descriptorsfabric8:push: Push Docker images to a registryfabric8:apply: Apply resources to a running cluster
- Development goals are used in deploying resource descriptors to the development cluster.
fabric8:run: Run a complete development workflow cyclefabric8:resource→fabric8:build→fabric8:applyin the foreground.fabric8:deploy: Deploy resources descriptors to a cluster after creating them and building the app. Same asfabric8:runexcept that it runs in the background.fabric8:undeploy: Undeploy and remove resources descriptors from a cluster.fabric8:watch: Watch for doing rebuilds and restarts
If you want to integrate the goals in the maven lifecycle phases, you can do it easily:
| |
ℹ️ Note
For lazyness purposes :p I will be referencing the fabric8-maven-plugin as f8mp.
⚠️ Warning
The f8mp needs to access to the Docker environment of Minikube, to do this just start the command
eval $(minikube docker-env). Without this command, Kubernetes will not find the Docker images built by f8mp.
Now when we do mvn clean install for example, the plugin will build the docker images and will generate the Kubernetes resource descriptors in the ${basedir}/target/classes/META-INF/fabric8/kubernetes directory.
Let’s check the generated resource descriptors.
⚠️ Warning
Wait ! Wait! We said that we will pass the ConfigMaps to the Spring Boot application. Where is that?!
Yep! Before generating our resources descriptors, we have to tell this to f8mp.
f8mp has an easy way to do this: the plugin can handle some Resource Fragments. It’s a piece of YAML code located in the src/main/fabric8 directory. Each resource get is own file, which contains some skeleton of a resource description. The plugin will pick up the resource, enriches it and then combines all the data. Within these descriptor files you are can freely use any Kubernetes feature.
In our case, we will deliver in the Resource Fragment the configuration of the environment variables to the Pod, where our Spring Boot Application will be executed. We will use a fragment of a Deployment, which will look like this:
| |
- The name of our Deployment and the container.
- The environment variables that we are creating and populating from the ConfigMap and Secret.
Now, when the f8mp will try to generate the resources descriptors, it will find this resource fragment, combine it with the other data. The resulting output will be coherent with the fregment that we already provided.
Let’s try it. Just run mvn clean install:
| |
- Generating the resources descriptors based on the detected configuration: Spring Boot application that is using the port 8080 with existing Actuator endpoints.
- Building the Docker image in Kubernetes mode (locally and not like the Openshift mode, which uses the Openshift S2I Mechanism for the build).
After building our project, we got these files in the ${basedir}/target/classes/META-INF/fabric8/kubernetes directory:
- my-school-deployment.yml
- my-school-svc.yml
Let’s check the Deployment:
| |
- Generated annotations that holds many usefull data, like the
git-commitid or thegit-branch - Labels section holds the Maven Project
groupId,artifactIdandversioninformation. Add to that, a labelprovider=fabric8to tell you that this data is generated by f8mp - The Docker Image, generated and built by f8mp. The suffix snapshot-180327-003059-0437 is the default format to assign a version tag.
- A liveness probe checks if the container in which it is configured is still up.
- A readiness probe determines if a container is ready to service requests.
💡 Tip
The liveness and readiness probes are generated because the f8mp has detected that the Spring-Boot-Actuator library in the classpath.
At this point, we can deploy our application just using the command mvn fabric8:apply, the output will look like:
| |
We can check all the resources that exists on our cluster
| |
This command will list all the resources in the default namespace. The output will be something:
| |
💡 Tip
We can list all these resources on the K8s Dashboard.
Wow! Yes, these resources have been created during the steps that we did before :) Good job !
5. It works ! Hakuna Matata !
It’s done ^^) we deployed the application and all its required resources; but how can we access the deployed application?
The application will be accessible thru the Kubernetes Service object called myschool.
Let’s check what is the service myschool, type kubectl get svc myschool, the output will be:
| |
The type of our service is ClusterIP. What is a ClusterIP ?
ClusterIP is the default ServiceType. It exposes the service on a cluster-internal IP so it will be only reachable from within the cluster.
So we cannot use this ServiceType because we need our service to be reachable from outisde the cluster. So is there any other type of service?
Yes! There are three other types of services, other than ClusterIP:
NodePort: Exposes the service on each Node’s IP at a static port (theNodePort). AClusterIPservice, to which theNodePortservice will route, is automatically created. You’ll be able to contact theNodePortservice, from outside the cluster, by requesting<NodeIP>:<NodePort>.LoadBalancer: Exposes the service externally using a cloud provider’s load balancer.NodePortandClusterIPservices, to which the external load balancer will route, are automatically created.ExternalName: Maps the service to the contents of theexternalNamefield (e.g.foo.bar.example.com), by returning aCNAMErecord with its value.
💡 Tip
In our case, we will be using the
LoadBalancerservice, which redirects traffic across all the nodes. Clients connect to theLoadBalancerservice through the load balancer’s IP.
Ok :) The LoadBalancer will be our ServiceType. But how can we tell this to the f8mp ?
We have two solutions:
- The Resource Fragments as we did before.
- The Inline Configuration, which is XML based configuration of the f8mp plugin.
Let’s use this time the Inline Configuration to tell the f8mp that we want a LoadBalancer service:
In the configuration section of the f8mp plugin, we will declare an enricher.
An enricher is a component used to create and customize Kubernetes and Openshift resource objects. f8mp comes with a set of enrichers which are enabled by default. One of these enrichers, is the fmp-service which is used to customize the Services.
The f8mp with the configured enricher will look like:
| |
Let’s build and a redeploy our project using mvn clean install fabric8:apply and see what is the type of the deployed service using kubectl get svc myschool:
| |
⚠️ Warning
The
<pending>shown in theEXTERNAL-IPcolumn is due that we are using minikube.
Cool ! How can we access the application now? How can we get the URL of the deployed application?
Euuuuh! The answer is shorter than the question :D to get the URL of the deployed app on minikube just type:
| |
This command will open the URL of the Spring Boot Application in your default browser :)
💡 Tip
The command
minikube service myschool --urlwill give us the path of the servicemyschool, which is pointing on our Spring Boot Application.
How can I access the Swagger UI of my deployed App?
| |
This command will open the URL of the Spring Boot Application in your default browser :)
The full source code of this tutorial, can be found here.
IV. Conclusion & final words:
The main goal of this tutorial is to introduce you to the Kubernetes ecosystem and to let you start playing with Kubernetes.
Putting your hands on practical exercices on Kubernetes will let you master this great platform. You will be able to feel the performance of Kubernetes when you experience many use cases.
You can consider the small application that we developed as a small microservice. You can develop other small apps and make interaction with them to start playing with the microservices architecture.
What other areas around Java Microservices, Docker and Kubernetes would you like to know? Let me know at my mail. I plan on making additional tutorials on these topics. I will be happy to pick topics based on your feedback!